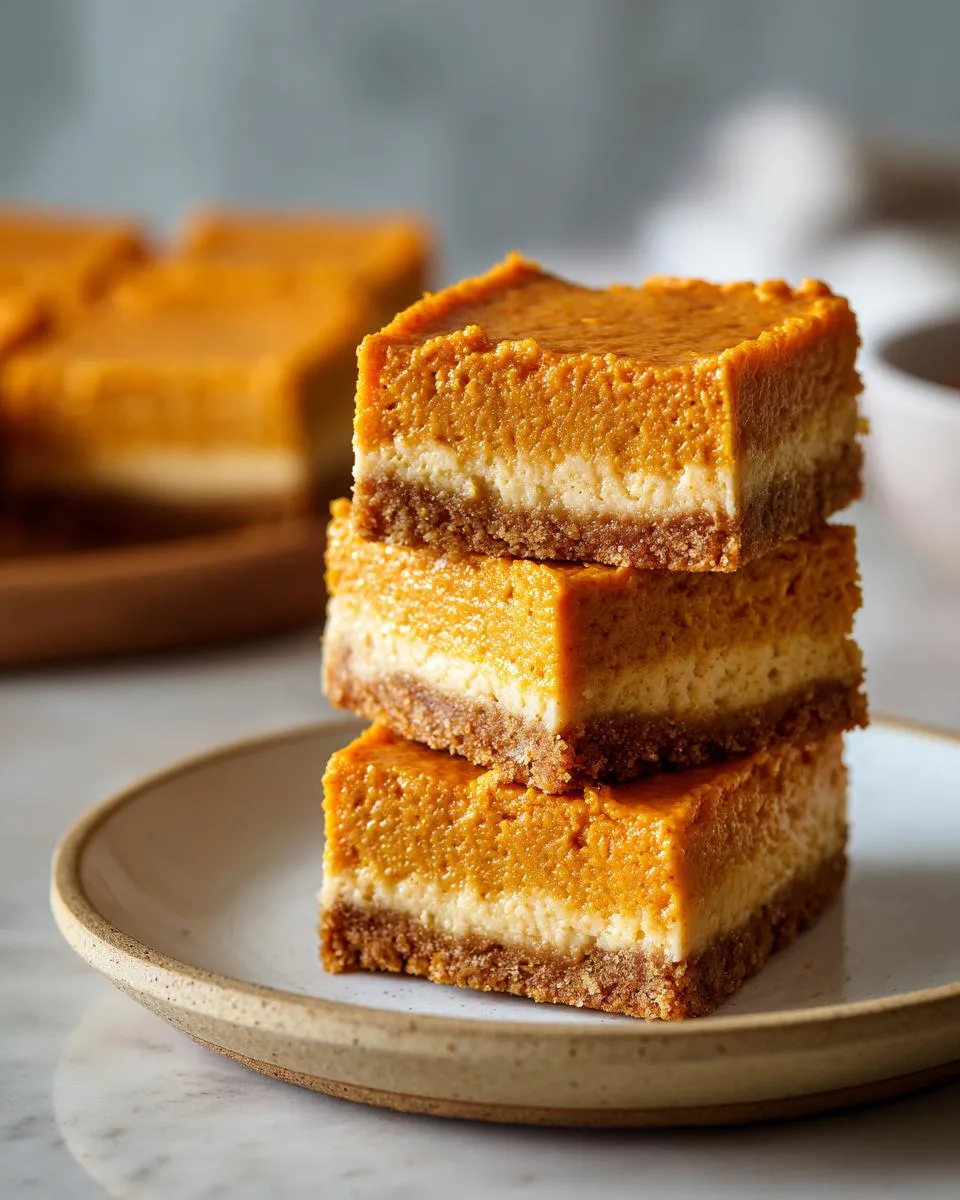
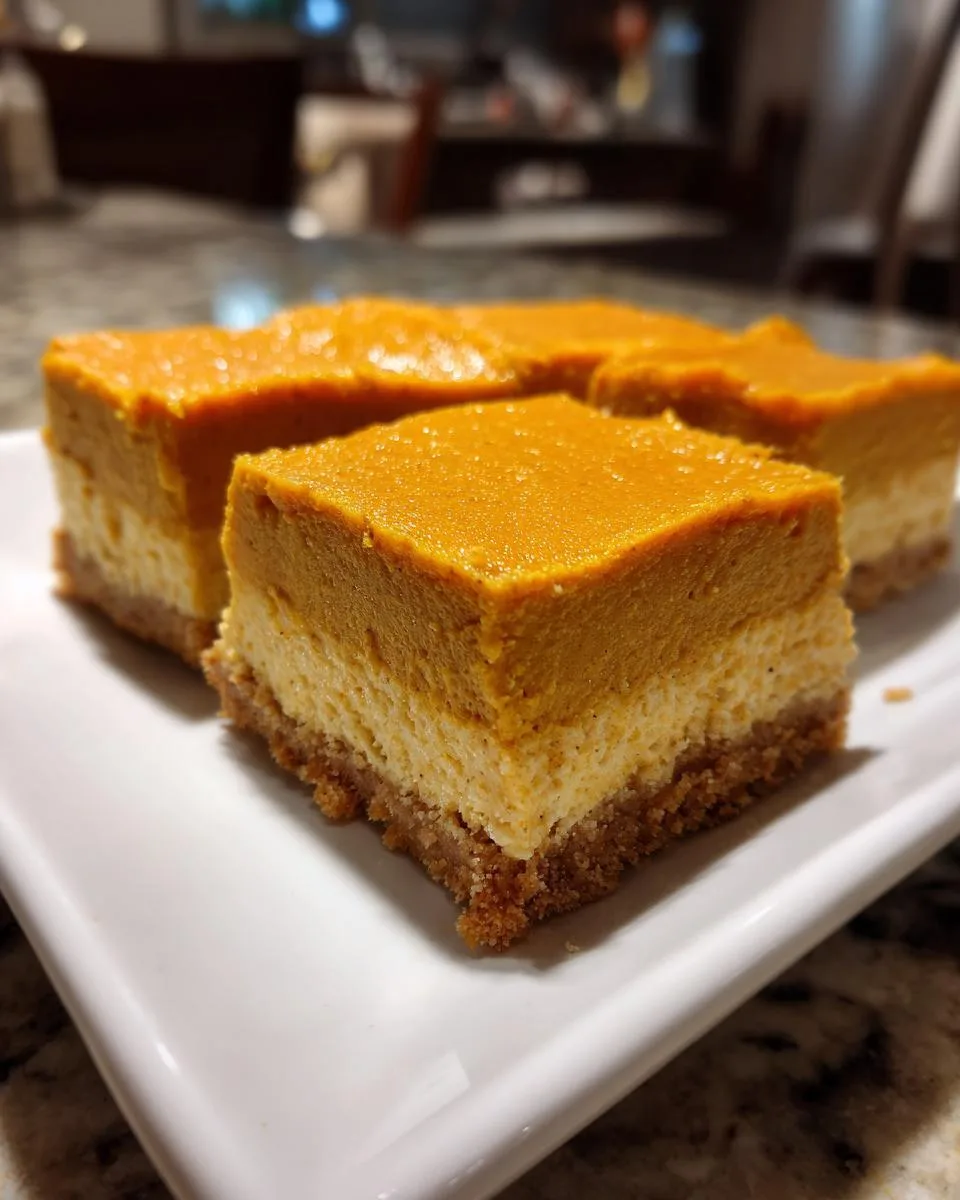
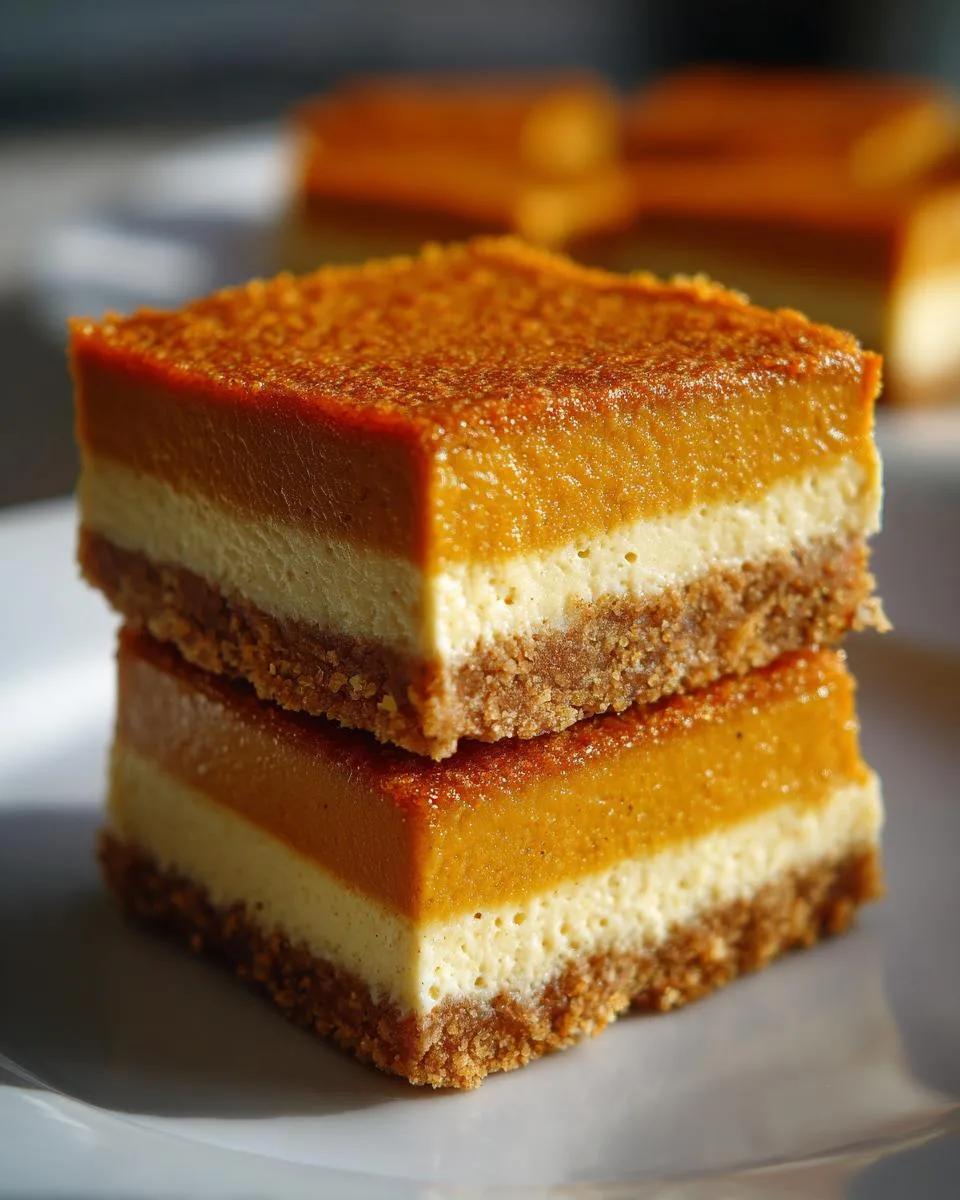
Every fall, my kitchen transforms into a pumpkin spice haven—and these pumpkin cheesecake bars are always the first treat I make when crisp weather hits. They’re simpler than baking a whole cheesecake (no water bath panic!), but just as creamy and spiced. I discovered this recipe years ago when I desperately needed to bring a dessert to a Halloween party last-minute. The graham cracker crust came together in minutes, and the filling—oh, that velvety pumpkin filling—whipped up while the crust baked. Now they’re my go-to whenever I need a cozy dessert that feels fancy without the fuss. The best part? That gorgeous marbled top you get from swirling the spices through the batter—it looks like you spent hours when really, you’ll be enjoying these pumpkin cheesecake bars in under an hour (plus chilling time, but we’ll get to that!).

Ingredients for Pumpkin Cheesecake Bars
Gather these simple ingredients, and you’re halfway to pumpkin spice heaven! I’ve learned through many batches that quality matters here—especially with the cream cheese and pumpkin. Here’s exactly what you’ll need:
- For the crust:
- 1 1/2 cups graham cracker crumbs (about 10 full sheets, crushed—I whizz mine in the food processor)
- 1/4 cup granulated sugar (trust me, this little bit makes the crust magical)
- 6 tbsp melted butter (salted or unsalted both work, but I prefer salted for that sweet-salty bite)
- For the filling:
- 16 oz cream cheese, softened (this is crucial—take it out 2 hours before baking or microwave in 15-sec bursts)
- 3/4 cup granulated sugar
- 2 large eggs (room temperature blends smoother)
- 1 cup pumpkin puree (not pie filling! Libby’s canned pumpkin is my go-to)
- 1 tsp vanilla extract (the real stuff makes a difference)
- 1 tsp ground cinnamon (freshly opened jar for maximum aroma)
- 1/2 tsp ground ginger (this adds that warm zing)
- 1/4 tsp ground nutmeg (just a whisper—it’s powerful!)
- 1/4 tsp ground cloves (the secret weapon that makes it taste like fall)
A quick pro tip: Measure your spices into a small bowl first—it’s easier than adding each one separately to the mixing bowl. And if you’re like me and always forget to soften cream cheese, 30 seconds in the microwave at 30% power does the trick without melting it!
How to Make Pumpkin Cheesecake Bars
Okay, let’s get to the fun part—turning these simple ingredients into dreamy pumpkin cheesecake bars! I promise it’s easier than you think. Just follow these steps, and you’ll have the creamiest, most perfectly spiced fall dessert ready in no time.
Preparing the Crust
First things first—preheat that oven to 350°F (175°C). While it’s heating up, grab your 8×8 inch baking pan and line it with parchment paper, leaving some overhang on the sides. This little trick will save you SO much frustration when it’s time to slice the bars later!
Now, mix your graham cracker crumbs, sugar, and melted butter in a bowl until it looks like wet sand. Dump it into your prepared pan and press it down firmly with the bottom of a measuring cup or your fingers. I like to really pack it in—this prevents crumbling when you cut the bars. Pop it in the oven for 10 minutes until it’s lightly golden and smells like toasted graham crackers. Let it cool completely while you make the filling—about 15-20 minutes. Don’t skip this step! A hot crust will melt your filling and make it weirdly greasy.
Making the Pumpkin Cheesecake Filling
Here’s where the magic happens! In a large bowl, beat your softened cream cheese (yes, softened—no shortcuts here!) with the sugar until it’s completely smooth and no lumps remain. This usually takes me about 2 minutes with a hand mixer. Scrape down the sides—those sneaky cream cheese lumps love to hide there!
Add the eggs one at a time, beating well after each addition. This gradual incorporation prevents cracking and gives you that silky texture. Now mix in the pumpkin puree, vanilla, and all those warming spices. The batter should be smooth and pumpkin-colored at this point—no streaks! If you’re feeling fancy, give it a quick taste (come on, we all do it) and adjust spices to your liking.

Baking and Chilling
Pour your gorgeous pumpkin filling over the cooled crust and smooth the top. Bake for 30-35 minutes—you’ll know it’s done when the edges look set but the center still has a slight jiggle (like Jell-O, not liquid). Don’t overbake! The bars will firm up as they cool.
Here’s the hardest part—patience! Let the pan cool completely on a wire rack, then refrigerate for at least 4 hours, preferably overnight. I know, I know—the waiting is torture! But trust me, this chilling time allows the flavors to develop and gives you that perfect cheesecake texture. When you’re ready to serve, use the parchment paper handles to lift the whole slab out before cutting into neat squares with a sharp knife dipped in hot water.
Pro tip: For clean cuts every time, wipe the knife between slices and run it under hot water again. The heat helps glide through the creamy filling without dragging.
Why You’ll Love These Pumpkin Cheesecake Bars
Listen, I know we all have our favorite fall treats, but these pumpkin cheesecake bars? They’re special. Here’s why they’ve become my absolute must-make dessert from September through November (okay, fine, sometimes I sneak them in during summer too!):
- Creamy dreamy texture – That perfect balance between rich cheesecake and spiced pumpkin filling is just *chef’s kiss*. Every bite melts in your mouth like autumn on a fork.
- No-fuss, no-mess baking – Unlike traditional cheesecakes that need water baths and stress over cracks, these bars practically make themselves. The crust takes 5 minutes flat, and the filling whips up while it bakes. Even my 12-year-old can make them!
- Make-ahead magic – These taste even better the next day (and the day after that). I always make them the night before parties so they’re perfectly chilled and the flavors have had time to party together in the fridge.
- Crowd-pleasing every time – Whether it’s a Halloween potluck or Thanksgiving dessert spread, these disappear fast. The pumpkin spice flavor makes them feel festive, while the cheesecake element keeps them fancier than your average bar cookie.
Seriously, once you try these, you’ll understand why my friends start texting me “pumpkin bar season yet??” the moment the first leaf falls. They’re that good.
Tips for Perfect Pumpkin Cheesecake Bars
After making these pumpkin cheesecake bars more times than I can count (and eating plenty of test batches along the way!), I’ve picked up some foolproof tricks that guarantee bakery-worthy results every time. Here are my absolute must-know tips:
1. Room temperature is non-negotiable
I can’t stress this enough – your cream cheese must be properly softened! Cold cream cheese leaves lumps no matter how long you beat it. Take it out 2 hours before baking, or if you’re impatient like me, microwave it in 15-second bursts until it yields gently to pressure. Eggs should be room temp too – cold ones can make the filling separate.
2. Don’t overmix the filling
Once you add the eggs, mix just until combined – no more! Overbeating incorporates too much air, which leads to puffy, cracked bars. I stop the mixer as soon as the last streak of egg disappears. For the smoothest texture, scrape down the bowl often with a rubber spatula to catch any hidden cream cheese lumps.
3. Parchment paper is your best friend
That overhanging parchment isn’t just for easy cleanup – it’s your secret weapon for perfect slices. When chilled, you can lift the whole slab out in one piece before cutting. No more wrestling with sticky bars stuck in the pan! Bonus: It prevents the dreaded metal taste that can happen with acidic fillings.
4. The toothpick test doesn’t lie
Unlike cakes, cheesecake bars should still jiggle slightly when done. To test, insert a toothpick about 1 inch from the edge – it should come out with moist crumbs (not wet batter). The center will firm up during chilling. If the edges start puffing or cracking, they’re overbaking – pull them out immediately!
5. Chill time can’t be rushed
I know it’s tempting to dig in right away, but these need at least 4 hours in the fridge to set properly. Overnight is even better! The flavors deepen beautifully, and you’ll get those clean, sharp edges when slicing. For fastest chilling, spread the bars in a thin layer on a baking sheet before refrigerating.
One last golden rule: Always use canned pumpkin puree (not pie filling) for consistent results. Fresh pumpkin varies too much in moisture content. Trust me – I learned this the hard way after a soggy pumpkin bar disaster!
Pumpkin Cheesecake Bars Variations
While the classic version of these pumpkin cheesecake bars is downright perfect, sometimes I love shaking things up with fun twists! Here are my favorite variations that still honor the original’s cozy spirit while adding exciting new flavors:
Caramel Swirl Pumpkin Cheesecake Bars
Oh my goodness – this is my husband’s absolute favorite! After pouring the pumpkin filling into the crust, dollop 2-3 tablespoons of good-quality caramel sauce (the thick, gooey kind) across the top. Then take a toothpick or knife and swirl it gently through the batter. The caramel bakes into ribbons of sweet richness that pair magically with the pumpkin spice. Pro tip: Warm the caramel slightly first so it flows easier!
Chocolate Chip Pumpkin Cheesecake Bars
For those who think chocolate makes everything better (I agree!), fold 1/2 cup of mini chocolate chips into the batter before baking. The mini chips distribute better than regular ones. My kids love when I do half semi-sweet and half white chocolate chips – it looks so pretty! The chocolate adds little melty surprises throughout each bite.
Pecan Streusel Topped Pumpkin Cheesecake Bars
Take these to next-level autumn goodness with a crunchy pecan streusel topping! Mix 1/2 cup chopped pecans, 1/4 cup brown sugar, 2 tbsp flour, and 2 tbsp cold butter until crumbly. Sprinkle over the pumpkin filling right before baking. The streusel gets perfectly crisp while the bars bake, adding wonderful texture contrast to the creamy filling. This version always disappears fastest at Thanksgiving!
Gingersnap Crust Variation
Feeling extra spicy? Swap the graham crackers for crushed gingersnap cookies in the crust! The extra ginger zing plays so nicely with the pumpkin filling. I use about 1 3/4 cups gingersnap crumbs since they’re denser than graham crackers. Bonus: This makes the bars naturally gluten-free if you use GF gingersnaps!
The beauty of these pumpkin cheesecake bars is how adaptable they are. Once you’ve mastered the base recipe, let your creativity run wild! I’ve even done a marbleized version where I reserved some plain cheesecake batter and swirled it with the pumpkin for a stunning two-tone effect. Whatever variation you choose, that creamy pumpkin spice magic always shines through.

Serving and Storing Pumpkin Cheesecake Bars
Now for the best part—enjoying your pumpkin cheesecake bars! I always serve these chilled straight from the fridge—that hour (or three!) of impatient waiting pays off when you get that first perfect bite of cold, creamy pumpkin goodness. For extra pizzazz, I sometimes dust the tops with a little cinnamon or powdered sugar right before serving. A dollop of whipped cream never hurts either!
Want to get fancy? Here’s my go-to serving trick: Warm a knife under hot water, dry it quickly, then make clean cuts to portion the bars. Transfer each one to a dessert plate with a thin metal spatula. The contrast of the cool cheesecake against the warm utensil makes for picture-perfect slices every time. I like to garnish with a tiny sprinkle of extra graham cracker crumbs or a single pecan half on top for that bakery-style finish.
As for storage, these bars keep beautifully in the refrigerator for up to 5 days when stored properly. I always use an airtight container—those glass Pyrex ones with the locking lids are my favorite because they prevent odors from seeping in. Layer the bars between sheets of parchment or wax paper so they don’t stick together. Pro tip: If you’re making them more than a day ahead, wait to cut them until you’re ready to serve for the freshest edges.
Freezing? Absolutely! These pumpkin cheesecake bars freeze like a dream for up to 3 months. I individually wrap uncut bars in plastic wrap, then place them in a freezer bag with all the air squeezed out. Thaw overnight in the fridge when cravings strike—they taste just as good as fresh! I’ve been known to hide a few in the back of the freezer for emergency dessert situations (you know, those days when only pumpkin spice will do).
One last serving note: These taste incredible slightly softened at room temperature too! If you prefer a softer texture, let them sit out for about 15 minutes before serving. Just don’t leave them out more than 2 hours—food safety first with all that delicious dairy.
Nutritional Information
While we all know these pumpkin cheesecake bars are worth every delicious calorie, here’s the nutritional breakdown for those who like to keep track (or just want to plan their workout accordingly!). Remember—these are estimates per bar and may vary slightly based on your specific ingredients.
- Serving Size: 1 bar (about 2″ square)
- Calories: 220
- Total Fat: 14g (8g saturated)
- Cholesterol: 65mg
- Sodium: 180mg
- Total Carbohydrates: 22g
- Dietary Fiber: 1g
- Sugars: 18g
- Protein: 3g
A quick note from my nutritionist friend: The pumpkin puree adds vitamin A (hello, healthy skin!) and the cream cheese provides calcium—so technically these are… health food? Okay, maybe that’s pushing it, but at least they’re made with real ingredients you can pronounce! For lighter versions, I’ve had success swapping in reduced-fat cream cheese and cutting the sugar by 1/4 cup—though I’ll admit, the original is always my favorite.
Pumpkin Cheesecake Bars FAQs
Over the years, I’ve gotten so many questions about these pumpkin cheesecake bars—here are the answers to everything you might be wondering before you bake!
Can I use fresh pumpkin instead of canned?
Technically yes, but I don’t recommend it! Fresh pumpkin has way more moisture than canned puree, which can make your bars soggy. If you insist, roast and puree sugar pumpkin (not carving pumpkins!), then strain it overnight in cheesecloth to remove excess water. Honestly? Libby’s canned pumpkin gives perfect results every time with zero fuss.
Why did my cheesecake bars crack?
Three main culprits: overmixing (incorporates too much air), overbaking (dries out the top), or cooling too fast (thermal shock). Next time, mix just until combined, pull them when the center still jiggles slightly, and let them cool gradually in the oven with the door cracked open for 30 minutes before refrigerating.
How do I freeze these properly?
They freeze beautifully! Chill completely first, then cut into bars. Wrap each tightly in plastic wrap, then place in a freezer bag with all the air squeezed out. They’ll keep for 3 months—thaw overnight in the fridge when ready to eat. The texture might be slightly denser but just as delicious!
Can I make these gluten-free?
Absolutely! Just swap the graham crackers for gluten-free cookies (gingersnaps work great) in the crust. All other ingredients are naturally GF—double check your cream cheese and pumpkin labels to be safe.
What’s the best way to cut clean slices?
My foolproof method: Chill thoroughly, then use a hot knife (run under hot water and dry quickly). Wipe between cuts. For extra clean edges, slice when almost frozen—pop them in the freezer for 20 minutes before cutting.
Got more questions? Drop them in the comments below! And if you try this recipe, I’d love to hear how your pumpkin cheesecake bars turned out—share your photos and tips with everyone!
Print30-Minute Pumpkin Cheesecake Bars Your Family Will Crave
Delicious pumpkin cheesecake bars with a creamy filling and a spiced crust.
- Prep Time: 15 mins
- Cook Time: 35 mins
- Total Time: 50 mins
- Yield: 16 bars 1x
- Category: Dessert
- Method: Baking
- Cuisine: American
- Diet: Vegetarian
Ingredients
- 1 1/2 cups graham cracker crumbs
- 1/4 cup granulated sugar
- 6 tbsp melted butter
- 16 oz cream cheese, softened
- 3/4 cup granulated sugar
- 2 large eggs
- 1 cup pumpkin puree
- 1 tsp vanilla extract
- 1 tsp ground cinnamon
- 1/2 tsp ground ginger
- 1/4 tsp ground nutmeg
- 1/4 tsp ground cloves
Instructions
- Preheat oven to 350°F. Line an 8×8 baking pan with parchment paper.
- Mix graham cracker crumbs, sugar, and melted butter. Press into the pan.
- Bake crust for 10 minutes. Let cool.
- Beat cream cheese and sugar until smooth. Add eggs one at a time.
- Mix in pumpkin puree, vanilla, and spices.
- Pour filling over crust. Bake for 30-35 minutes.
- Let cool, then refrigerate for at least 4 hours.
- Cut into bars and serve chilled.
Notes
- Use canned pumpkin puree, not pumpkin pie filling.
- For smoother texture, blend filling before baking.
Nutrition
- Serving Size: 1 bar
- Calories: 220
- Sugar: 18g
- Sodium: 180mg
- Fat: 14g
- Saturated Fat: 8g
- Unsaturated Fat: 5g
- Trans Fat: 0g
- Carbohydrates: 22g
- Fiber: 1g
- Protein: 3g
- Cholesterol: 65mg


