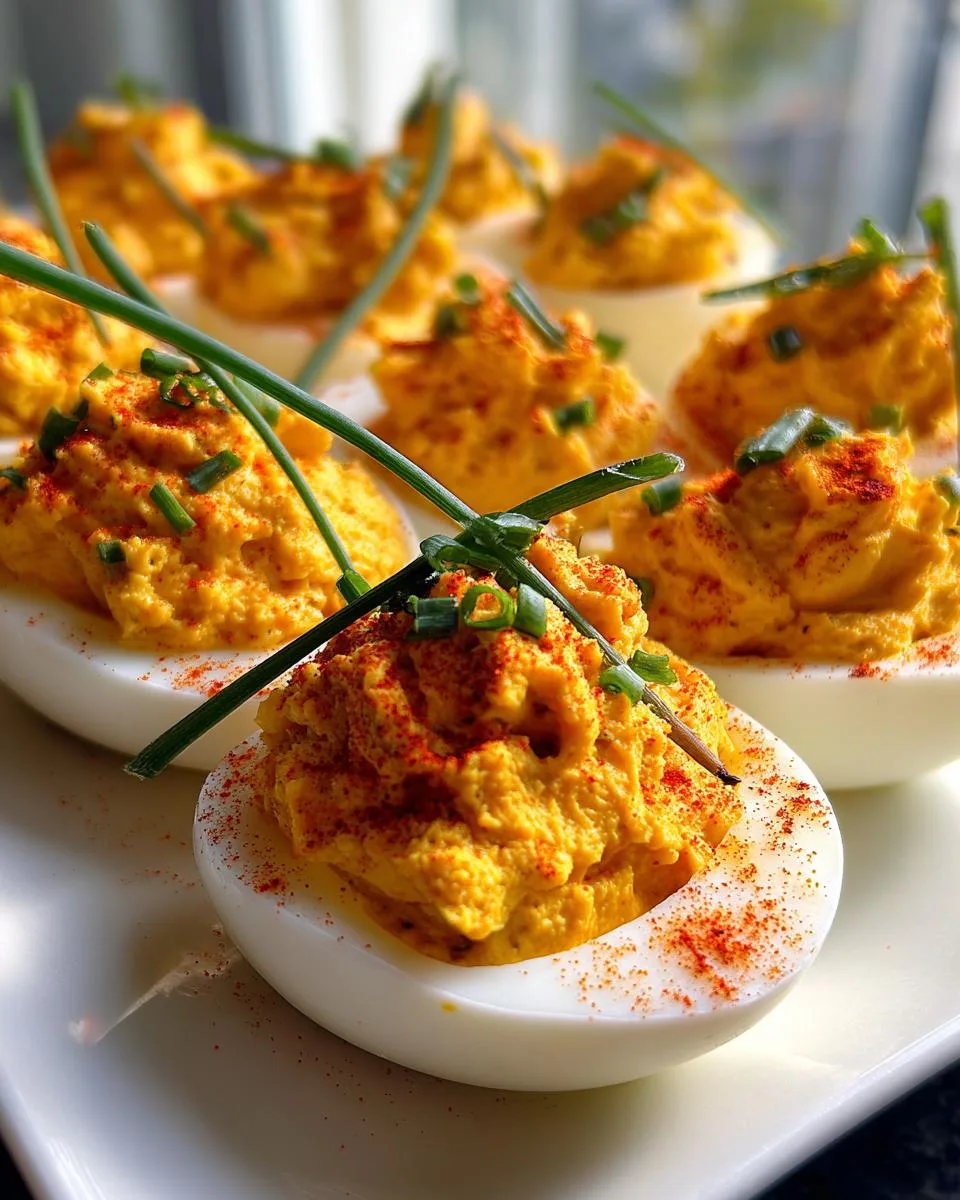
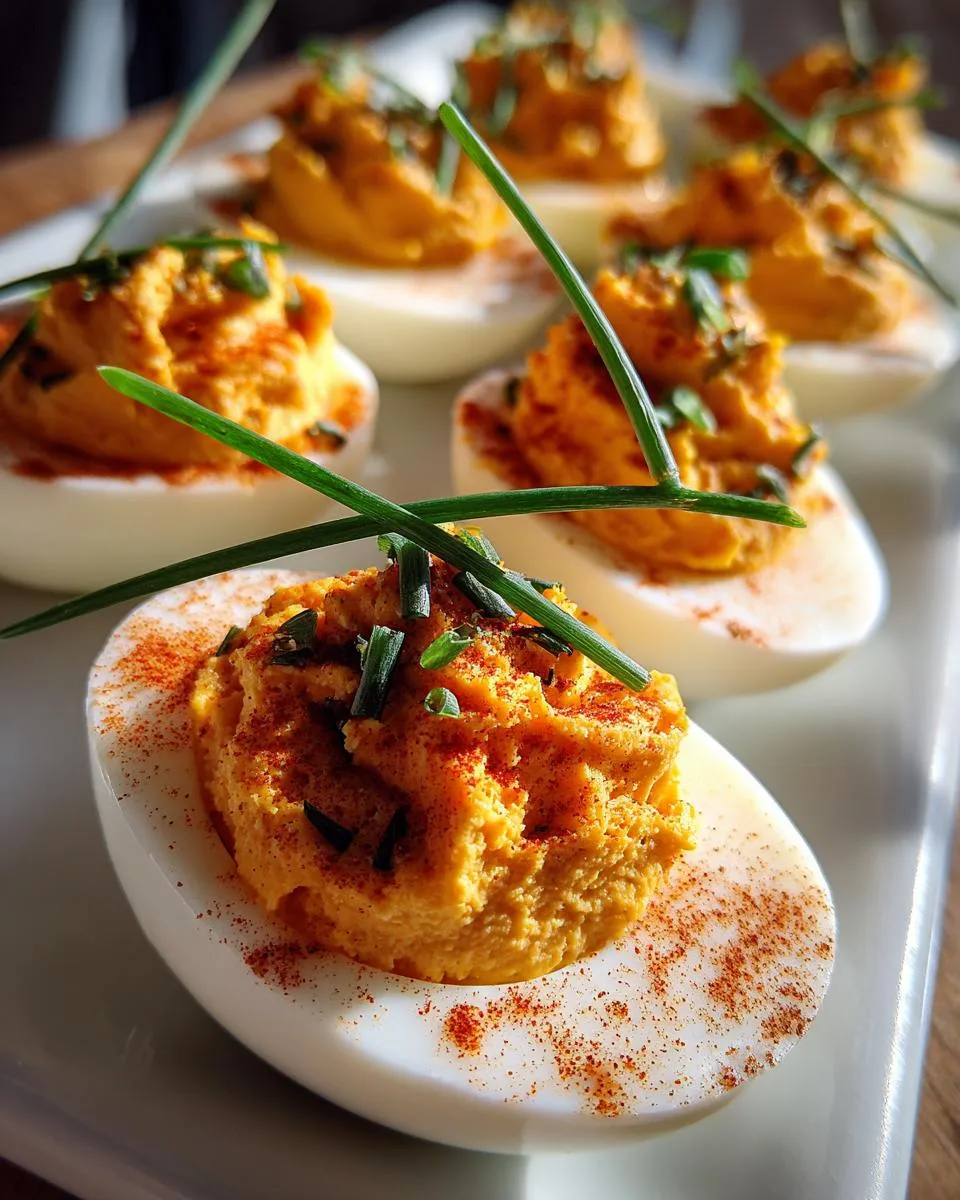
You know those classic deviled eggs everyone brings to potlucks? I took them to a whole new level last Thanksgiving when I accidentally grabbed the pumpkin puree instead of extra mayo. Best kitchen mistake ever! These pumpkin deviled eggs became the star of our holiday spread – that gorgeous orange filling and cute chive stems made everyone think I’d slaved for hours. Now my family demands them at every fall gathering. Trust me, one bite of these creamy, slightly sweet deviled eggs with that smoky paprika kick, and you’ll never go back to the basic version.

Ingredients for Pumpkin Deviled Eggs
Here’s everything you’ll need to make these show-stopping deviled eggs – simple ingredients that create magic together:
- 6 large eggs (trust me, size matters here!)
- 1/4 cup pumpkin puree (not pumpkin pie filling!)
- 1 tablespoon mayonnaise (I use full-fat for extra creaminess)
- 1 teaspoon Dijon mustard (the secret flavor booster)
- 1/4 teaspoon paprika (plus extra for dusting)
- Pinch of salt and pepper (to taste)
- Fresh chive stems (for that perfect “pumpkin stem” garnish)
Ingredient Notes
Let me share some hard-earned kitchen wisdom about these ingredients:
That pumpkin puree? Fresh is fantastic if you’ve got it, but canned works great too – just make sure it’s 100% pure pumpkin with no added spices or sweeteners. I learned that lesson the hard way when my first batch tasted like pumpkin pie filling (not what we’re going for here!).
And about those eggs – using room temperature eggs makes peeling SO much easier. I take mine out of the fridge at least 30 minutes before boiling. If you’re in a hurry, soak them in warm (not hot!) water for 5 minutes. The shells practically slide off!
How to Make Pumpkin Deviled Eggs
Okay, let’s get to the fun part! Making these pumpkin deviled eggs is easier than you think, but I’ve got some tricks to make them extra special. Follow these steps and you’ll have a platter of autumn magic in no time.
Preparing the Eggs
First things first – those eggs need to be perfect! Here’s how I do it:
Place your eggs in a single layer in a saucepan and cover with cold water by about an inch. Bring to a rolling boil, then immediately turn off the heat and cover. Let them sit for exactly 12 minutes (set a timer!) – this gives you perfectly cooked yolks without that icky gray ring.
Now for the tricky part – peeling. Immediately transfer the eggs to an ice bath and let them cool completely. This shock stops the cooking and makes the shells slip right off. Gently tap each egg all over and roll between your hands to loosen the shell before peeling under running water. Patience is key here!
Mixing the Filling
This is where the magic happens! Carefully slice each cooled egg lengthwise (I use a sharp knife wiped clean between cuts) and pop out the yolks into a bowl.
Now mash those yolks with a fork until they’re fine crumbs – no lumps! Add the pumpkin puree, mayo, mustard, paprika, salt and pepper. Here’s my secret: I like to mix with a hand mixer for about 30 seconds to get that ultra-smooth, creamy texture. The filling should be thick but pipeable – add a teeny bit more mayo if needed.
Taste your filling (the best part!) and adjust the seasoning. Want more orange color? Add another pinch of paprika. Need more zip? A splash more mustard does the trick.
Spoon the filling into a piping bag fitted with a star tip (or just use a plastic bag with the corner snipped off) and pipe generous swirls into each egg white half. Don’t overfill – you want them to sit pretty on the plate!
Finally, stick a chive stem at an angle into each one to look like a pumpkin stem. Chill for at least 30 minutes before serving so the flavors can cozy up together.

Why You’ll Love These Pumpkin Deviled Eggs
Oh my gosh, where do I even start? These pumpkin deviled eggs are seriously game-changing. Here’s why they’ll become your new go-to appetizer:
- Festive AF: That vibrant orange filling with the chive “stems” makes them look like adorable little pumpkins! I’ve brought these to so many fall parties where they disappear before anything else on the table. People can’t resist snapping photos before they eat them.
- Easier than pie: Literally! If you can boil eggs and stir ingredients together, you can make these. The prep is so simple – no fancy techniques needed. I’ve whipped them up in 20 minutes when surprise guests arrived (just don’t tell them how easy they were).
- Total crowd-pleaser: Kids go crazy for the pumpkin version (it’s like eating mini pumpkins!), while adults appreciate the sophisticated twist on a classic. I’ve seen picky eaters and foodies alike devour these. The pumpkin adds just enough sweetness to balance the smoky paprika – it’s the perfect bite.
Seriously, once you make these, you’ll understand why they’ve become my signature fall dish. Even my grandma – who’s been making traditional deviled eggs for 50 years – asked for this recipe. That’s how you know they’re special!
Tips for Perfect Pumpkin Deviled Eggs
After making these pumpkin deviled eggs more times than I can count (okay, maybe exactly 37 times last fall alone), I’ve picked up some foolproof tricks to make them absolutely perfect every single time:
Fresh chives make all the difference. Those little green stems aren’t just for looks – they add the perfect fresh oniony crunch that balances the creamy filling. I always snip them right before serving so they stay crisp. Pro tip: Look for chives with long, straight stems that will stand up like perfect pumpkin vines.
Resist the urge to overfill! I learned this the messy way at my first attempt. The filling should mound slightly above the egg white, but if you pile it too high, your beautiful “pumpkins” will topple over when someone tries to pick one up. Fill just until the yolk mixture reaches the edges of the white – about a heaping teaspoon per half.
Chill your eggs before slicing. Here’s my secret for those clean cuts – after boiling and peeling, pop the eggs in the fridge for 10 minutes. Cold eggs slice way more neatly than room temp ones. Wipe your knife between cuts too – no one wants ragged edges on their pretty pumpkins!
The squeeze test for perfect texture. Your filling should hold its shape when piped – if you squeeze some out and it holds a peak that slowly droops (like soft-serve ice cream), it’s just right. Too stiff? Add a few drops of milk. Too runny? A sprinkle more paprika or yolk dust (just crush some extra yolk) will thicken it up.
And my bonus tip? Make a few extra! These disappear so fast you’ll want to keep a secret stash in the fridge just for yourself. Not that I’ve ever done that… okay, I totally have.
Variations for Pumpkin Deviled Eggs
One of my favorite things about this recipe is how easily you can tweak it to suit different tastes – I’ve experimented with so many versions! Here are my absolute favorite twists that still keep that pumpkin-y magic:
Spicy kick: Add a pinch of cayenne pepper to the filling mix if you like some heat. I did this for a Halloween party last year and called them “Devil’s Pumpkin Eggs” – they were gone in minutes! Start with just 1/8 teaspoon though – that smoked paprika already brings some warmth.
Lightened-up version: Swap the mayo for Greek yogurt (I use full-fat for creaminess) and you’ve got a protein-packed appetizer that still tastes indulgent. My yoga friends go crazy for this version – it’s become our post-class tradition.
Extra smoky: If you’re like me and adore smoky flavors, try using smoked paprika instead of regular. Bonus points if you sprinkle a tiny bit on top as garnish too. This variation always reminds me of campfires and fall bonfires.
Sweet and savory: For a more pronounced pumpkin flavor, mix in 1/2 teaspoon maple syrup or honey. It sounds weird, but trust me – that subtle sweetness paired with the creamy yolk is heavenly. My husband insists on this version now.
The best part? You can mix and match these ideas! My current favorite is the Greek yogurt base with a touch of maple and smoked paprika. Don’t be afraid to play around – that’s how some of the best kitchen creations happen (just like my original happy accident with the pumpkin puree!).
Serving Pumpkin Deviled Eggs
Okay, so you’ve made these gorgeous pumpkin deviled eggs – now how do you show them off? After years of trial and error (and many party platters), here are my foolproof ways to serve them that’ll have everyone raving:
The classic platter: Arrange them on a simple white serving dish with some autumn leaves scattered around. The contrast makes those orange centers pop! I like to dust a little extra paprika around the edges for a festive touch. Bonus points if you can find mini pumpkin decorations to tuck between the eggs.
With crunchy companions: These pair amazingly with crisp veggies like endive leaves (perfect little scoops!), cucumber rounds, or even apple slices. The fresh crunch balances the creamy eggs beautifully. For crunch with spice, serve alongside peppery crackers or pumpkin seed brittle – the textures play so well together!
Cocktail party style: At my last fall gathering, I placed each egg on individual spoons with a tiny sprig of thyme. Fancy looking but SO easy – guests could grab and go without needing a plate. This works especially well if you’re serving drinks and want easy mingling food.
The brunch board: These aren’t just for parties! I love including them on weekend brunch spreads with smoked salmon, bagel chips, and cream cheese. The pumpkin flavor somehow works perfectly with breakfast foods – especially when you add a mimosa to the mix!
My golden rule? Always serve chilled but not ice-cold. Take them out of the fridge about 10 minutes before serving so the flavors can wake up. And whatever you do – don’t hide these at the back of the table. They deserve center stage!
Storing Pumpkin Deviled Eggs
Here’s the good news – if you somehow don’t devour all these pumpkin deviled eggs in one sitting (it’s happened maybe twice in my life), they store beautifully! The trick is keeping that creamy filling fresh and preventing the eggs from drying out. Here’s exactly how I do it:
First, arrange the eggs in a single layer in an airtight container. If you need to stack them (we’ve all been there with fridge space!), place a sheet of parchment or wax paper between layers. This keeps the chive stems from getting squashed and prevents the filling from sticking to the lid. I learned this the hard way after ruining a beautiful batch when the top layer stuck to the container – tragic!
They’ll keep perfectly in the fridge for up to 2 days. Any longer and the whites start to get rubbery – though honestly, they’ve never lasted that long in my house! If you want to prep ahead, you can boil and peel the eggs up to 3 days in advance, then just mix and fill the day you’re serving. The filling actually gets better after chilling overnight as the flavors meld together.
One important note – don’t freeze them! I made that mistake once thinking I’d be clever and have ready-made appetizers. The texture turns absolutely dreadful – the filling gets watery and the whites become tough. Trust me, fresh is always better with deviled eggs.
When you’re ready to serve leftovers, just pull them out about 10 minutes before to take the chill off. If the chives have wilted (they sometimes do in the fridge), simply replace them with fresh stems for that perfect pumpkin presentation. And if you’re feeling fancy, a quick sprinkle of fresh paprika right before serving makes them look freshly made!
Nutritional Information
Now, I’m no nutritionist, but let me tell you what I’ve learned about these pumpkin deviled eggs from all my kitchen experiments. First off – they’re packed with good stuff! That pumpkin puree sneaks in extra vitamins while keeping things creamy, and those egg whites give you a nice protein boost.
Of course, exact numbers vary depending on your ingredients – like whether you use full-fat mayo or Greek yogurt, or if you go heavy on the paprika. But here’s the general picture: you’re getting protein from the eggs, fiber from the pumpkin, and healthy fats that’ll actually keep you satisfied (unlike those sad veggie platters that leave you hungry).
The best part? Unlike many holiday appetizers that leave you feeling weighed down, these pumpkin deviled eggs feel indulgent but won’t wreck your appetite for the main meal. I always feel good serving them knowing they’re a smarter choice than, say, fried appetizers or creamy dips – though no one would ever guess they’re on the healthier side!
Just remember – with any recipe, your mileage may vary based on the exact brands and amounts you use. But isn’t that the fun of home cooking? Making it your own while still enjoying all the delicious benefits!
Common Questions About Pumpkin Deviled Eggs
I’ve gotten so many questions about these pumpkin deviled eggs over the years – seems like everyone wants to make them perfectly! Here are the answers to the questions people ask me most often:
Can I make these ahead of time?
Absolutely! In fact, the flavors get even better after chilling. You can boil and peel the eggs up to 3 days in advance (keep them whole in the fridge). The filling can be mixed 1 day ahead – just store it separately in an airtight container. Assemble no more than 4 hours before serving so the chives stay fresh-looking. Pro tip: If your filling thickens in the fridge, just stir in a few drops of milk before piping.
What’s the best pumpkin substitute if I don’t have puree?
Honestly? Nothing tastes quite like pumpkin, but in a pinch, you can use sweet potato puree (just bake and mash a small one). I’ve also had success with butternut squash puree – it’s got that similar earthy sweetness. Just avoid anything with added spices or sugar. And whatever you do, don’t try canned pumpkin pie filling – I made that mistake once and ended up with dessert deviled eggs (not as good as it sounds!).
How do I pipe the filling neatly without fancy tools?
Don’t stress about buying special equipment! My favorite trick is using a plastic bag – just spoon the filling into a quart-sized zip-top bag, press out the air, and snip about 1/2 inch off one corner. Squeeze gently in a spiral motion starting from the outside. No bag? A small spoon works too – just use the back of it to smooth the filling. The ridges from piping look pretty, but taste is what really matters!
Got more questions? Just ask! I’ve probably made every mistake possible with this recipe (broken eggs, runny filling, you name it) so I can save you the trouble. Happy deviling!
Print6 Creamy Pumpkin Deviled Eggs That Steal the Spotlight
Pumpkin Deviled Eggs with a paprika-colored yolk filling and chive stem garnish.
- Prep Time: 15 mins
- Cook Time: 10 mins
- Total Time: 25 mins
- Yield: 12 deviled eggs 1x
- Category: Appetizer
- Method: Boiling
- Cuisine: American
- Diet: Vegetarian
Ingredients
- 6 hard-boiled eggs
- 1/4 cup pumpkin puree
- 1 tbsp mayonnaise
- 1 tsp Dijon mustard
- 1/4 tsp paprika
- Salt and pepper to taste
- Chive stems for garnish
Instructions
- Cut eggs in half lengthwise and remove yolks.
- Mash yolks with pumpkin puree, mayonnaise, mustard, paprika, salt, and pepper.
- Spoon filling back into egg whites.
- Garnish with chive stems.
- Chill before serving.
Notes
- Use fresh pumpkin puree for best flavor.
- Adjust paprika for desired color.
Nutrition
- Serving Size: 2 halves
- Calories: 120
- Sugar: 1g
- Sodium: 120mg
- Fat: 8g
- Saturated Fat: 2g
- Unsaturated Fat: 5g
- Trans Fat: 0g
- Carbohydrates: 3g
- Fiber: 1g
- Protein: 6g
- Cholesterol: 190mg


