There’s something magical about pulling warm pumpkin scones with glaze from the oven on a crisp fall morning. The scent of cinnamon and nutmeg fills the kitchen, and that first bite – oh my! The tender crumb practically melts in your mouth, with just the right amount of sweetness from that dreamy glaze drizzled on top.
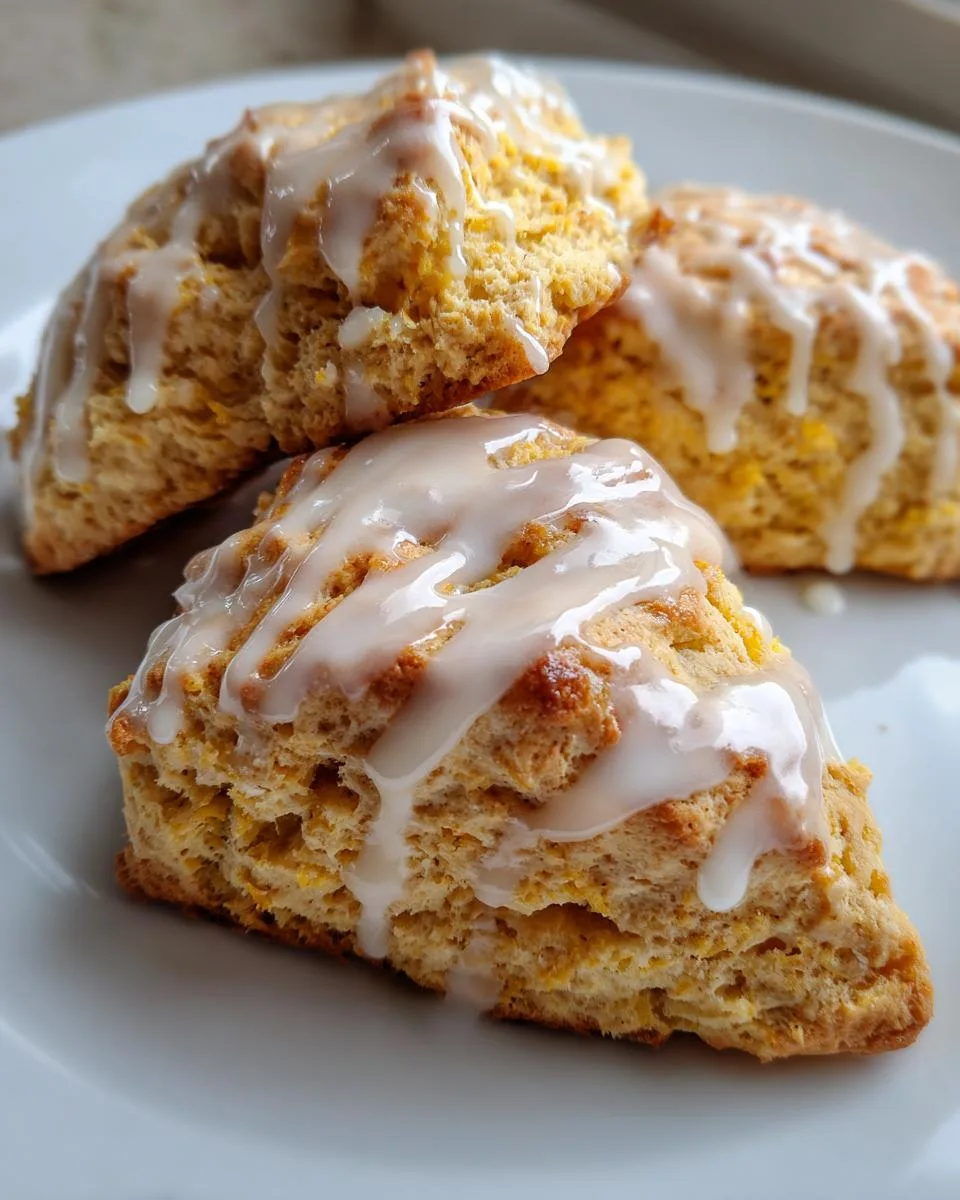
I’ll never forget the first time I made these for my sister’s birthday brunch. She took one bite, closed her eyes, and sighed “This tastes like autumn in pastry form.” Now they’re our family’s go-to treat whenever pumpkin season rolls around. What I love most is how simple they are to make – just a few basic ingredients transformed into something extraordinary.
Why You’ll Love These Pumpkin Scones with Glaze
Let me tell you why these pumpkin scones with glaze will become your new obsession:
- They’re ridiculously easy – Mix, shape, bake, glaze. Done in 30 minutes flat!
- That perfect autumn flavor – Warm pumpkin spice hugs every bite
- Cloud-soft texture – Flaky yet tender, just like your favorite bakery treats
- The glaze makes everything better – Sweet drizzle takes them from great to “can I have thirds?”
Seriously, these pumpkin scones with glaze taste like someone bottled up cozy fall mornings and baked them into pastry form. Your kitchen will smell amazing, and your taste buds will thank you!
Ingredients for Pumpkin Scones with Glaze
Gathering the right ingredients is half the battle when making these pumpkin scones with glaze – and trust me, quality matters here! I’ve made this recipe enough times to know exactly what works. Let’s break it down so you can shop and prep like a pro.
Dry Ingredients
- 2 cups all-purpose flour (spooned and leveled – no packing!)
- 1/4 cup granulated sugar (the perfect amount to let the pumpkin shine)
- 1 tablespoon baking powder (yes, a full tablespoon – that’s the scone secret!)
- 1/2 teaspoon salt (balances all those sweet spices)
- 1 teaspoon ground cinnamon (the star of the spice show)
- 1/2 teaspoon ground nutmeg (freshly grated if you’re fancy)
- 1/4 teaspoon ground cloves (just a pinch – these are potent!)
- 1/4 teaspoon ground ginger (adds that warm zing)
Wet Ingredients
- 1/2 cup cold unsalted butter, cubed (I freeze mine for 15 minutes first – game changer!)
- 1/2 cup pumpkin puree (not pumpkin pie filling – check that label!)
- 3 tablespoons milk (whole milk makes them extra rich)
- 1 large egg, beaten (room temp blends better)
- 1 teaspoon vanilla extract (the good stuff if you’ve got it)
For That Dreamy Glaze
- 1 cup powdered sugar (sifted to avoid lumps)
- 2 tablespoons milk (add slowly to control thickness)
- 1/2 teaspoon vanilla extract (optional but oh-so-worth it)
See? Nothing too crazy – just simple ingredients that work together like magic. Now let me show you why cold butter and proper measuring make all the difference…
How to Make Pumpkin Scones with Glaze
Alright, let’s get baking! These pumpkin scones with glaze come together in just a few simple steps – but I’ve got some tricks up my sleeve to make sure yours turn out bakery-perfect every time. Follow along closely, and don’t skip my little “chef’s notes” throughout – they’re the difference between good scones and “oh-my-gosh-I-need-another-one” scones!
Step 1: Mix Dry Ingredients
First things first – grab that big mixing bowl and whisk together all your dry ingredients. I’m talking flour, sugar, baking powder, salt, and all those gorgeous spices. Really take a moment to whisk them well – you want every bite of your pumpkin scones with glaze to have that perfect spice balance. Pro tip: If your spices have been sitting in the cabinet awhile, give them a quick sniff – fresh spices make all the difference!
Step 2: Cut in Butter
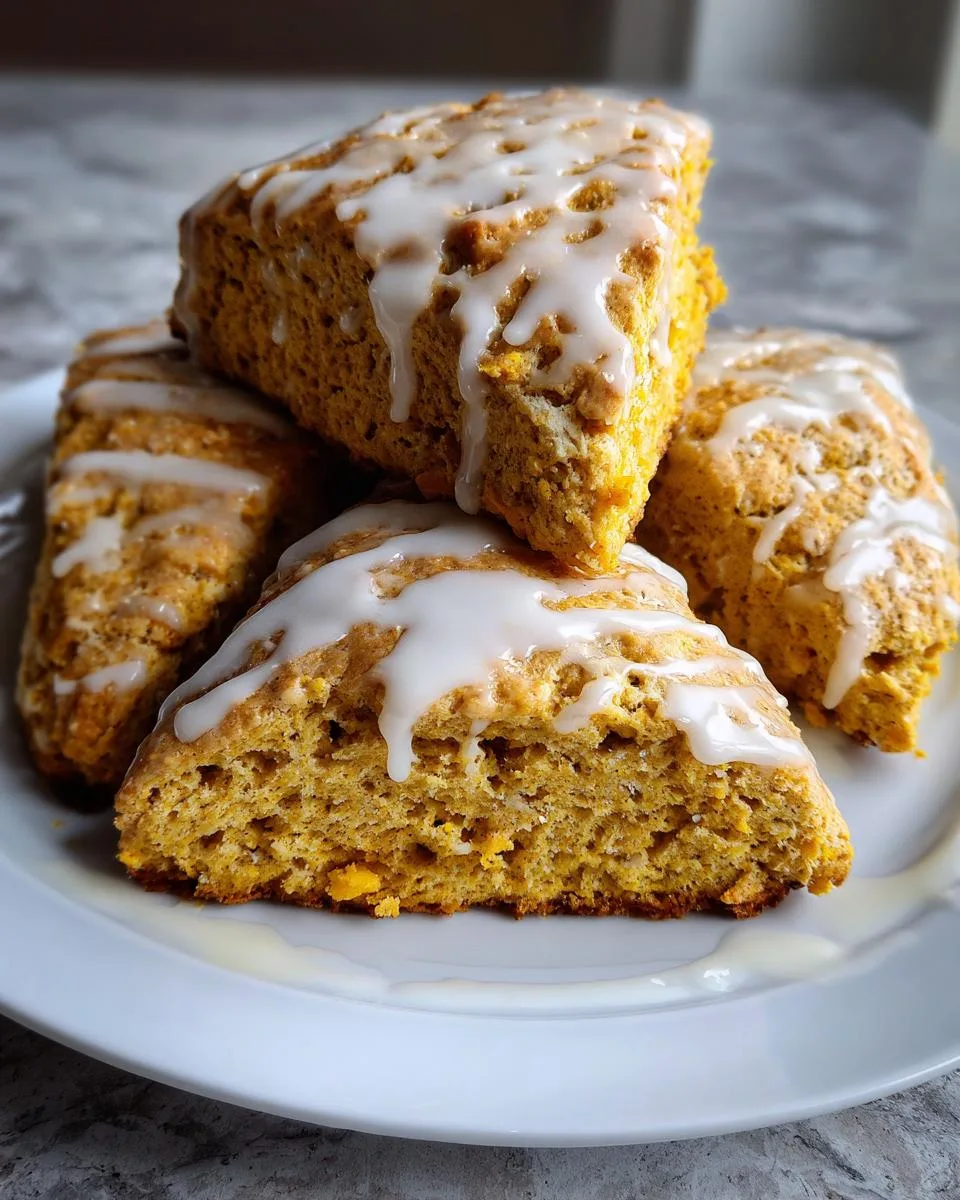
Now for the secret to flaky layers – cold butter! Toss those little cubes into your dry mixture and start cutting them in. I like using a pastry cutter, but two forks work in a pinch. You’re looking for pea-sized crumbs when you’re done – resist the urge to overmix! The butter should stay cold, so if your kitchen’s warm, pop the bowl in the fridge for 5 minutes if needed. Trust me, cold butter = flaky magic in your pumpkin scones with glaze.
Step 3: Combine Wet Ingredients
In a separate bowl, whisk together the pumpkin puree, milk, egg, and vanilla until smooth. This is where the magic starts happening – that beautiful orange color! Now, make a well in your dry ingredients and pour the wet mixture in. Gently fold everything together until just combined – a few flour streaks are totally fine. Overmixing is the enemy of tender scones!
Step 4: Shape and Bake
Turn your dough onto a lightly floured surface and pat it into a circle about 1-inch thick. Use a sharp knife to cut it into 8 wedges (like a pizza!) and transfer them to your prepared baking sheet. Bake at 400°F for 12-15 minutes until they’re puffed and golden. Your kitchen will smell amazing! Let them cool just slightly before glazing – too hot and the glaze will melt right off.
Step 5: Glaze the Scones
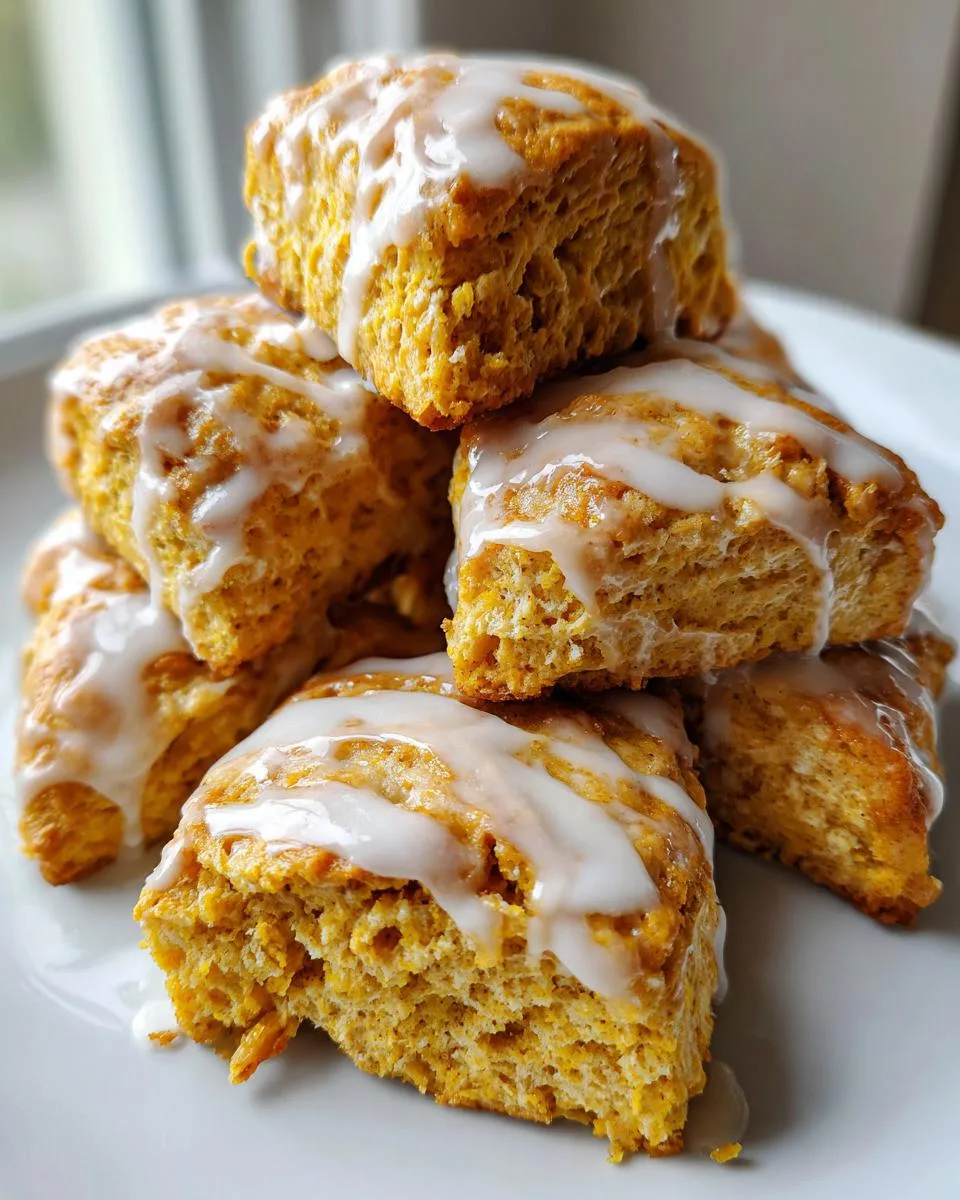
While your pumpkin scones cool slightly, whisk together the powdered sugar, milk, and vanilla for the glaze. You want it thick but pourable – add milk a teaspoon at a time if needed. Now drizzle that sweet goodness over each scone in zig-zags or swirls – whatever makes you happy! The glaze will set as they cool completely. Now try to resist eating them all at once… I dare you!
Tips for Perfect Pumpkin Scones with Glaze
After making these pumpkin scones with glaze more times than I can count, I’ve learned a few tricks that guarantee bakery-worthy results every time. Here’s what you need to know:
- Butter should be ice-cold – I pop mine in the freezer for 15 minutes before starting. Warm butter = flat scones!
- Handle the dough gently – Overmixing makes tough scones. A few flour streaks are totally fine.
- Measure pumpkin puree right – Too much makes them soggy. Use dry measuring cups and level off the top.
- Don’t skip the chill – If your kitchen’s warm, refrigerate the shaped scones for 10 minutes before baking.
- Watch the bake time – Pull them out when just golden. They’ll continue cooking slightly on the tray.
Follow these tips, and your pumpkin scones with glaze will be tender, flaky, and perfect every single time!
Ingredient Substitutions
Look, I get it – sometimes you’re halfway through a recipe and realize you’re out of something. Or maybe you need to tweak these pumpkin scones with glaze for dietary needs. No worries! Here’s my tried-and-true substitution guide from all my kitchen experiments:
For the Dairy-Free Crowd
- Butter: Swap equal amounts of very cold coconut oil or vegan butter. Texture stays flaky!
- Milk: Any unsweetened nut milk works great. Almond gives the mildest flavor.
Gluten-Free Option
- Flour: Use 1:1 gluten-free baking blend. The scones will be slightly denser but still delicious.
Pumpkin Puree Problems?
- Out of pumpkin: Sweet potato puree makes a fantastic swap with similar moisture.
Sugar Swaps
- Granulated sugar: Coconut sugar works but makes the scones darker.
- Powdered sugar glaze: Blend regular sugar with cornstarch for DIY powdered sugar.
A quick heads up – some substitutions change texture slightly. Dairy-free versions might not rise quite as high, and gluten-free can be more crumbly. But hey – imperfect scones still taste amazing with that glaze! The key is keeping your butter (or substitute) ICE COLD no matter what you use.
Serving Suggestions for Pumpkin Scones with Glaze
Now that you’ve baked these gorgeous pumpkin scones with glaze, let’s talk about how to serve them like a pro! Honestly, they’re delicious plain – I’ve been known to sneak bites straight from the cooling rack – but a few simple pairings can take them to the next level.
My absolute favorite way? Still-warm from the oven with a steaming mug of spiced chai tea. The cardamom and cinnamon in the tea make the pumpkin flavors pop even more. On lazy weekend mornings, I’ll sometimes go all out with a dollop of freshly whipped cream and an extra drizzle of glaze – because why not?
For coffee lovers, these pumpkin scones with glaze pair beautifully with:
- A creamy pumpkin spice latte (obviously!)
- Dark roast coffee with a splash of vanilla creamer
- Iced coffee with cinnamon simple syrup
If you’re feeling fancy, try them with:
- A smear of spiced honey butter (just mix soft butter with honey and cinnamon)
- A side of vanilla bean yogurt for dipping
- Fresh apple slices for a crisp contrast
And here’s my secret brunch trick – split a slightly warm scone, toast it lightly, and sandwich it with a spoonful of lemon curd. The tartness against the sweet pumpkin is magical! But really, no matter how you serve them, these pumpkin scones with glaze will disappear fast – I promise.
Storage and Reheating
Here’s the thing about these pumpkin scones with glaze – they rarely last long enough to need storing in my house! But on the off chance you have leftovers (or, you know, want to hide a few from hungry family members), here’s exactly how to keep them fresh and delicious for days.
Room Temperature Storage: Once completely cooled, pop them in an airtight container with parchment between layers. They’ll stay perfect for about 2-3 days this way. The glaze helps keep them moist – one of the many reasons I never skip it!
Freezing Like a Pro: These pumpkin scones with glaze freeze beautifully! Here’s my method:
- Freeze unglazed scones first on a baking sheet until solid (about 1 hour)
- Transfer to freezer bags, squeezing out all the air
- When ready to eat, thaw at room temperature, then warm and glaze
They’ll keep for up to 3 months this way – perfect for holiday prep!
Reheating Magic: Want that fresh-from-the-oven experience? Here’s how:
- Oven method: 300°F for 5-8 minutes – revives that crisp exterior
- Toaster oven: Low setting for 3-4 minutes – my quick fix!
- Microwave (in a pinch): 10-15 seconds, but they’ll soften
Pro tip: Add fresh glaze after reheating for that just-made look and texture!
One warning – if you’ve already glazed them before storing, the scones might stick together a bit. No big deal – just gently separate them and maybe add a fresh drizzle to cover any imperfections. Because let’s be real – even “imperfect” pumpkin scones with glaze are still pretty darn amazing!
Nutritional Information
Okay, let’s talk numbers – because I know some of you are curious about what’s actually in these pumpkin scones with glaze! First, a little disclaimer: these are estimates based on standard ingredients, and your exact counts might vary slightly depending on specific brands or measurements. But here’s the general breakdown per scone (because let’s be real – who’s stopping at just one?):
- Calories: About 250 (but totally worth every single one!)
- Fat: 10g (that’s where all the flaky goodness comes from)
- Saturated Fat: 6g (thank you, butter!)
- Carbohydrates: 35g (mostly from that dreamy glaze)
- Sugar: 12g (but hey, it’s pumpkin spice season – live a little!)
- Protein: 4g (egg power!)
- Fiber: 2g (thank you, pumpkin!)
Now, before anyone panics about the numbers – remember these are treats meant to be enjoyed in moderation (emphasis on “meant to be” because I won’t judge if you eat two). You can always make them slightly lighter by:
- Using reduced-fat milk
- Cutting the glaze amount in half
- Substituting half the butter with applesauce (though texture changes a bit)
But personally? I say embrace the indulgence – life’s too short not to enjoy properly glazed pumpkin scones! Just balance it out with an extra walk around the block while imagining your next batch. That’s how nutrition works, right?
FAQs About Pumpkin Scones with Glaze
I get so many questions about these pumpkin scones with glaze – seems like everyone wants to know the secrets to making them perfect! Here are answers to the most common ones I hear from friends and family (and yes, even from random neighbors who smell them baking and come knocking at my door).
Can I freeze pumpkin scones before baking?
Absolutely! My freezer always has a batch ready for unexpected guests. Shape the dough into wedges, freeze them solid on a tray, then transfer to a freezer bag. When you’re ready, bake straight from frozen – just add 2-3 extra minutes. No thawing needed! The glaze should be added fresh after baking though.
Why did my scones turn out dry?
Oh no! Dry scones usually mean one of three things happened:
- Overmixed the dough (those gluten strands get tough)
- Used too much flour when shaping (always dust lightly!)
- Baked too long (set a timer – they continue cooking on the tray)
Next time, try brushing the tops with cream before baking for extra insurance against dryness!
Can I make pumpkin scones with glaze ahead of time?
You bet! These are actually better on day two when the flavors meld. I often bake them the night before, then glaze in the morning. Store cooled, unglazed scones airtight at room temp up to 2 days. The glaze keeps well in the fridge too – just whisk in a splash of milk if it thickens.
What’s the best way to drizzle the glaze neatly?
After many messy attempts, here’s my foolproof method:
- Let scones cool completely first
- Use a zip-top bag with the corner snipped off
- Hold about 6 inches above and do quick zig-zags
- If you mess up? More glaze hides mistakes beautifully!
Pro tip: Put parchment under the cooling rack to catch drips – easy cleanup!
Can I skip the eggs in this recipe?
While eggs help with structure, you can try substituting with:
- 1/4 cup unsweetened applesauce
- 1 tbsp ground flaxseed + 3 tbsp water (let sit 5 mins first)
The texture will be slightly different but still tasty. Just be extra careful not to overmix the dough!

15-Minute Pumpkin Scones with Glaze – Heavenly Fall Treat
Soft and fluffy pumpkin scones with a sweet glaze, perfect for breakfast or a snack.
- Prep Time: 15 mins
- Cook Time: 15 mins
- Total Time: 30 mins
- Yield: 8 scones 1x
- Category: Breakfast
- Method: Baking
- Cuisine: American
- Diet: Vegetarian
Ingredients
- 2 cups all-purpose flour
- 1/4 cup granulated sugar
- 1 tbsp baking powder
- 1/2 tsp salt
- 1 tsp ground cinnamon
- 1/2 tsp ground nutmeg
- 1/4 tsp ground cloves
- 1/4 tsp ground ginger
- 1/2 cup cold unsalted butter, cubed
- 1/2 cup pumpkin puree
- 3 tbsp milk
- 1 large egg
- 1 tsp vanilla extract
- For the glaze: 1 cup powdered sugar, 2 tbsp milk, 1/2 tsp vanilla extract
Instructions
- Preheat oven to 400°F (200°C). Line a baking sheet with parchment paper.
- In a large bowl, whisk flour, sugar, baking powder, salt, cinnamon, nutmeg, cloves, and ginger.
- Cut in cold butter until mixture resembles coarse crumbs.
- In another bowl, mix pumpkin puree, milk, egg, and vanilla.
- Stir wet ingredients into dry ingredients until just combined.
- Turn dough onto a floured surface and shape into a 1-inch thick circle.
- Cut into 8 wedges and transfer to the baking sheet.
- Bake for 12-15 minutes until golden brown.
- Cool slightly before drizzling with glaze.
Notes
- Use cold butter for flaky scones.
- Do not overmix the dough.
- Store in an airtight container for up to 3 days.
Nutrition
- Serving Size: 1 scone
- Calories: 250
- Sugar: 12g
- Sodium: 200mg
- Fat: 10g
- Saturated Fat: 6g
- Unsaturated Fat: 3g
- Trans Fat: 0g
- Carbohydrates: 35g
- Fiber: 2g
- Protein: 4g
- Cholesterol: 45mg

