There’s nothing like the deep, rich flavor of homemade slow cooker elderberry syrup to make you feel like you’re sipping liquid armor for your immune system. I first stumbled onto this magical elixir when my neighbor handed me a jar during flu season, and let me tell you, it became my kitchen obsession. After years of making it on the stovetop (and nearly burning more batches than I’d care to admit), I discovered the slow cooker method – and wow, what a game changer!
This gentle cooking method coaxes out every bit of goodness from those tiny purple berries without any babysitting. The low heat preserves more nutrients than boiling, and your house will smell like spiced berry heaven for hours. My kids now call it “mom’s magic potion,” and I love knowing exactly what’s in our family’s daily immune boost – no mystery ingredients, just pure elderberry goodness with a touch of honey sweetness.

Why You’ll Love This Slow Cooker Elderberry Syrup
Let me count the ways this syrup will become your new kitchen staple:
- Set it and forget it – No more hovering over a bubbling pot! The slow cooker does all the work while you go about your day
- More nutrients, less fuss – Low heat keeps all those precious antioxidants and vitamins intact (unlike boiling them to death)
- Wallet-friendly wellness – One batch costs less than store-bought bottles and lasts for months
- Customizable sweetness – You control the honey amount (I sometimes cut it in half when using in tea)
- Your house will smell amazing – Like spiced berry jam and cozy winter days had a baby
Ingredients for Slow Cooker Elderberry Syrup
Here’s the beautiful simplicity of this recipe – just five powerhouse ingredients bubbling away to create your own immune-boosting magic potion. I’ve learned through trial and error (mostly error) that quality makes all the difference here, so don’t skimp!
- 1 cup dried elderberries – Look for organic, dark purple berries with no stems (I get mine from a local herb shop, but health food stores usually carry them too)
- 4 cups filtered water – Tap water works, but filtered lets the berry flavors shine through without any chlorine notes
- 1 whole cinnamon stick – None of that pre-ground stuff! The stick slowly releases its warmth without making the syrup gritty
- 1 tsp freshly grated ginger – I keep a nub in my freezer just for this – so much brighter than dried powder
- 1 cup raw honey – This is where I splurge – local, unpasteurized honey adds extra immune benefits (but regular works in a pinch)
A quick tip from my many syrup-making adventures: measure your honey after it’s in liquid form if possible. Trying to scrape a cup of thick, crystallized honey out of the jar is how I once lost half my batch to the countertop!
Equipment You’ll Need
One of the best things about this recipe? You probably already have everything you need in your kitchen right now. Here’s the short and sweet list:
- Slow cooker – Any size will do, but I find my 4-quart works perfectly for this batch size
- Fine-mesh sieve – Essential for catching all those tiny berry bits (cheesecloth works too, but it’s messier)
- Glass jar with lid – I save pickle jars for this – just wash well with hot soapy water first!
And if you want to make your life even easier:
- Small funnel – Saves you from sticky spills when transferring to your jar (learned this the hard way)
- Wooden spoon – For stirring in the honey without scratching your slow cooker
- Measuring cups – Though I often just eyeball the water after making this so many times
That’s it! No fancy gadgets required – just simple tools for simple, wholesome goodness.

How to Make Slow Cooker Elderberry Syrup
Okay, here’s where the magic happens! I’ve made this syrup so many times I could probably do it in my sleep, but I’ll walk you through each step like I’m right there in your kitchen with you. The beauty of this method is how hands-off it is – just a little prep, then let your slow cooker work its low-and-slow magic.
Step 1: Combine Ingredients in Slow Cooker
First things first – dump those gorgeous purple elderberries right into your slow cooker. No need to soak them first (I tried that once – total waste of time). Add the cinnamon stick and freshly grated ginger – trust me, that little bit of ginger makes all the difference for that warm, spicy kick.
Now pour in your water. I like to swirl it around a bit to make sure all the berries get wet. Don’t stir too much though – those elderberries can be fragile! Just give everything a gentle poke with your spoon to make sure nothing’s sticking to the bottom.
Step 2: Slow Cook for 6 Hours
Here’s where patience pays off. Set your slow cooker to LOW and walk away for 6 hours. I know, I know – you’ll be tempted to peek, but resist! Every time you lift that lid, you’re letting heat escape and adding to your cooking time.
Important safety tip: Don’t try to speed things up by cooking on high. I made that mistake once and ended up with a bitter, overcooked mess. Low heat gently coaxes out all the good stuff from the berries without destroying those precious immune-boosting compounds.
Your house will start smelling absolutely divine around hour 3 – like spiced berry jam and cozy winter days. That’s how you know it’s working!
Step 3: Strain and Add Honey
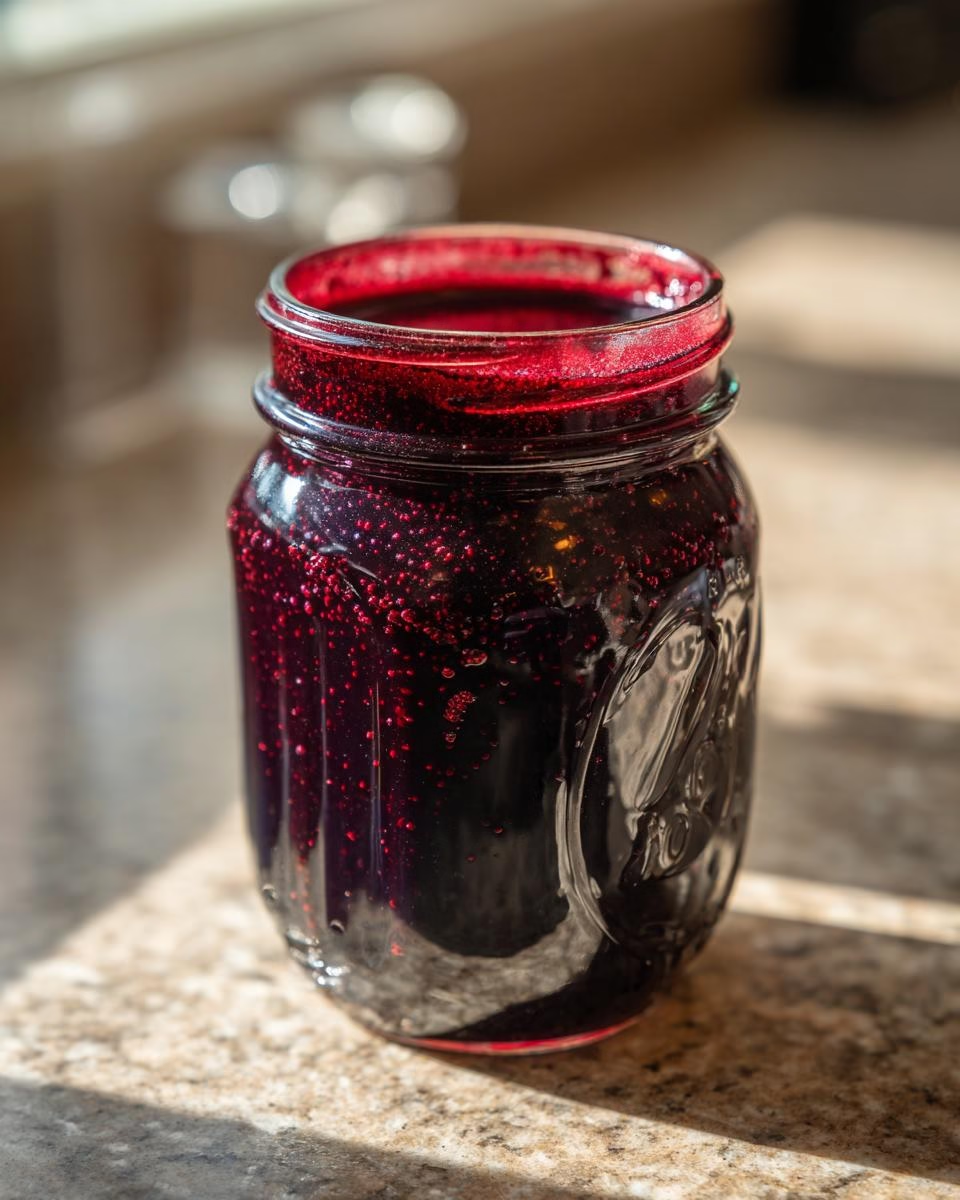
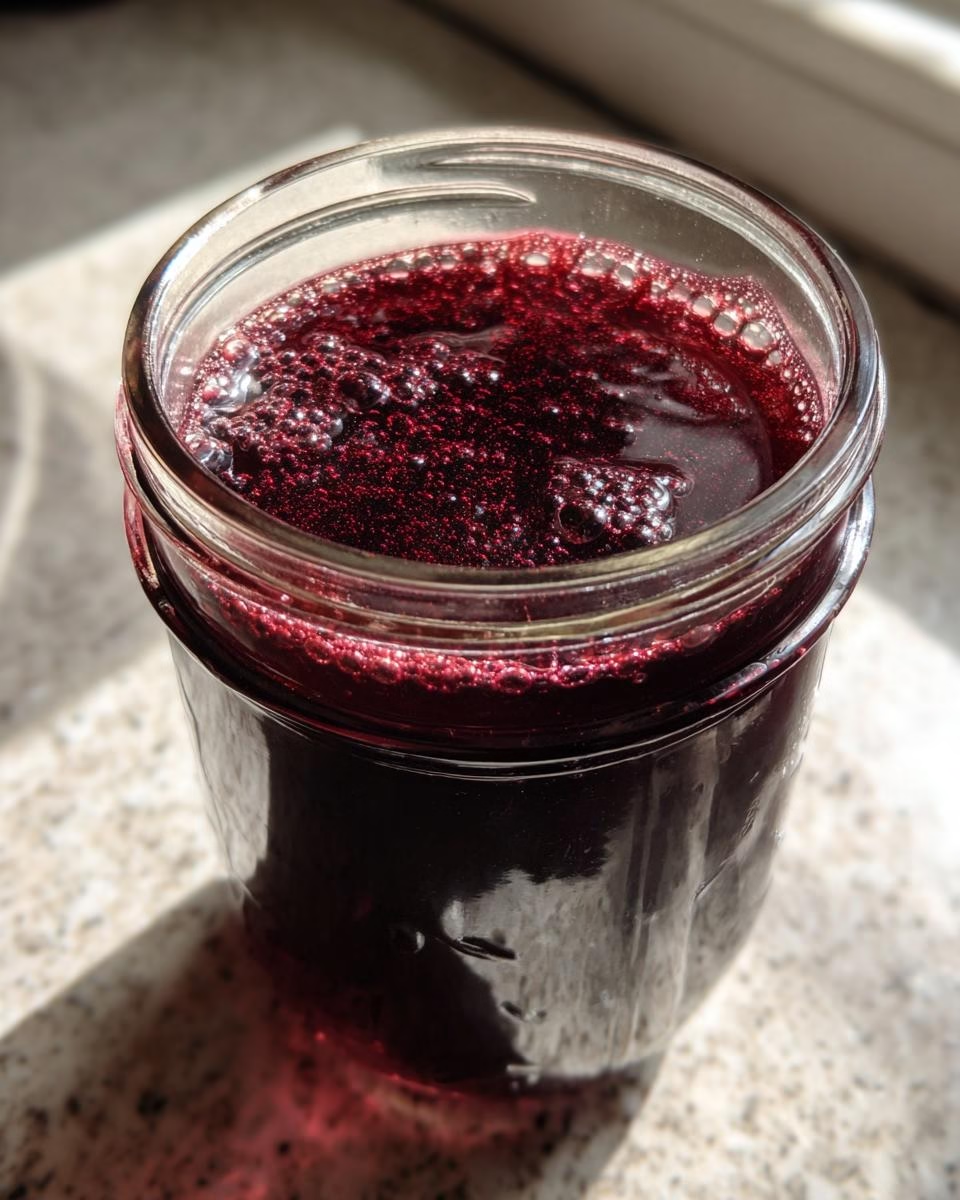
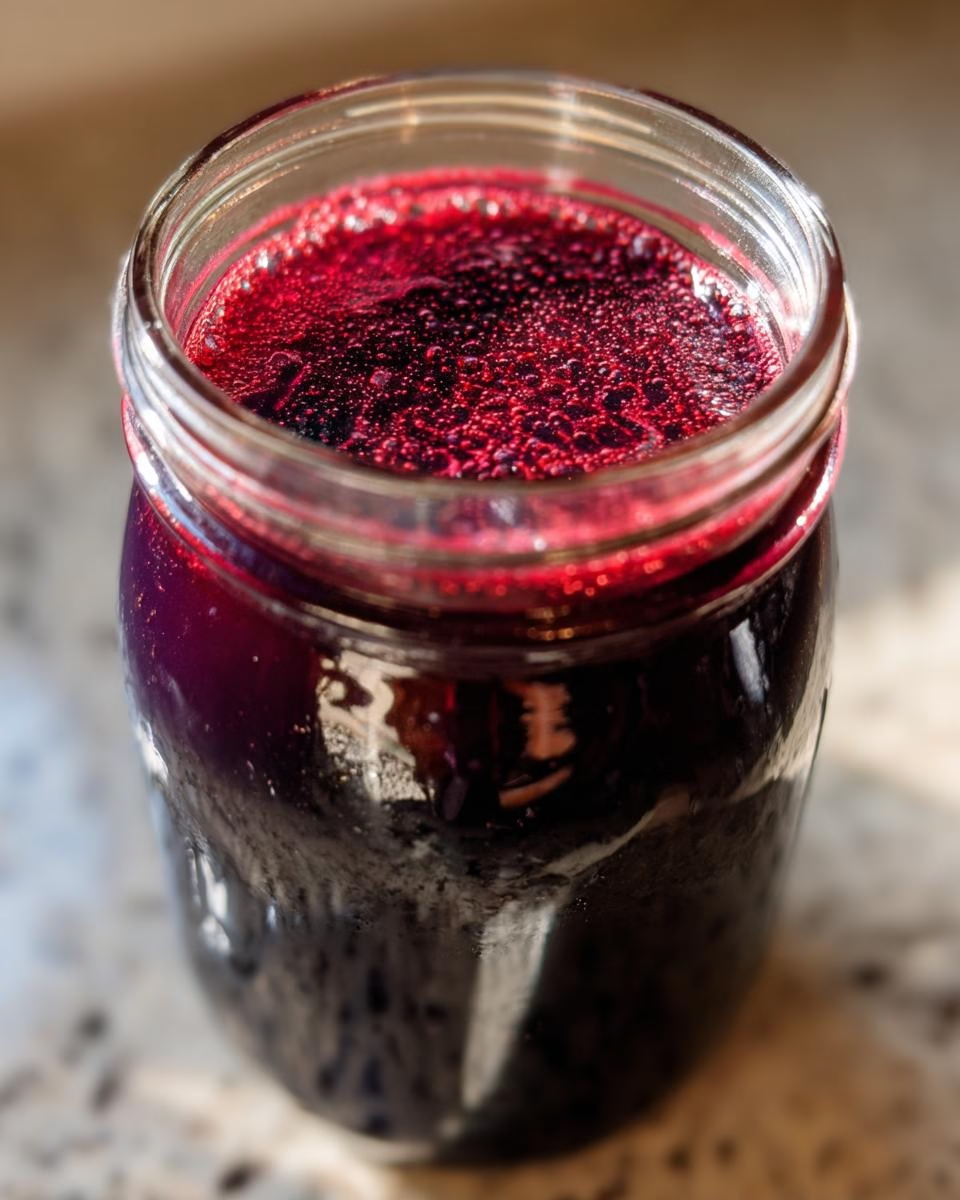
After 6 hours, you’ll have this gorgeous deep purple liquid that looks like something from a wizard’s potion cabinet. Now for the messy-but-fun part: straining!
Place your fine-mesh sieve over a large bowl and carefully pour the mixture through. I like to use the back of a spoon to press gently on the berries to get every last drop of that precious liquid – but don’t go crazy or you’ll end up with cloudy syrup.
Here’s my favorite trick: let the strained liquid cool for about 10 minutes before adding honey. Why? Raw honey’s enzymes break down at high temps, and we want to keep all those good-for-you properties intact. Stir in your honey until it’s completely dissolved – this is when the syrup transforms from tart to perfectly balanced.
Pro tip: If your honey is crystallized, just warm the jar in a bowl of hot water for a few minutes first. Much easier than trying to scrape it out!

Tips for Perfect Slow Cooker Elderberry Syrup
After making dozens of batches (and yes, plenty of mistakes), here are my hard-earned secrets for foolproof syrup every time:
- Go organic when you can – Especially with the honey and elderberries. You’re making medicine here, so quality matters!
- Sterilize those jars – Just run them through the dishwasher or pour boiling water in before filling. Makes your syrup last longer.
- Taste before bottling – Like it sweeter? Add an extra drizzle of honey. Too sweet? A squeeze of lemon balances it perfectly.
- Label with dates – Trust me, you’ll forget when you made it otherwise (ask me how I know).
- Double the batch – It keeps for months, and you’ll be glad you did when cold season hits!
Storing and Using Your Syrup
Now that you’ve got this beautiful jar of purple gold, let’s talk about keeping it fresh and all the delicious ways to use it! My first batch ever went bad because I left it on the counter (oops), so learn from my mistakes.
Storage tips: Always keep your syrup in the fridge – it’ll stay good for about 2 months this way. I use glass jars with tight lids (those old mustard jars work great after a good wash). If you notice any fizzing or odd smells, toss it immediately. But honestly? Mine never lasts that long because we use it up so fast!
Daily dose: For immune support, I give my family 1-2 teaspoons daily. Kids love it straight off the spoon (mine call it “purple honey”), but you can also mix it into:
- Hot tea – My afternoon ritual: ginger tea with a spoonful of syrup. The steam feels extra soothing when you’re fighting off a cold.
- Yogurt or oatmeal – Swirl it in for a naturally sweet breakfast boost.
- Sparkling water – Fancy mocktail vibes with health benefits!
- Pancakes – Drizzle instead of maple syrup for immune-supporting flapjacks.
Pro tip: If you’re using it in hot drinks, let your tea or water cool slightly first so you don’t destroy those precious honey enzymes. I keep a small spoon right in the jar for easy dosing – prevents double-dipping when everyone’s fighting over it during flu season!

Slow Cooker Elderberry Syrup FAQs
Over the years, I’ve gotten so many questions about this syrup from friends and family (and even random neighbors who smell it cooking!). Here are the answers to the most common ones that pop up:
Can I use fresh elderberries instead of dried?
You can, but you’ll need about twice as many since fresh berries contain more water. The bigger issue? Raw elderberries contain compounds that can upset your stomach, so you must cook them thoroughly. That’s why I stick with dried – they’re safer, more concentrated, and available year-round at my local co-op.
Is this safe for kids?
Absolutely! My kids have been taking this since they were toddlers (with pediatrician approval, of course). For little ones under 1, just skip the honey – you can use maple syrup instead. The standard dose is 1/2 to 1 teaspoon daily for kids, 1-2 teaspoons for adults. During cold season, we sometimes do twice daily doses for a few days.
How long does the syrup last?
In the fridge, it keeps beautifully for about 2 months – if it lasts that long! The honey acts as a natural preservative. You’ll know it’s gone bad if it gets fizzy, changes color dramatically, or smells fermented. I always make a fresh batch at the start of cold season and another mid-winter.
Can I freeze the syrup?
Yes! This is my secret for having elderberry syrup year-round. Pour it into ice cube trays (about 1 tablespoon per cube), freeze solid, then pop the cubes into a freezer bag. Each cube is a perfect single dose – just thaw overnight in the fridge or drop one into hot tea. Frozen, it keeps for 6 months easily.
What if I don’t have a slow cooker?
No worries! You can simmer it on the stove over very low heat for about 45 minutes (watch it like a hawk – I’ve burned more batches this way than I care to admit). The slow cooker just makes it foolproof and more hands-off. If you’re making it regularly, consider borrowing a friend’s slow cooker – that’s how I got hooked on this method!
Nutritional Information
Let’s talk numbers – but keep in mind, these are estimates because your syrup’s exact nutrition will depend on your specific ingredients (like how much honey you used or how thick you strained it). Here’s what you can typically expect per 1 teaspoon serving:
- Calories: About 20 kcal
- Carbohydrates: 5g (mostly from the natural sugars in honey and berries)
- Sugar: 4g (all natural, no refined sugars!)
- Fiber: 0g (the straining removes the berry skins)
- Protein: 0g
- Fat: 0g
Now here’s the part that doesn’t show up on nutrition labels – all those amazing antioxidants, vitamins, and immune-supporting compounds from the elderberries! The slow cooking method helps preserve more of these beneficial plant compounds than boiling would. I like to think of each teaspoon as a little burst of purple power for my immune system.
Quick disclaimer: These values can vary based on your exact ingredients. Using raw local honey? That adds trace minerals and enzymes. Organic elderberries? Higher antioxidant levels. The numbers above are averages to give you a general idea, but the real magic is in what those lab tests don’t measure!
Okay, now it’s your turn! I want to hear all about your slow cooker elderberry syrup adventures. Did your house smell like a cozy winter cabin? Did your kids go crazy for it like mine do? Maybe you put your own spin on the recipe – swapped in some orange peel or added a pinch of cloves? Tell me everything!
Drop a comment below with your results, questions, or brilliant variations. And if you loved this recipe as much as we do, give it a rating – it helps other home remedy makers find this magical purple potion too. Happy syrup making, friends – may your immune systems be strong and your slow cookers stay busy!
PrintSlow Cooker Elderberry Syrup: A 6-Hour Immune Boosting Miracle
Make your own elderberry syrup at home using a slow cooker. This natural remedy is packed with antioxidants and vitamins to support your immune system.
- Prep Time: 10 mins
- Cook Time: 6 hours
- Total Time: 6 hours 10 mins
- Yield: 3 cups 1x
- Category: Remedy
- Method: Slow Cooker
- Cuisine: Global
- Diet: Vegetarian
Ingredients
- 1 cup dried elderberries
- 4 cups water
- 1 cinnamon stick
- 1 tsp grated fresh ginger
- 1 cup honey
Instructions
- Combine elderberries, water, cinnamon stick, and ginger in a slow cooker.
- Cook on low for 6 hours.
- Strain the mixture through a fine-mesh sieve into a bowl.
- Discard the solids and let the liquid cool slightly.
- Stir in honey until fully dissolved.
- Pour the syrup into a clean glass jar and store in the refrigerator.
Notes
- Use organic ingredients for best results.
- Store in the fridge for up to 2 months.
- Take 1-2 teaspoons daily for immune support.
Nutrition
- Serving Size: 1 tsp
- Calories: 20
- Sugar: 4g
- Sodium: 0mg
- Fat: 0g
- Saturated Fat: 0g
- Unsaturated Fat: 0g
- Trans Fat: 0g
- Carbohydrates: 5g
- Fiber: 0g
- Protein: 0g
- Cholesterol: 0mg


