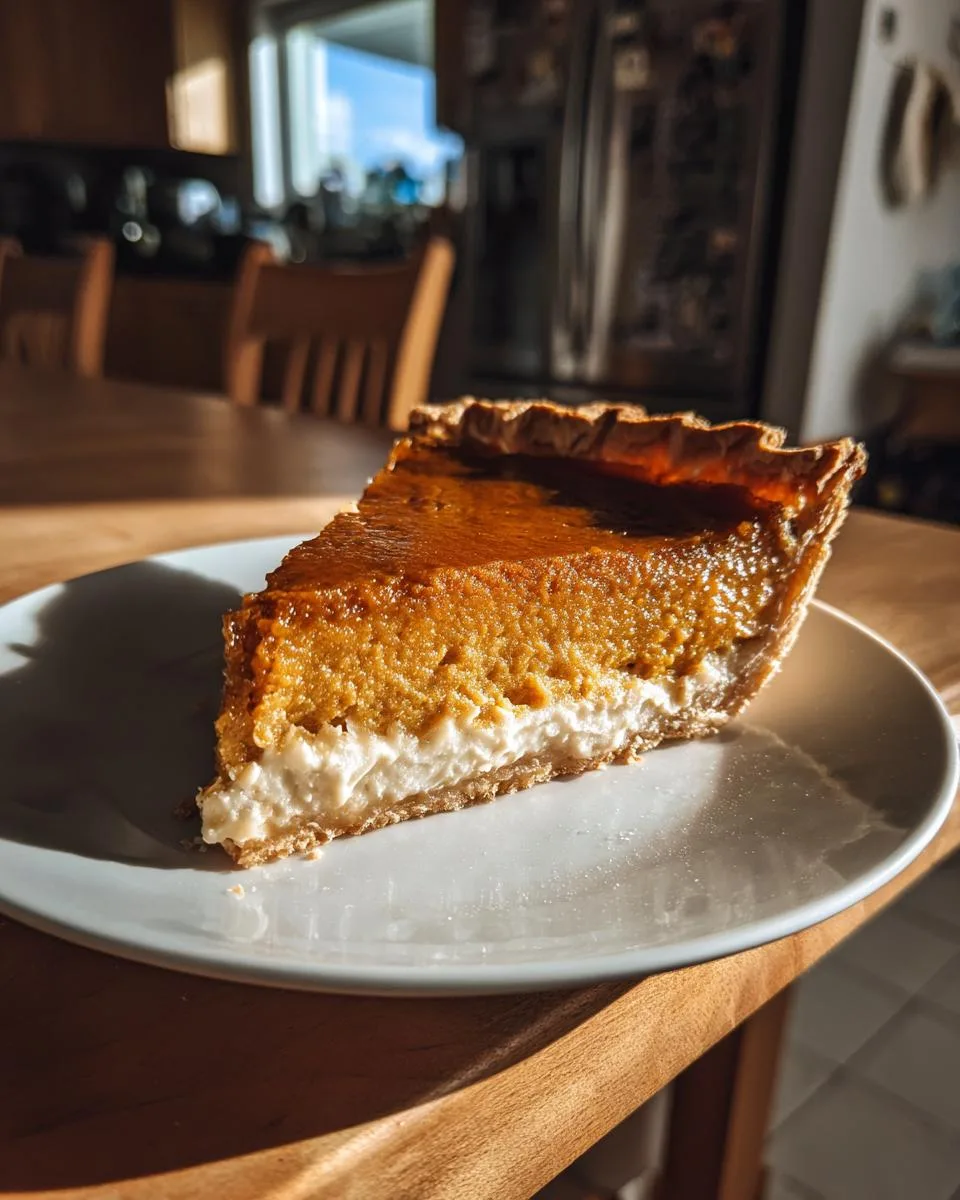
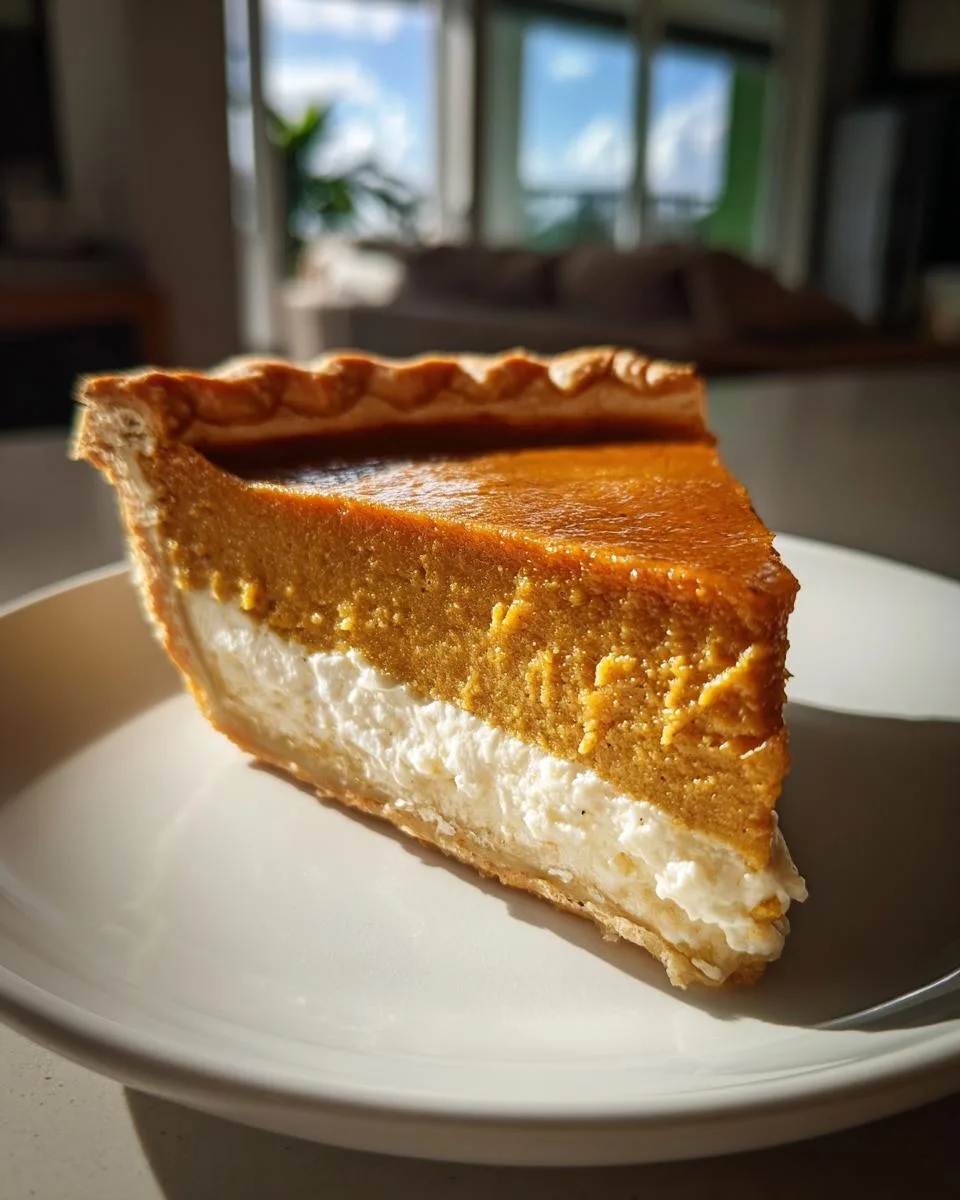
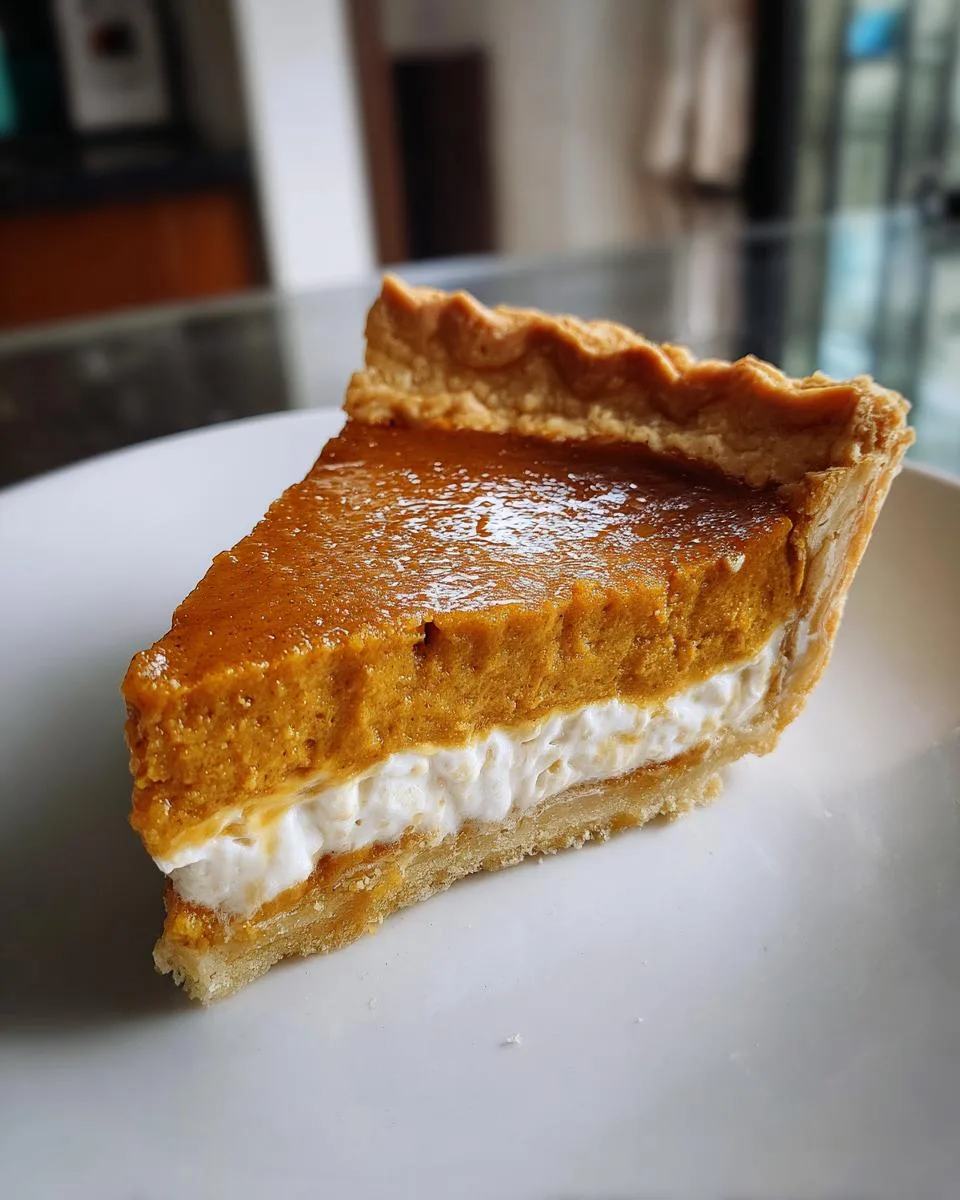
There’s something magical about the moment that first crisp autumn breeze hits—suddenly, all I can think about is baking my classic pumpkin pie. It’s not just a dessert in our house; it’s a whole mood. The way the spices fill the kitchen, that first golden slice wobbling on a plate, the way my kids’ eyes light up when they sneak a bite of whipped cream off the top—this pie is pure nostalgia in a flaky crust.
My version is simple, unfussy, and exactly what a pumpkin pie should be: velvety smooth, warmly spiced, and just sweet enough. No fancy twists, no over-the-top toppings—just the kind of pie your grandma would approve of. I’ve made this every Thanksgiving since I was old enough to reach the counter, and trust me, after one bite, you’ll understand why it’s stood the test of time. The secret? Letting the pumpkin shine (and okay, maybe a little extra cinnamon because life’s too short for bland desserts).
Why You’ll Love This Classic Pumpkin Pie
This isn’t just any pumpkin pie—it’s the one you’ll crave every fall. Here’s why:
- Creamy dreamy texture: That silky smooth filling? It’s like eating pumpkin-flavored clouds (but in the best possible way). No weird lumps or grittiness—just pure comfort.
- Spice that’s just right: I’ve perfected the cinnamon-ginger-nutmeg trio so it warms you up without overpowering the pumpkin. It’s like a cozy sweater for your taste buds.
- No-fail method: Even if you’ve never baked a pie before, this recipe holds your hand through every step. The filling comes together in one bowl—how easy is that?
- The smell alone wins Thanksgiving: When this beauty bakes, your whole house will smell like holiday magic. Fair warning—you might catch people hovering around the oven.
Ingredients for Classic Pumpkin Pie
Gather these simple ingredients—I promise you probably have most in your pantry already. But here’s the thing: using exactly what’s listed makes all the difference between good pie and “oh-my-goodness-I-need-seconds” pie.
- 1 (9 inch) unbaked pie crust – Homemade is wonderful, but hey, I won’t judge if you use store-bought. Just make sure it’s the kind you unroll, not the frozen shells (those make me sad).
- 1 (15 oz) can pumpkin puree – Not pumpkin pie mix—that’s prespiced and will throw everything off. Libby’s is my ride-or-die brand here.
- 1 (14 oz) can sweetened condensed milk – That thick, sticky nectar of the baking gods. Pro tip: run the can under hot water for 30 seconds to make pouring easier.
- 2 large eggs – Like, actually large. Not “I grabbed whatever was in the fridge” eggs. They bind everything together beautifully.
- The spice trio:
- 1 tsp cinnamon (use the good stuff—your pie deserves it)
- ½ tsp ginger (freshly opened for maximum zing)
- ½ tsp nutmeg (I grate whole nuts but pre-ground works too)
- ½ tsp salt – Seems tiny but it’s the secret weapon that makes all the flavors pop.
See? Nothing weird or hard to find. Now let’s make some magic!
How to Make Classic Pumpkin Pie
Alright, let’s get down to the good stuff—making that dreamy pumpkin pie happen. Don’t let the word “pie” intimidate you; this is one of those recipes where simple steps lead to spectacular results. I’ll walk you through each stage like I’m right there in the kitchen with you (pretend I’m the friend who steals spoonfuls of filling but always helps with dishes).
Preparing the Crust
First things first—let’s talk crust. Whether you’re using homemade or store-bought, handle it gently like it’s your favorite vintage record. Unroll it into your pie plate and press it in without stretching—this prevents shrinking. I like to flute the edges by pinching between my thumb and forefinger, but a simple fork crimp works too if you’re going for rustic charm.
Here’s my little secret: I never blind bake this crust. The high initial oven temperature gives it a head start while the filling stays protected underneath. Just pop it in the fridge while you mix the filling to keep it chilled.

Mixing the Filling
Now for the star of the show—that velvety pumpkin filling. Grab your biggest mixing bowl (trust me, you’ll want room to whisk enthusiastically) and dump in the pumpkin puree. Break up any clumps with your whisk before adding the sweetened condensed milk—pour slowly unless you want sticky countertops.
Crack in those eggs one at a time, whisking well after each. You’re looking for complete incorporation—no streaks of yolk floating around. Now sprinkle in your spices like you’re seasoning royalty: cinnamon first, then ginger, nutmeg, and finally that pinch of salt. Give it thirty seconds of vigorous whisking until the mixture is smooth as silk and smells like autumn heaven.

Baking and Cooling
Pour that gorgeous orange filling into your waiting crust—it should come right to the edge but not overflow. Slide it onto the middle rack of your preheated 425°F oven and set a timer for 15 minutes. This initial blast gives the crust that perfect golden start.
When the timer dings, without opening the door, reduce the heat to 350°F. Bake for another 35-40 minutes until the edges are set but the center still jiggles slightly—like jello, not liquid. It’ll firm up as it cools. Resist the temptation to poke it constantly; patience rewards you with crack-free pie.
Let it cool completely on a wire rack—about 2 hours minimum. I know, torture right? But cutting too soon leads to sad, soupy slices. Once cooled, refrigerate for at least 3 hours (overnight is even better) for picture-perfect slices that hold their shape.

Tips for the Perfect Classic Pumpkin Pie
Listen, I’ve made every pumpkin pie mistake so you don’t have to—here are my hard-earned secrets for absolute perfection:
- Crack prevention: That initial high heat then lower temp isn’t just for fun—it prevents cracks by setting the edges first while the center bakes gently.
- Spice freshness test: Smell your spices before using. If you don’t get a strong whiff of cinnamon when you open the jar, it’s time for a new one.
- Even baking: Rotate your pie halfway through the lower-temp bake if your oven runs hot in spots.
- Knife trick: If the crust browns too fast, gently wrap foil around just the edges—no fancy pie shields needed.
- Patience pays: I know it’s hard, but letting it cool completely before cutting means cleaner slices that don’t weep.
Follow these, and you’ll be the pumpkin pie hero at any gathering!
Ingredient Substitutions and Variations
Life happens—maybe you’re out of pumpkin puree or need a dairy-free version. Don’t worry, I’ve got you covered with these tested swaps (though fair warning, the original recipe will always have my heart).
For the pumpkin puree: Fresh works if you’re feeling ambitious—roast a sugar pumpkin, scoop the flesh, and puree until smooth. Just make sure to drain it in cheesecloth for an hour or you’ll get watery pie. The flavor? Deeper, earthier. The effort? Considerable.
Dairy-free friends: Swap the sweetened condensed milk for full-fat coconut milk (the canned kind) plus ¾ cup brown sugar. The texture stays creamy but with a subtle coconut vibe—not bad for fall!
Egg alternatives: Each egg = ¼ cup unsweetened applesauce. The pie sets softer but still holds shape after chilling overnight. Or try flax eggs (1 tbsp ground flax + 3 tbsp water per egg).
Spice rebels: Add ¼ tsp cloves for extra warmth or cardamom for something unexpected. Just don’t skip the salt—it’s non-negotiable for balancing flavors!
Serving and Storing Classic Pumpkin Pie
The best part? Diving into that first glorious slice! Let me tell you how I like to serve mine—with a towering dollop of barely-sweetened whipped cream that melts lazily over the spiced filling. Sometimes I’ll sprinkle toasted pecans on top for crunch, or drizzle caramel if I’m feeling fancy. But honestly? This pie shines brightest all on its own.
Leftovers (ha—as if!) keep beautifully in the fridge for 3-4 days. Just cover loosely with foil. Cold pie straight from the fridge is my secret midnight snack, but if you must reheat, 10 seconds in the microwave takes off the chill without turning it rubbery. Pro tip: Freeze individual slices wrapped tightly in plastic for up to 2 months—future you will send thank-you notes!
Nutritional Information
Here’s the scoop on what’s in each glorious slice of classic pumpkin pie (because let’s be real – we’re all going to have seconds anyway):
- Calories: 320 (totally worth every one)
- Fat: 12g (mostly from that flaky, buttery crust we love)
- Sugar: 35g (it’s dessert – live a little!)
- Protein: 7g (pumpkin power!)
Remember: Nutritional values are estimates and vary based on ingredients used. Store-bought crusts might change the numbers slightly, but the homemade memories? Those are priceless.
Frequently Asked Questions
Can I freeze pumpkin pie? Absolutely! Wrap cooled pie tightly in plastic wrap followed by foil (or use an airtight container) and freeze for up to 2 months. Thaw overnight in the fridge—the texture stays perfect. Pro tip: Freeze individual slices for quick dessert emergencies!
How to prevent a soggy crust? That initial 425°F blast is your best defense—it sets the crust fast. Also, make sure your filling isn’t too watery (shake the pumpkin can before opening to check for excess liquid). If you’re paranoid like me, a quick egg white brush on the unbaked crust adds extra protection.
Why did my pie crack? Usually means it baked too fast or cooled too quickly. Next time, try placing a baking sheet on the rack below your pie to diffuse heat, and let it cool gradually in the turned-off oven with the door cracked for 30 minutes.
Can I make this ahead? Oh honey, this pie actually tastes better the next day! Bake it 1-2 days before serving—the flavors meld beautifully. Just keep refrigerated and add whipped cream right before serving.
Fresh vs canned pumpkin? Canned gives consistent results and saves hours. But if you’ve got a sugar pumpkin and time to spare, fresh puree adds lovely depth—just drain it well (I squeeze it in cheesecloth like I’m wringing out a towel).
I’d love to hear how your classic pumpkin pie turns out—did you stick to the recipe or add your own twist? Leave a comment below (bonus points if you tell me about your first pumpkin pie memory!). And if you snapped a photo of that golden beauty, tag me—I live for pie pics!
PrintClassic Pumpkin Pie Recipe with 3 Essential Tips for Perfection
A classic pumpkin pie with a smooth, spiced filling and flaky crust.
- Prep Time: 15 minutes
- Cook Time: 55 minutes
- Total Time: 1 hour 10 minutes
- Yield: 8 servings 1x
- Category: Dessert
- Method: Baking
- Cuisine: American
- Diet: Vegetarian
Ingredients
- 1 (9 inch) unbaked pie crust
- 1 (15 ounce) can pumpkin puree
- 1 (14 ounce) can sweetened condensed milk
- 2 large eggs
- 1 teaspoon ground cinnamon
- 1/2 teaspoon ground ginger
- 1/2 teaspoon ground nutmeg
- 1/2 teaspoon salt
Instructions
- Preheat oven to 425°F (220°C).
- Place pie crust in a 9-inch pie plate.
- In a large bowl, whisk pumpkin puree, condensed milk, eggs, cinnamon, ginger, nutmeg, and salt.
- Pour filling into pie crust.
- Bake for 15 minutes.
- Reduce oven temperature to 350°F (175°C) and bake for 35-40 minutes until filling is set.
- Cool completely before serving.
Notes
- Use fresh pumpkin puree for best flavor.
- Let pie cool completely to set properly.
- Store leftovers in refrigerator.
Nutrition
- Serving Size: 1 slice
- Calories: 320
- Sugar: 35g
- Sodium: 300mg
- Fat: 12g
- Saturated Fat: 5g
- Unsaturated Fat: 5g
- Trans Fat: 0g
- Carbohydrates: 45g
- Fiber: 3g
- Protein: 7g
- Cholesterol: 70mg


