
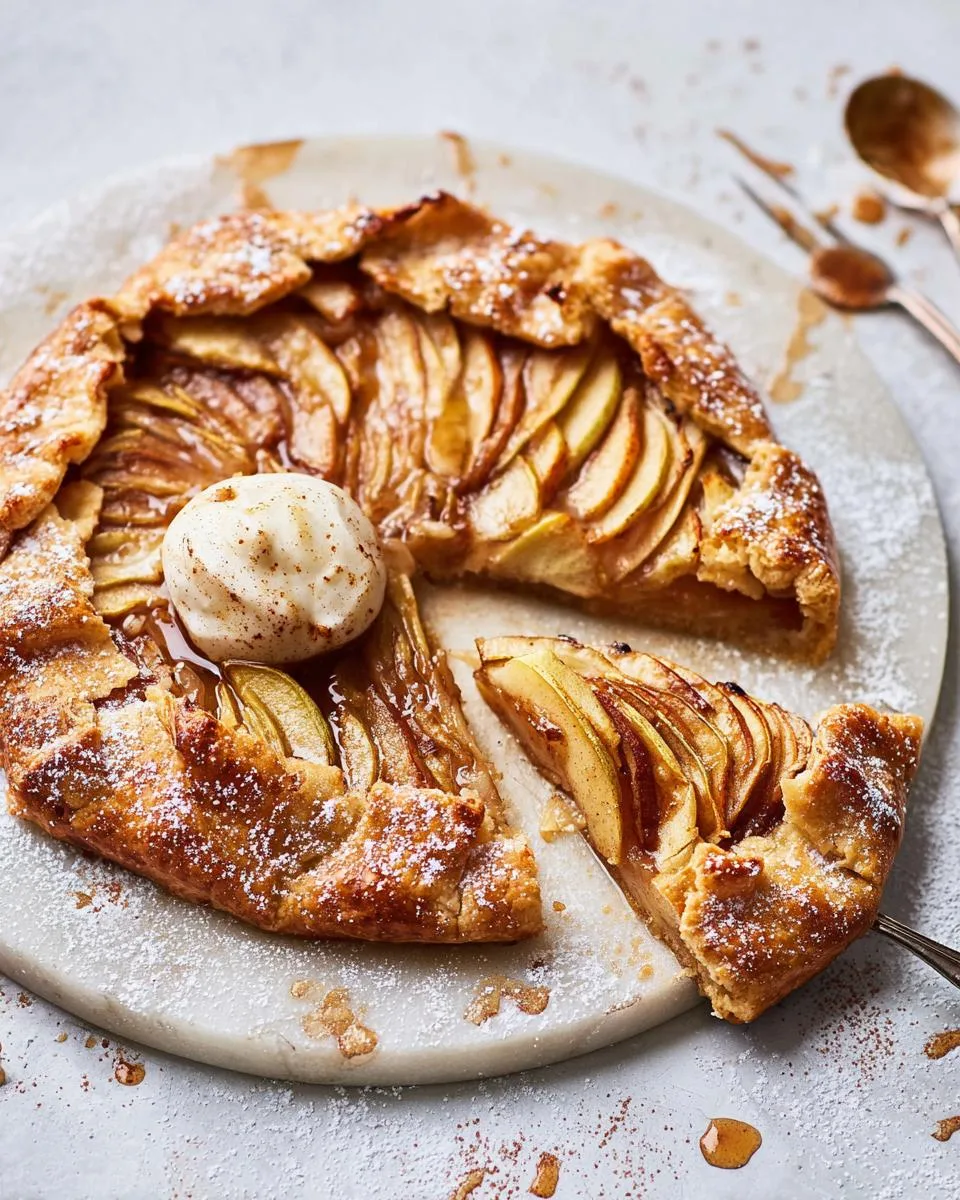
There’s something about an apple galette that just feels like a cozy fall afternoon, you know? It’s got that rustic, imperfect charm that makes everyone at the table smile. I first made one for a small gathering of friends, and honestly, I was shocked at how easy it came together—way less fuss than a traditional pie, but it looked like I’d spent hours on it. The flaky, buttery crust wraps around tender, spiced apples so effortlessly, and the whole thing feels like a warm hug on a plate. Trust me, once you try this, you’ll be making it for every autumn get-together.
Why You’ll Love This Apple Galette
- It’s so much easier than a traditional pie—no crimping, no special pan, just roll and fold. I love that it looks rustic and gorgeous without any fuss.
- You can use whatever apples you have on hand, from tart Granny Smith to sweet Honeycrisp. This apple galette is super forgiving that way.
- The free‑form shape means every slice is a little different, and that’s part of its charm. Plus, it’s ready in under an hour—perfect for impressing guests on a whim.
Ingredients for Apple Galette
Let me walk you through what you’ll need for this gorgeous rustic tart. The ingredients are simple, but a few details make all the difference.
For the crust, you’ll want 1 1/4 cups all‑purpose flour (spooned and leveled, please—don’t scoop straight from the bag), 1/2 teaspoon salt, 1 tablespoon sugar, and 1/2 cup cold unsalted butter, cut into small cubes. The butter absolutely has to be cold—think straight from the fridge. You’ll also need 3 to 4 tablespoons ice water (make sure it’s really icy cold).
For the filling, grab 3 medium apples—I love Granny Smith or Honeycrisp—peeled, cored, and thinly sliced (about 1/8‑inch thick). Then 1/4 cup granulated sugar, 1 teaspoon ground cinnamon, 1/4 teaspoon ground nutmeg, 1 tablespoon fresh lemon juice, and 1 tablespoon unsalted butter, melted.
To finish, you need 1 large egg yolk beaten with 1 tablespoon water for the egg wash, and 1 tablespoon coarse sugar (like turbinado) for that lovely sparkle on top.
How to Make This Apple Galette
Okay, let’s break this down into simple steps. The whole process is really forgiving, but two things matter: keeping that butter cold and giving the dough time to chill. Don’t rush either one, and you’ll be golden (literally!).
Prepare the Flaky Crust for Apple Galette
Grab a bowl and whisk together your flour, salt, and sugar. Now, add those cold butter cubes. Use a pastry cutter or your fingertips to work the butter into the flour until it looks like coarse crumbs with some pea-sized bits of butter still visible. That’s exactly what you want—those little chunks create the flaky layers. Drizzle in the ice water, one tablespoon at a time, tossing with a fork until the dough just starts to come together. Don’t overdo it! Form it into a disk, wrap it in plastic, and pop it in the fridge for at least 30 minutes. You can even make this a day ahead—just take it out a few minutes before rolling if it’s super firm.
Make the Spiced Apple Filling for Apple Galette
While the dough chills, toss your apple slices with the sugar, cinnamon, nutmeg, and lemon juice. That lemon juice isn’t just for flavor—it keeps the apples from browning and brightens everything up. I like to let the mixture sit for about 5 to 10 minutes. You’ll notice the apples release some juices; that’s okay, just drain off the excess before piling them onto the dough so your crust doesn’t get soggy.
Assemble and Bake the Apple Galette
Preheat your oven to 400°F (200°C) and line a baking sheet with parchment paper. On a lightly floured surface, roll that chilled dough into a 12-inch circle. It doesn’t have to be perfect—rustic is the name of the game here! Gently transfer it to your baking sheet. Now, arrange the apple slices in the center, leaving a solid 2-inch border. Fold that border up and over the apples, pleating it as you go around the circle. Brush the crust with your egg wash, sprinkle generously with coarse sugar, and bake for 30 to 35 minutes until the crust is a deep golden brown and the filling is bubbly. Let it cool for about 10 minutes before slicing so those juices can settle. Trust me on this one!
Frequently Asked Questions About Apple Galette
Can I use other apple varieties?
Absolutely! That’s one of the best things about this rustic tart. I’ve used everything from tart Granny Smith to sweet Fuji and even a mix of both. Just keep in mind that softer apples like McIntosh might break down a bit more during baking, so I lean toward firmer varieties for a nicer texture.
Can I make the dough in advance?
You bet! This easy pastry dough is super forgiving that way. You can wrap it tightly in plastic and keep it in the fridge for up to 2 days, or even freeze it for a month. Just let it thaw in the fridge overnight before rolling out.
Do I need to peel the apples?
I always do, but you don’t have to. Peeling gives the filling a smoother, more uniform texture, and the apples soften beautifully without any tough skin getting in the way. If you’re feeling lazy or want a more rustic look, leaving the peel on works fine—just wash them well first.
How do I prevent a soggy bottom?
The secret is twofold. First, let the apple mixture sit for a few minutes after tossing with sugar and lemon juice, then drain off any excess liquid before piling them onto the dough. Second, make sure your oven is fully preheated to 400°F—that high heat helps the bottom crust crisp up before the apples release too much moisture. For more information on baking techniques, check out King Arthur Baking’s guide.
Can I freeze the baked galette?
Yes, and it’s a lifesaver for busy weeks! Let it cool completely, then wrap it tightly in foil and pop it in the freezer for up to 2 months. To reheat, just place it in a 350°F oven straight from frozen for about 15 minutes—it’ll taste almost as fresh as the day you baked it.
Tips for the Perfect Apple Galette
After making this apple galette more times than I can count, I’ve picked up a few tricks that make all the difference. Here are my go-to tips for nailing it every single time.
- Keep that butter and ice water ice-cold. I pop my butter cubes in the freezer for 10 minutes before mixing. Warm butter just won’t create those beautiful flaky layers.
- Don’t overwork the dough. Stop mixing as soon as it comes together—overworking develops gluten and gives you a tough crust instead of a tender one.
- Slice your apples uniformly, about 1/8-inch thick, so they bake evenly. And don’t be shy with the egg wash on those crust edges—that’s what gives it that gorgeous golden shine.
- For the best flavor, use a mix of tart and sweet apples. Granny Smith and Honeycrisp together are my absolute favorites!
Serving Suggestions for Apple Galette
I love serving this warm with a big scoop of vanilla ice cream—the contrast of warm spiced apples and cold cream is just perfect. A drizzle of caramel sauce or a dollop of whipped cream works beautifully too. And honestly? Don’t be shy about having a slice for breakfast with your morning coffee. It’s a galette, so it’s practically rustic toast, right?
How to Store and Reheat Apple Galette
If you have any leftovers (which is rare in my house!), just pop them in the fridge for up to 2 days. To bring back that gorgeous crispness, reheat slices in a 350°F oven for about 10 minutes. Trust me, don’t even think about the microwave—it’ll turn that beautiful flaky crust into a sad, soggy mess. A quick oven reheat works like magic.
Apple Galette Nutritional Information
Here’s the quick rundown for one serving (1 slice, which is 1/8 of the galette): about 280 calories, 14g fat, 38g carbs, 3g protein, 18g sugar, and 180mg sodium. Just remember, these are estimates—exact numbers can shift a bit depending on your apple choice and brand of butter. It’s a treat, so enjoy every bite! For more detailed nutritional needs, feel free to use your favorite calculator.
Did You Make This Apple Galette?
I’d love to hear how yours turned out! Drop a comment, leave a rating, or tag me in your photos on social media. Happy baking!
PrintIrresistible 3-Apple Galette

A free-form apple tart with a flaky crust and spiced apple filling. Simple to make and looks impressive.
- Prep Time: 20 minutes
- Cook Time: 35 minutes
- Total Time: 55 minutes
- Yield: 8 servings 1x
- Category: Dessert
- Method: Baking
- Cuisine: French
- Diet: Vegetarian
Ingredients
- 1 1/4 cups all-purpose flour
- 1/2 teaspoon salt
- 1 tablespoon sugar
- 1/2 cup cold unsalted butter, cut into cubes
- 3 to 4 tablespoons ice water
- 3 medium apples (such as Granny Smith or Honeycrisp), peeled, cored, and thinly sliced
- 1/4 cup sugar
- 1 teaspoon ground cinnamon
- 1/4 teaspoon ground nutmeg
- 1 tablespoon lemon juice
- 1 tablespoon unsalted butter, melted
- 1 egg yolk beaten with 1 tablespoon water (for egg wash)
- 1 tablespoon coarse sugar (for sprinkling)
Instructions
- Make the crust: In a bowl, mix flour, salt, and sugar. Cut in cold butter until mixture resembles coarse crumbs. Add ice water, 1 tablespoon at a time, until dough holds together. Form into a disk, wrap in plastic, and refrigerate for at least 30 minutes.
- Preheat oven to 400°F (200°C). Line a baking sheet with parchment paper.
- In another bowl, toss apple slices with sugar, cinnamon, nutmeg, and lemon juice.
- On a floured surface, roll dough into a 12-inch circle. Transfer to prepared baking sheet.
- Arrange apples in the center of dough, leaving a 2-inch border. Fold the border over the apples, pleating as you go. Brush crust with egg wash and sprinkle with coarse sugar.
- Bake for 30 to 35 minutes, until crust is golden and apples are tender. Let cool slightly before serving.
Notes
- You can use any apple variety you like. A mix of tart and sweet works best.
- Serve warm with vanilla ice cream or whipped cream.
- Leftovers keep in the fridge for up to 2 days. Reheat in a 350°F oven.
Nutrition
- Serving Size: 1 slice (1/8 of galette)
- Calories: 280
- Sugar: 18g
- Sodium: 180mg
- Fat: 14g
- Saturated Fat: 8g
- Unsaturated Fat: 5g
- Trans Fat: 0g
- Carbohydrates: 38g
- Fiber: 3g
- Protein: 3g
- Cholesterol: 55mg
