
You know that struggle, right? You want to feed your kids something healthier than drive-thru nuggets, but the homemade versions often turn out sad and soggy. I’ve been there, standing over a baking sheet, wondering where all the crunch went. It took me a dozen attempts, but I finally cracked the code for baked chicken nuggets that are actually, genuinely crispy. No deep fryer required. My secret is a super simple coating and a smart baking technique that gives you that satisfying crunch in every single bite. Trust me, this foolproof recipe is about to become a weeknight hero in your kitchen.
Why You Will Love These baked Chicken Nuggets
I’m not gonna lie – I was skeptical at first. Could baked nuggets really compete with the greasy, crunchy ones from the fast food joint? Turns out, yes. And here’s why you’ll be making these on repeat.
They’re incredibly crispy without deep frying. No more sad, soggy breading. The combination of Parmesan and a good breadcrumb coating, plus a drizzle of oil, gives you that golden, crunchy shell you crave. It’s the crunchy texture that actually satisfies.
You probably already have everything in your pantry. No weird ingredients, no special trips to the store. Chicken, breadcrumbs, eggs, some spices – that’s it. It’s a recipe you can whip up on a whim, even on a busy weeknight.
Ready in under 35 minutes. From fridge to table in half an hour. That’s faster than ordering delivery. The prep is simple, and the oven does the heavy lifting while you set the table or wrangle the kids.
Kids and adults actually fight over them. I’ve served these to picky toddlers and grown-up food critics. They disappear. No leftovers. It’s the kind of meal that makes everyone happy without you having to make two different dinners.
Key Ingredients for the Best baked Chicken Nuggets
Let’s talk ingredients, because they really make or break this recipe. I’ve tested enough batches to know that the right stuff matters. Here’s what you’ll need and why each one plays a starring role.
Boneless skinless chicken breasts, cut into 1-inch bite-sized cubes. I know, I know – you could use thighs, and I’ll get to that later. But for these nuggets, breasts are my go-to. They’re lean, cook quickly, and the uniform cubes mean everything gets done at the same time. No overdone pieces, no raw centers. Just perfect little bites.
Plain breadcrumbs or panko for extra crunch. I’m a panko fanatic. Those big, airy flakes give you that shattering crispness that makes you forget these are baked. Regular breadcrumbs work too, but panko takes it to the next level. If you’ve got them, use them.
Freshly grated Parmesan cheese (not the shelf-stable kind). This is non-negotiable for me. The powdery stuff in a jar doesn’t melt the same way – it just sits there. Freshly grated Parmesan melts into the breadcrumbs and adds a nutty, salty flavor that’s key to the coating. Plus, it helps the crust get golden and crispy. Trust me, grate it yourself.
Large eggs. They’re the glue that holds everything together. Beat them until frothy so the coating sticks evenly. No fuss, no special tricks.
Olive oil. This is your secret weapon for browning. A drizzle right before baking helps the crust turn that gorgeous golden brown. Don’t skip it – dry nuggets are sad nuggets.
And the spices: garlic powder, paprika, salt, and pepper. Simple but they pack a punch. The paprika gives a little color and warmth.
A quick note on substitutions: If you’re dairy-free, swap the Parmesan for nutritional yeast – it adds that same savory, cheesy kick. Need gluten-free? Use almond flour or crushed pork rinds instead of breadcrumbs. Both work beautifully.
The Key to a Better Coating
Here’s the trick I wish I’d known sooner: press the coating on firmly. I used to just dip the chicken and let the breadcrumbs fall where they may. Half the time, the coating would slide right off during baking, leaving me with sad, bare nuggets. Not anymore.
After you dip each piece in the egg wash (let the excess drip off first – you don’t want a soggy mess), drop it into the breadcrumb mixture and press down gently but firmly with your fingers. Flip it over and press again. You want the crumbs to really embed into the egg. It’s like giving the chicken a snug little jacket. This simple step ensures every bite gets that crispy, cheesy crust, and nothing falls off in the oven. Game changer, I promise.
Equipment You Will Need for This baked Chicken Nuggets Recipe
Alright, let’s keep it simple. You don’t need a fancy kitchen to make these nuggets. Here’s what you’ll actually use:
A large baking sheet. Standard half-sheet size works great. You want enough room to spread the nuggets out so they crisp up instead of steaming each other.
Parchment paper. Trust me on this one. It makes cleanup a breeze and prevents sticking without adding extra fat. Just line the sheet and you’re good to go.
Two shallow bowls. One for the beaten eggs, one for the breadcrumb mixture. Wide, shallow bowls make dipping easy – no awkward fumbling with deep containers.
A sharp knife and a cutting board. You’ll be cubing the chicken into bite-sized pieces. A good knife makes the job quick and safe. Dull knives are just asking for trouble.
Optional but awesome: a wire rack set inside the baking sheet. This little trick lets air circulate all around the nuggets, so the bottoms get just as crispy as the tops. If you have one, use it. If not, no worries – flipping halfway through does the job just fine.
Step-by-Step Instructions for Crispy baked Chicken Nuggets
Alright, let’s get down to business. I’m going to walk you through every single step, just like I’m standing right there in the kitchen with you. It’s easier than you think, and once you get the rhythm down, you’ll be making these on autopilot.
Prepare Your Chicken and Oven
First things first – crank that oven to 400°F (200°C). This temperature is the sweet spot, seriously. It’s hot enough to get the coating golden and crispy, but not so hot that the outside burns before the chicken cooks through. I learned that one the hard way. So, don’t rush this step. Let the oven fully preheat while you do the rest.
While that’s heating up, take out your baking sheet and line it with parchment paper. I know it feels like an extra step, but trust me, you’ll thank me later. It keeps the nuggets from sticking and makes cleanup, like, five minutes faster. It’s a win-win.
Now, grab your chicken breasts. Pat them dry with a paper towel first – this helps the egg wash stick better. Then, using a sharp knife and a steady hand, cut them into those 1-inch bite-sized pieces. Try to keep them uniform in size. Smaller pieces cook faster, larger ones take longer, and we want everything to finish at the same time. No one wants a raw bite in the middle of their dinner.
Set Up Your Breading Station
This is the assembly line, and you’ll be glad you got organized. You need two shallow bowls. Not deep ones – shallow. Trust me, it makes dipping way less awkward.
In the first bowl, crack your eggs and beat them until they’re frothy. Just give them a good whisk for about thirty seconds. The frothiness helps the coating stick evenly, so don’t skip it. It’s not about being fancy, it’s just about giving the breadcrumbs something to grab onto.
In the second bowl, dump in the breadcrumbs (or panko, my personal favorite), the freshly grated Parmesan, garlic powder, paprika, salt, and pepper. Here’s the important part: mix those dry ingredients really well. Don’t be lazy about it. You don’t want one nugget that’s a salt bomb and another that tastes like nothing. Stir it all together until the spices and cheese are evenly distributed. It takes like thirty seconds and makes a huge difference in every single bite of your baked chicken nuggets.
Coat the Chicken Nuggets
Okay, this is where the magic happens. Take a piece of chicken and drop it into the egg wash. Use your fingers or tongs to turn it around, making sure it’s completely coated. Then, lift it out and let the excess egg drip off. You don’t want a soggy, drippy mess – just a nice, even coating.
Now, move it to the breadcrumb mixture. Here’s the key: press it down firmly. I’m not talking about a gentle pat – I mean really press those crumbs into the chicken. Flip it over and press again, making sure you get a thick, even layer. This is what prevents the dreaded naked nugget after baking. Think of it like giving the chicken a snug, cozy jacket that’s going to get super crispy in the oven.
Place each coated nugget onto your prepared baking sheet. Make sure they’re not touching each other. They need their own space for the hot air to circulate and crisp them up. If they’re crowded, they’ll just steam and get soggy. No thanks.
Bake and Achieve the Perfect Crunch
Before they go into the oven, drizzle the olive oil evenly over the tops of the nuggets. Just a little bit goes a long way. It’s the secret to that golden-brown, crispy exterior. Think of it as a little mini-fry in the oven.
Pop them in and set your timer for 15-18 minutes. But here’s the most important tip I can give you, and this was a real “aha!” moment for me: flip them halfway through. At the 8 or 9-minute mark, pull the sheet out and use tongs to flip each nugget over. I used to skip this step and always ended up with beautiful tops and pale, flabby bottoms. Once I started flipping, the difference was night and day. Every single side gets that perfect crunch.
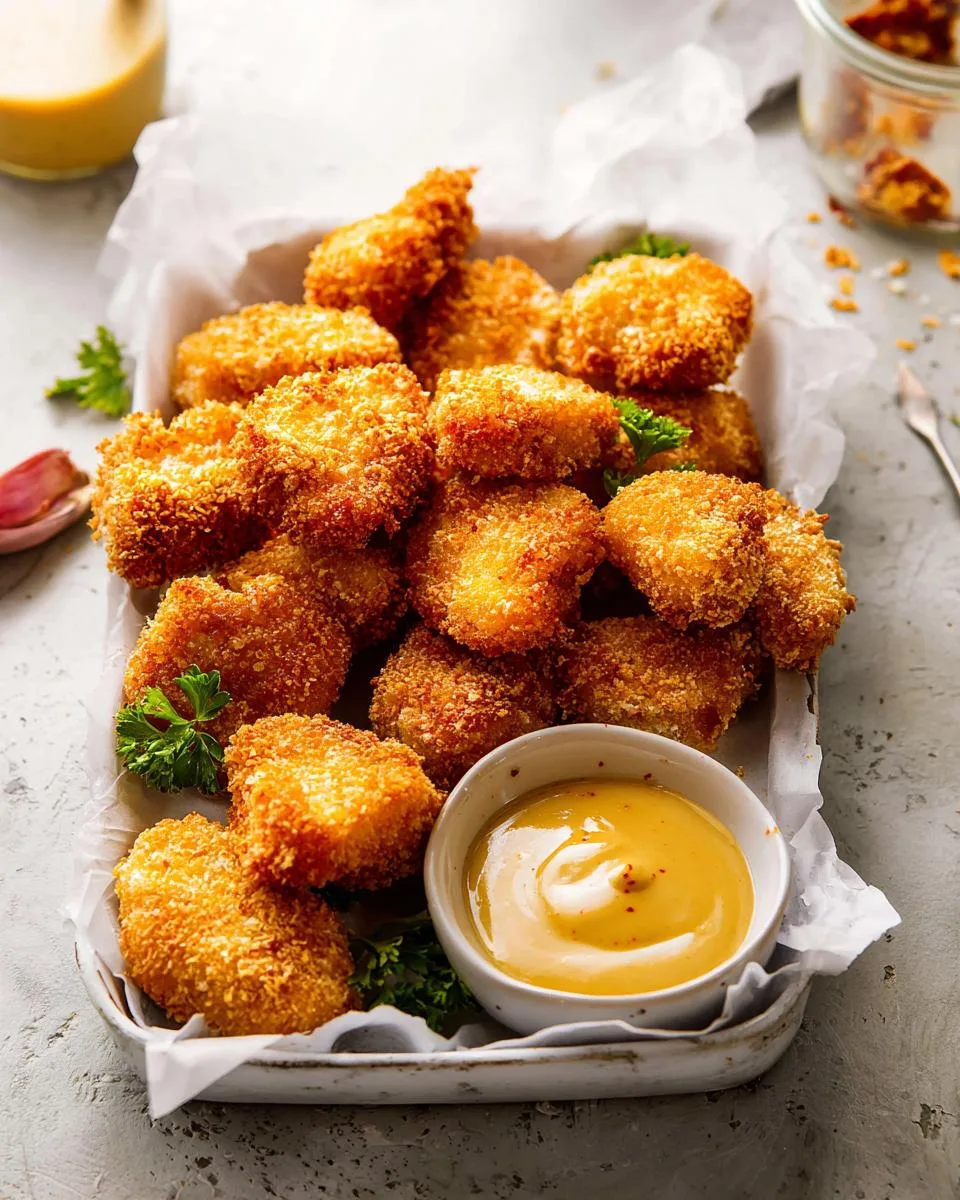
Just remember, baking time can vary based on the size of your nuggets. You’ll know they’re done when the coating is golden brown and crispy, and the internal temperature reads 165°F. If you don’t have a meat thermometer, cut one open to check there’s no pink in the middle. That first batch I made without flipping? Pale bottoms and uneven cooking. Now? Perfect, crispy, golden bites every single time. That flip is a total game-changer. Don’t skip it.
Tips for Perfect baked Chicken Nuggets Every Time
Alright, let’s talk about the little things that take these from “pretty good” to “can’t-stop-eating-them.” After countless batches, I’ve figured out what really matters. Here are my top tips for perfect baked chicken nuggets, every single time.
Don’t overcrowd the baking sheet. This is the biggest mistake I see. If you pile the nuggets on top of each other, they steam instead of crisp. You end up with soggy, sad breading. Give them some breathing room. If you have to use two baking sheets, do it. Your patience pays off with perfectly crunchy edges.
Use panko for maximum crunch. I said it before, and I’ll say it again – panko breadcrumbs are the secret weapon here. Their big, airy flakes create a way crispier crust than traditional breadcrumbs. They just shatter when you bite into them. It’s the texture you’re after, and panko delivers every time.
Let the coated nuggets rest for 5 minutes before baking. This is the tip that changed everything for me. Pop the breaded nuggets in the fridge for about five minutes. This little rest helps the coating set and stick to the chicken. Less falling off, more crunch in every bite. It’s a tiny step that makes a big difference.
If your nuggets aren’t browning, check your oven. Here’s the thing – ovens can be liars. If you’re pulling out pale, sad nuggets, your oven might actually run cooler than it’s set to. Get an oven thermometer. It’s a cheap fix that saves you from undercooked chicken. If they still aren’t browning, a quick blast under the broiler for the last minute or two does the trick. Just watch them closely so they don’t burn!
And one more thing: pat your chicken dry before you start coating it. Extra moisture creates steam, and steam is the enemy of crispiness. A quick pat with a paper towel helps the egg wash grab onto the chicken better. It’s a tiny detail that ensures your coating actually stays put.
Delicious Variations on These baked Chicken Nuggets
One of the things I love most about this recipe is how easy it is to switch up. You can change the whole flavor profile with just a couple of tweaks. Here are a few of my favorite ways to mix it up.
For a little heat, try adding 1/2 teaspoon of cayenne pepper to the breadcrumb mixture. I’ve been on a spicy kick lately, and it adds such a nice warmth without being overwhelming. It’s perfect for game day or when you just want something with a little more excitement.
Swap the Parmesan for freshly shredded cheddar and add a pinch of onion powder. I actually discovered this one by accident when I ran out of Parmesan. The cheddar melts right into the breadcrumbs and creates these amazing little crispy, cheesy bits. A pinch of onion powder just ties it all together beautifully.
If you’re watching your carbs, use crushed pork rinds instead of breadcrumbs. This one’s for my low-carb friends. I like to crush them up pretty fine so they coat the chicken evenly. They bake up incredibly crispy and crunchy, and honestly, you won’t miss the breadcrumbs at all. It’s a great way to get your nugget fix.
Sometimes I just want something a little different. Adding a teaspoon of dried oregano or Italian seasoning to the breadcrumb mix changes the whole vibe. It reminds me of a chicken parmesan, but without all the work. I love dipping these in a simple marinara sauce.
Serving Suggestions for Your baked Chicken Nuggets
You know what makes these nuggets even better? The right dipping sauce. I’ve tested a bunch over the years, and these three are my absolute favorites. They’re simple, they’re fast, and they take the nuggets from good to unforgettable.
Classic ketchup. I know, it’s basic, but sometimes basic is exactly right. The tangy sweetness of ketchup cuts through the crunchy coating perfectly. It’s the gold standard, and honestly, my kids won’t even look at the nuggets unless there’s a little pile of ketchup on the plate.
Honey mustard. This is my personal go-to. Just mix equal parts honey and Dijon mustard (or yellow mustard if that’s what you’ve got) and whisk until smooth. It’s sweet, it’s tangy, and it clings to every nook and cranny of the crispy crust. I could eat it with a spoon.
Simple sriracha mayo. For when you want a little kick. Stir together a couple tablespoons of mayo with a teaspoon of sriracha (more if you’re brave). It’s creamy, slightly spicy, and it’s become my secret weapon for dipping everything from nuggets to fries.
Now, let’s talk sides. I love serving these with a simple side salad – just some mixed greens, cherry tomatoes, and a light vinaigrette. The freshness balances out the richness of the nuggets. Or, go for sweet potato fries. They bake up at the same temperature, so you can throw them in together. And for a quick, no-fuss option, fresh veggie sticks (carrots, celery, bell peppers) are perfect. It’s a balanced meal that feels indulgent but is actually really good for you. Dinner, done right.
How to Store Leftover baked Chicken Nuggets
Let’s be honest—if you have leftovers, you’ve done something right. These nuggets are usually gone before I can even think about saving some. But if you’re lucky enough to have a few left over, here’s how to handle them so they’re just as good the next day.
First, let them cool completely. I know, it’s hard to wait, but trust me on this. If you pack them away while they’re still warm, they’ll steam themselves into a sad, soggy mess. Once they’re cool, pop them in an airtight container and stick them in the fridge. They’ll stay good for up to 3 days.
Now, reheating. This is the make-or-break moment. Whatever you do, do not put them in the microwave. I’m serious. I know it’s tempting, but it will turn your beautiful, crunchy nuggets into rubbery, sad little things. Don’t do it.
Instead, reheat them in the oven or an air fryer at 350°F for about 5-7 minutes. Just until they’re warmed through and the coating gets crispy again. It takes a little extra time, but it’s totally worth it. You’ll get that crunch back, and they’ll taste almost as good as fresh. That’s the secret to enjoying them all over again.
Frequently Asked Questions About baked Chicken Nuggets
I get asked a lot of questions about these nuggets, and honestly, I love it. It means people are actually making them, which is the best feeling. So here are the answers to the four things I hear most often. Hopefully, this covers whatever you’re wondering about.
Q1: Can I use chicken thighs instead of breasts? Absolutely, yes. I use thighs sometimes when I want a little extra juiciness. They’re a bit more forgiving and don’t dry out as easily. Just keep an eye on the cook time – thighs might need a couple extra minutes since they’re a bit thicker. The internal temp still needs to hit 165°F, so your thermometer is your best friend here.
Q2: How do I make them gluten-free? Easy peasy. Just swap the regular breadcrumbs for gluten-free breadcrumbs or crushed pork rinds. I’ve had a lot of luck with both. The pork rinds give you an insane crunch that honestly rivals the original. If you’re using gluten-free breadcrumbs, I’d recommend toasting them lightly first for extra crispiness. It makes a real difference.
Q3: Can I freeze the unbaked nuggets? Yes, and this is a total lifesaver on busy nights. Arrange the coated nuggets in a single layer on a baking sheet and pop them in the freezer until they’re solid. Then transfer them to a freezer-safe bag – they’ll keep for up to 3 months. When you’re ready to bake, just pull out what you need and add about 5 minutes to the baking time. No need to thaw. Dinner is solved.
Q4: Why are my nuggets not crispy? This is the one that breaks my heart, because I’ve been there. There are two usual suspects. First, the coating might be too thin. Are you pressing the breadcrumb mixture firmly onto the chicken? You really want to pack it on. Second, you might not have used enough oil. That drizzle of olive oil is crucial for that golden, crunchy shell. If you’re skimping, you’ll end up with dry, pale nuggets. Oh, and make sure you’re not crowding the pan – they need their space to get crispy. Once you nail these two things, you’ll have perfect crispy baked chicken nuggets every single time.
Nutritional Information for baked Chicken Nuggets
I always get asked about the numbers, so here’s the deal. The nutritional info I’ve included is just an estimate. It can change depending on the exact brands you use, the size of your chicken pieces, and how you tweak the recipe. So take it as a rough guide, not gospel. Your best bet is to use a calculator if you need precise numbers for your specific diet. Enjoy!
When you make these, I want to hear about it! Drop a comment below and let me know how they turned out. And if you snapped a pic of your crispy baked chicken nuggets, share it on social media – tag me so I can see your handiwork. Happy cooking!
Printbaked Chicken Nuggets: 15 Minutes to Crispy Perfection

Crispy baked chicken nuggets made with simple ingredients. A healthier alternative to fried nuggets.
- Prep Time: 15 minutes
- Cook Time: 18 minutes
- Total Time: 33 minutes
- Yield: 4 servings 1x
- Category: Appetizer
- Method: Baking
- Cuisine: American
- Diet: Low Calorie
Ingredients
- 1 lb boneless skinless chicken breasts, cut into bite-sized pieces
- 1 cup breadcrumbs
- 1/2 cup grated Parmesan cheese
- 1 tsp garlic powder
- 1 tsp paprika
- 1/2 tsp salt
- 1/4 tsp black pepper
- 2 large eggs
- 2 tbsp olive oil
Instructions
- Preheat your oven to 400°F (200°C). Line a baking sheet with parchment paper.
- In a bowl, mix breadcrumbs, Parmesan, garlic powder, paprika, salt, and pepper.
- In another bowl, beat the eggs.
- Dip each chicken piece into the egg, then coat with the breadcrumb mixture. Press gently to adhere.
- Place the nuggets on the baking sheet. Drizzle with olive oil.
- Bake for 15-18 minutes, flipping halfway, until golden and cooked through.
- Serve hot with your favorite dipping sauce.
Notes
- You can use panko breadcrumbs for extra crunch.
- Chicken is cooked when internal temperature reaches 165°F.
- Store leftovers in an airtight container in the fridge for up to 3 days.
Nutrition
- Serving Size: 1 serving (about 6 nuggets)
- Calories: 320
- Sugar: 2g
- Sodium: 540mg
- Fat: 14g
- Saturated Fat: 4g
- Unsaturated Fat: 9g
- Trans Fat: 0g
- Carbohydrates: 20g
- Fiber: 2g
- Protein: 28g
- Cholesterol: 145mg
