
I still remember the first time I tried Chicken and Waffles. I was skeptical – I mean, fried chicken on a waffle? It sounded like a breakfast mashup that shouldn’t work. But one bite of that crispy, savory chicken hitting the sweet, fluffy waffle with a drizzle of maple syrup, and I was hooked. That contrast is pure magic. I’ve tested this recipe more times than I can count, tweaking the brine and the flour blend until it was just right. Trust me, this version nails that perfect balance every single time.
Why You’ll Love This Chicken and Waffles Recipe
This isn’t just another recipe—it’s the one you’ll keep coming back to. Here’s what makes it special:
- Juicy, flavor-packed chicken. The buttermilk brine does all the heavy lifting, keeping the meat tender and infusing it with spices right to the bone.
- That irresistible crispy crust. My seasoned flour blend creates a shatteringly crunchy coating that holds up perfectly against the syrup.
- Fluffy, sweet waffles. They’re the ideal canvas—light and buttery, ready to soak up all that maple goodness.
- Perfect for any time of day. Weekend brunch? Yes. Comforting weeknight dinner? Absolutely. This dish works whenever you need a little joy on your plate.
Key Ingredients for Chicken and Waffles
This recipe doesn’t call for anything fancy—just smart, everyday ingredients that work together beautifully. Here’s what you’ll need and why each one matters.
1 lb chicken tenderloins (about 6–7 pieces) are my go-to. They cook fast, stay juicy, and are already the perfect size for stacking on a waffle. You want even pieces so they fry up at the same rate.
1 cup whole buttermilk is non-negotiable here. It’s the tenderizing hero, breaking down the chicken’s proteins so every bite stays moist and flavorful. Don’t even think about using low-fat—you need that full richness.
2 teaspoons kosher salt, divided—I split it between the brine and the flour. Kosher salt dissolves evenly and seasons without that harsh, salty punch you get from table salt.
Smoked paprika is my secret weapon. It adds a deep, smoky warmth that makes the crust taste like it’s been simmering on a grill, not just a stovetop. White pepper brings a gentle, earthy heat without those little black specks—it just blends right into the flour.
And that hot sauce in the brine? Totally optional, but I always add a few dashes. It doesn’t make the chicken spicy—it just gives a subtle kick that wakes up all the other flavors. Trust me on this one.
Ingredient Notes and Substitutions
I get it—sometimes you’re halfway through and realize you’re missing something. No worries, I’ve got your back. If you don’t have chicken tenderloins, just grab boneless, skinless chicken breasts and cut them into strips. They’ll cook up just fine, though you might need an extra minute or two in the oil.
No white pepper? Use black pepper instead. It’s a little more visible, but the flavor is still great. And for a gluten-free version, swap the all-purpose flour with a 1:1 gluten-free blend—I’ve done it, and it works beautifully.
But here’s the thing: don’t skip the buttermilk. It’s the secret to tender, juicy chicken. If you don’t have any on hand, make a quick substitute by stirring 1 tablespoon of lemon juice into 1 cup of milk. Let it sit for 5 minutes, and you’re good to go. It’s not quite the same, but it’ll do the job in a pinch.
Step-by-Step Instructions for Perfect Chicken and Waffles
Alright, let’s get cooking! I know the total time looks long—about 3 hours 35 minutes—but trust me, most of that is the fridge doing the work for you. This recipe breaks down into simple, logical steps. I’ll walk you through each one, from the first dip in the buttermilk to that final, glorious bite. Let’s make some magic.
Preparing the Buttermilk Brine
This is where it all starts. The buttermilk brine isn’t just for show—it tenderizes the chicken and infuses every single bite with flavor. Don’t skip it, and don’t rush it.
First, pat your chicken tenderloins dry. This helps the brine stick to the meat instead of sliding off. Toss them into a large resealable bag, then pour in the buttermilk, along with half the salt, garlic powder, onion powder, white pepper, and smoked paprika. Add a few dashes of hot sauce if you’re feeling brave—I always do. Seal the bag, then massage it gently to make sure every piece is fully coated. Pop it in the fridge for at least 3 hours, but overnight is really best if you can plan ahead. The longer it sits, the deeper the flavor goes.
Frying the Chicken to Crispy Perfection
Okay, this is the fun part. When you’re ready to fry, start by setting up your dredging station. In a shallow pie plate, whisk together the remaining flour and spices. Now, take the chicken out of the brine, letting the excess buttermilk drip off. Dredge each tender in the seasoned flour, pressing gently so it adheres to every nook and cranny. Shake off the excess and place them on a baking sheet. Here’s a tip I learned the hard way: let the coated chicken rest for 5-10 minutes before frying. It helps the coating stick like glue.
Pour about 2 inches of vegetable oil into a large pot and heat it to 350°F. A deep fry thermometer is your best friend here—it takes all the guesswork out. Carefully place 4-5 tenders into the hot oil. Don’t overcrowd the pot! Fry for 2-3 minutes, until golden brown and the internal temperature reaches 165°F. Transfer to a wire rack set over a baking sheet. Let the oil come back to 350°F between batches. This keeps the chicken crispy, not greasy.
Assembling and Serving Your Chicken and Waffles
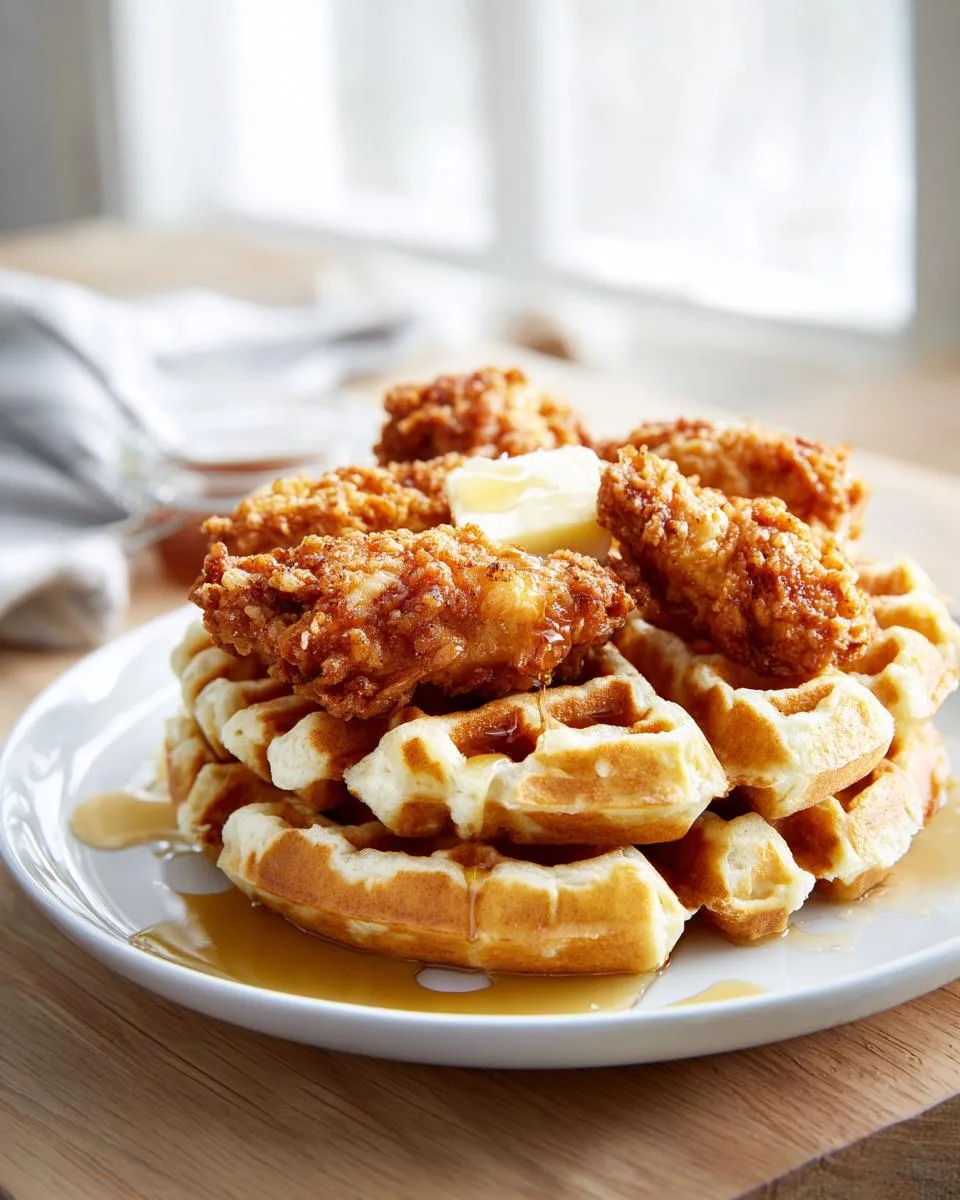
While the chicken rests, reheat your waffles. I like to pop them in a toaster or a 350°F oven for a few minutes to get them crisp again. Place a warm waffle on a plate, top with a few pieces of fried chicken, and add a pat of softened butter. Drizzle generously with pure maple syrup. If you want to get fancy, throw on some fresh berries or a sprinkle of powdered sugar. Serve immediately—this dish waits for no one! The contrast of hot, crispy, savory chicken with the sweet, fluffy waffle is pure perfection.
Tips for Success with This Chicken and Waffles Recipe
After making this recipe more times than I can count, I’ve picked up a few tricks that make all the difference. First, use a deep fry thermometer. It’s the only way to guarantee your oil stays at 350°F, and that’s what gives you that perfectly golden, crispy crust. Don’t try to eyeball it—I’ve burned more batches than I’d like to admit guessing.
Don’t overcrowd the pot. I know it’s tempting to throw in all the chicken at once, but the oil temperature will drop, and you’ll end up with greasy, soggy coating. Fry in small batches of 4-5 pieces, and let the oil come back up to temp between each round. While you’re at it, keep the finished chicken warm on a wire rack in a 200°F oven. That way, everything stays crispy and hot until you’re ready to serve.
Another little thing: let the chicken rest for 5 minutes after frying. It keeps the juices inside so every bite is tender and moist. And for the waffles, reheat them in a toaster or a 350°F oven for a few minutes—microwaves make them sad and soggy. One more pro tip: always use kosher salt. It distributes more evenly and seasons without that harsh, salty punch. Trust me, these small details really add up.
Variations to Try
This recipe is fantastic as is, but I love playing around with it. Sometimes I add a pinch of cayenne to the flour for a little extra heat. Or swap the maple syrup for honey or hot honey—that sweet-and-spicy combo is just incredible with the crispy chicken. For a richer flavor, try using boneless chicken thighs instead of tenderloins. They’re extra juicy and forgiving.
I’ve also snuck a dash of cinnamon into the waffle batter before, and it gives the whole dish a warm, cozy vibe. But my absolute favorite twist? Topping the whole stack with a fried egg. The runny yolk mixing with the syrup and the crispy chicken is next-level. Trust me, once you try it, you might not go back.
What to Serve with Chicken and Waffles
This dish is honestly hearty enough to stand all on its own—I’ve eaten it for dinner plenty of times without a single side. But if you’re feeding a crowd or want to round things out, a simple green salad with a tangy vinaigrette is my go-to. It cuts through all that richness perfectly. Collard greens or roasted sweet potatoes work great too if you’re craving something warm and comforting.
For drinks, you can’t beat a tall glass of iced tea or a hot cup of coffee. Fresh orange juice is also lovely—it’s bright and cuts through the savory, syrupy goodness. Honestly, just pick what makes you happy and dig in!
How to Store and Reheat Leftovers
If you somehow have leftovers—and that’s a big if in my house—here’s what to do. Store the chicken and waffles in separate airtight containers in the fridge. They’ll stay good for up to 3 days. When you’re ready to reheat, don’t you dare use the microwave. It’ll turn that beautiful crispy coating into a soggy mess. Instead, pop the waffles in a toaster or a 350°F oven for about 5 minutes. For the chicken, an air fryer or a 375°F oven works wonders. Give it 8-10 minutes, and it’ll come back almost as good as fresh. Trust me on this.
Frequently Asked Questions About Chicken and Waffles
I get a lot of questions about this recipe, and honestly, I asked the same things myself when I first started making it. Here are the answers to the ones I hear most often.
Can I use boneless chicken breasts instead of tenderloins?
Absolutely! Just cut them into strips about the same size as tenderloins so they cook evenly. You might need an extra minute or two in the oil, but the key is to make sure the internal temperature hits 165°F. Tenderloins are just easier because they’re already the perfect size and shape, but breasts work great too.
How do I keep the fried chicken crispy?
This is the million-dollar question! The secret is to drain the chicken on a wire rack, not paper towels. Paper towels trap steam and make the coating soggy. Also, don’t cover the chicken with foil or a lid—that’s the same problem. Serve it right away, and if you need to keep it warm while you finish frying, pop it in a 200°F oven on that same wire rack. That’s how you get that perfect crispy fried chicken every time.
Can I prepare the chicken in advance?
You bet! In fact, I recommend marinating the chicken overnight for the most flavor. That buttermilk brine works its magic for hours. You can also dredge the chicken in the seasoned flour up to 2 hours before frying—just keep it on a baking sheet in the fridge. That rest helps the coating stick better, so you get an even crunchier crust.
What if I don’t have a deep fry thermometer?
No worries, I’ve been there. You can test the oil by dropping a tiny pinch of flour into the pot. If it sizzles immediately, you’re in business. Another trick is to stick the handle of a wooden spoon into the oil—if bubbles form around it, the oil is about 350°F. It’s not perfect, but it gets you close. Just keep an eye on the chicken and adjust the heat as you go.
Estimated Nutritional Information
Just a quick heads-up—these numbers are estimates. I’m not a nutritionist, so take them with a grain of salt. Per serving (one waffle and a few tenders), you’re looking at about 450 calories, 18g fat, 4g saturated fat, 40g carbs, 30g protein, 800mg sodium, and 5g sugar. They’ll shift depending on your exact ingredients, so use this as a rough guide. It’s just for reference, not a medical recommendation.
PrintChicken and Waffles: 5 Secrets for Perfect Crisp
Crispy fried chicken served on fluffy buttermilk waffles with butter and maple syrup.
- Prep Time: 3 hours 20 minutes
- Cook Time: 15 minutes
- Total Time: 3 hours 35 minutes
- Yield: 6 servings 1x
- Category: Main Course
- Method: Frying
- Cuisine: American
- Diet: Low Lactose
Ingredients
- 1 lb chicken tenderloins (about 6–7 pieces)
- 1 cup whole buttermilk
- 2 teaspoons kosher salt, divided
- 2 teaspoons garlic powder, divided
- 1 1/2 teaspoons onion powder, divided
- 1 1/2 teaspoons ground white pepper (or black pepper), divided
- 1 1/2 teaspoons smoked paprika, divided
- hot sauce, optional
- 1 cup all-purpose flour
- vegetable oil, for frying
- Buttermilk Waffles, click link for full waffles recipe
- pure maple syrup & softened butter, for serving
Instructions
- Prepare the buttermilk waffles as directed in that recipe. Reheat the waffles to serve once the fried chicken is done.
- Pat the chicken dry. Place tenders in a large resealable bag. Cover with buttermilk, 1 teaspoon each salt, garlic powder, onion powder, white pepper, and smoked paprika. Add hot sauce if desired.
- Massage everything together to coat the chicken. Seal and refrigerate for at least 3 hours or overnight.
- In a shallow pie plate, combine flour with remaining 1 teaspoon each salt and garlic powder, and 1/2 teaspoon each onion powder, white pepper, and smoked paprika. Whisk to combine.
- In a large pot, heat oil over medium-high heat to 350°F using a deep fry thermometer.
- Set a baking sheet aside. Take chicken from brine, shake off excess, and dredge in seasoned flour. Coat all gaps. Shake off excess and place on baking sheet. Repeat for all tenders.
- Let the coated chicken rest while oil heats.
- Carefully place 4-5 tenders into hot oil. Fry until golden brown and crispy, about 2-3 minutes, until internal temperature reaches 165°F. Place on a wire rack or paper towel-lined sheet.
- Repeat for remaining chicken. Let oil return to 350°F between batches. Let chicken rest 5 minutes.
- Place waffles on plates. Top with fried chicken. Serve immediately with butter, maple syrup, and fresh fruit if desired.
Notes
- Use a deep fry thermometer for best results.
- Marinate chicken overnight for the most flavor.
- Don’t overcrowd the pot when frying.
- Serve the dish immediately for the best texture.
Nutrition
- Serving Size: 1 serving
- Calories: 450
- Sugar: 5 g
- Sodium: 800 mg
- Fat: 18 g
- Saturated Fat: 4 g
- Unsaturated Fat: 12 g
- Trans Fat: 0 g
- Carbohydrates: 40 g
- Fiber: 2 g
- Protein: 30 g
- Cholesterol: 80 mg
