
There’s something about the combination of seasoned beef, melty cheese, and tender pasta that just hits the spot, right? Well, this Instant Pot Cheeseburger Mac and Cheese is my go-to when I need that comfort food fix fast. I remember the first time I made it after a crazy long day—I was skeptical that a pressure cooker could pull off something this creamy and satisfying in under 30 minutes. But it totally did, and now it’s a regular in our weeknight rotation. I’ve been using my Instant Pot for years, and this recipe is one of the most reliable ones I’ve come across. You get all the cheeseburger goodness without the bun, and cleanup is a breeze. Trust me, once you try it, you’ll never look at boxed mac and cheese the same way again.
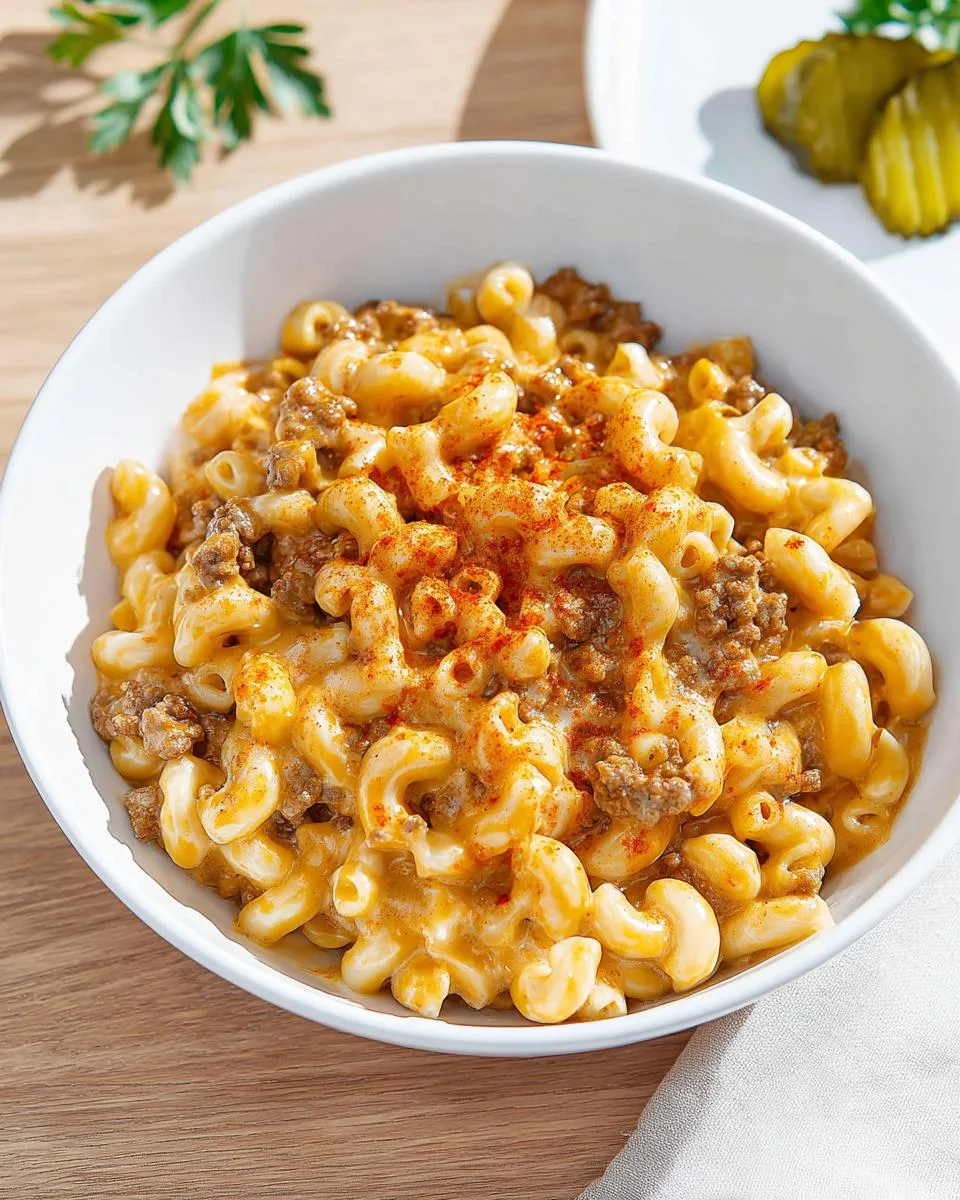
Why You’ll Love This Instant Pot Cheeseburger Mac and Cheese
- It goes from hungry to happy in about 25 minutes flat. Seriously, that’s it.
- You get all the flavors of a cheeseburger without the bun, and cleanup is just one pot.
- It’s creamy, cheesy, and packed with real seasoned beef taste that kids and adults both go crazy for.
- This meal is super budget-friendly. You’re using simple pantry staples and a pound of ground beef to feed the whole crew.
Ingredients for Instant Pot Cheeseburger Mac and Cheese
Here’s what you’ll need to pull this together. I like to use 1 lb ground beef – 80/20 gives you the best flavor, but any lean works. 2 cups elbow macaroni (or any small pasta you have on hand). For the cheese, 2 cups shredded cheddar – sharp cheddar is my go-to, and honestly, grating it yourself makes it melt so much creamier. You’ll also need 1 tbsp mustard (yellow or Dijon both work), 2 tbsp ketchup, and the usual spices: paprika, salt, pepper. 1 cup milk – whole milk gives you a luscious sauce, but 2% is fine. And 2 cups beef broth – low-sodium is great so you control the salt. Don’t forget the aromatics: a small onion, a couple cloves of garlic, and a splash of olive oil. That’s it! And if you need to swap anything out, I’ve got a whole section on substitutions coming up.
How to Make Instant Pot Cheeseburger Mac and Cheese
Alright, let’s get cooking! This comes together fast, so I like to have everything prepped and ready before I even turn on the Instant Pot. Trust me, it makes the whole process way smoother. You’ll start by browning the beef, then build the sauce, pressure cook, and finish with cheese. Simple stuff, but I’ll walk you through each step so you nail it every time.
Sauté the Beef and Aromatics
First, turn your Instant Pot to sauté mode and add a tablespoon of olive oil. Toss in the ground beef and let it cook, breaking it apart with a wooden spoon, until it’s no longer pink—about 5 minutes. Don’t drain all the fat; a little bit adds flavor. Then add your diced onion and minced garlic. Cook for another 2 minutes until the onion softens and smells amazing. Stir in the paprika, salt, pepper, mustard, and ketchup. That little bit of ketchup and mustard is what gives it that classic cheeseburger vibe. Your kitchen should already smell like a diner at this point.
Build the Sauce and Pressure Cook
Now pour in the beef broth and milk. Here’s the key: scrape up any browned bits from the bottom of the pot with your spoon. If you skip this, you’ll get a burn warning, and nobody wants that. Once the bottom is clean, dump in the elbow macaroni and press it down gently so it’s fully submerged in the liquid. Close the lid, set the valve to sealing, and cook on high pressure for 5 minutes. When the timer goes off, do a quick release immediately. Do not let it natural release—the pasta will turn into mush, and we want it al dente and creamy.
Finish with Cheese and Rest
Open the lid carefully and give everything a good stir. The pasta might look a little soupy at first, but that’s okay. Now add your shredded cheddar cheese and stir until it’s completely melted and the sauce turns velvety. Let it rest in the pot for about 2 minutes before serving. I like to let it sit a bit longer if I have time—it gets even creamier as it thickens. Serve it up and get ready for some serious comfort food.
Tips for Perfect Instant Pot Cheeseburger Mac and Cheese
I’ve made this recipe more times than I can count, and I’ve definitely learned a few tricks along the way. These tips will help you avoid the common pitfalls and get that creamy, cheeseburger-flavored perfection every single time. Trust me, a little know‑how goes a long way.
Choose the Right Cheese
Sharp cheddar is my absolute favorite here—it gives you that bold, tangy cheeseburger flavor. And please, grate it yourself if you can. Pre‑shredded cheese has anti‑caking stuff that makes it clump and not melt as smoothly. A quick pass over a box grater makes all the difference.
Avoid a Burn Warning
Nothing kills the vibe like a burn notice mid‑cook. The secret? After you pour in the broth and milk, really scrape up all those browned bits from the bottom of the pot. If you skip this, the Instant Pot sensors think something’s burning and it’ll stop cooking. A quick deglaze saves the day.
Adjust the Consistency
Sometimes the sauce looks a little thin right after pressure cooking. No worries—just stir in a cornstarch slurry (1 tablespoon cornstarch mixed with 2 tablespoons water) and hit sauté for a minute. It thickens right up. If it’s too thick (maybe from resting too long), a splash of milk brings it back to creamy perfection.
Variations and Substitutions
I love playing around with this recipe depending on what’s in my fridge or who I’m feeding. Here are a few of my favorite tweaks—each one keeps the cheeseburger soul alive but gives it a fun new twist.
- Swap the ground beef for ground turkey or a plant‑based meat substitute. The flavor is still awesome, and you won’t miss a thing.
- Use different pasta shapes—shells, rotini, or even ditalini work great. Just adjust the cook time: small shapes need about 4 minutes, bigger ones might need 6. Keep an eye on them.
- Add diced pickles or crispy bacon bits right before serving for that extra diner‑style cheeseburger kick. It’s my secret weapon.
- Make it spicy by tossing in some chopped jalapeños (fresh or pickled) with the onion. A dash of hot sauce on top never hurts either.
- For a gluten‑free version, use gluten‑free pasta and a gluten‑free beef broth. Cook time might vary slightly, so check the pasta package.
- Dairy‑free? No problem—use your favorite dairy‑free shredded cheese and unsweetened milk alternative. The sauce won’t be quite as creamy, but it’s still delicious.
Serving Suggestions
This dish is totally a meal on its own, but if you want to round it out, I love pairing it with a simple green salad with ranch dressing. The cool crunch is a nice contrast. Roasted broccoli or air-fryer fries are also perfect on the side. And here’s my personal touch: I always set out little bowls of extra ketchup and mustard for dipping. It makes it feel even more like a cheeseburger experience!
Storage and Reheating
If you’ve got leftovers (lucky you!), let the mac and cheese cool completely before transferring it to an airtight container. It’ll keep in the fridge for up to 4 days. When you’re ready to reheat, add a splash of milk—trust me, the pasta soaks up the sauce as it sits, so a little extra liquid brings back that creamy texture. I usually microwave mine in 30-second bursts, stirring in between, or reheat it in a pot on the stove with a splash of water. One thing I’ve learned the hard way: don’t freeze this dish. The cheese sauce tends to separate and get grainy, and nobody wants that. Just keep it in the fridge and enjoy within a few days.
Frequently Asked Questions about Instant Pot Cheeseburger Mac and Cheese
I get asked about this recipe all the time, so I figured I’d answer the most common questions right here. These are the little things that can trip you up, but once you know them, you’ll be making perfect cheeseburger mac and cheese every single time.
Can I use a different type of pasta?
Absolutely! I’ve made this with shells, rotini, and even ditalini—they all work great. Just keep an eye on the cook time. Small shapes like shells or rotini usually need about 4 minutes on high pressure. Bigger ones like penne might need 6. The key is making sure the pasta is fully submerged in the liquid before you close the lid. If it’s poking out, it won’t cook right.
Why did I get a burn notice?
Ugh, the dreaded burn notice! I’ve been there. It almost always happens because you didn’t scrape up the browned bits from the bottom after sautéing the beef. Those bits can scorch under pressure. So after you pour in the broth and milk, really get in there with your spoon and deglaze the pot. Also, milk can be tricky—it’s more likely to scorch than water. Using whole milk helps, and stirring well before sealing the lid makes a difference too.
How can I make this dish lower in calories?
Sure thing! You can swap the ground beef for a leaner option like 93/7, use reduced-fat cheddar, and go with skim milk instead of whole. The flavor will still be good, I promise—it just won’t be quite as rich and creamy. If you’re okay with a slightly less indulgent sauce, these swaps work like a charm. I’ve done it when I’m watching portions, and my family didn’t even notice.
Can I add vegetables?
Yes, and I love doing this! Dice up some bell peppers or mushrooms and sauté them right along with the onion—they soften beautifully and blend right in. Another trick: after pressure cooking, stir in a handful of frozen peas. They warm up from the residual heat and add a pop of color and sweetness. No need to change the cook time for any of these additions.
Nutritional Information
Just a quick heads-up: the nutritional info I’ve shared is an estimate. It’ll change depending on the exact brands you use, how you tweak the recipe, and your portion sizes. So take it as a general guide, not a hard-and-fast rule. Your mileage may vary!
PrintEasy 25-Minute Instant Pot Cheeseburger Mac and Cheese
A quick one-pot meal combining seasoned ground beef, pasta, and melted cheese. You get the flavors of a cheeseburger in a creamy mac and cheese dish.
- Prep Time: 10 minutes
- Cook Time: 15 minutes
- Total Time: 25 minutes
- Yield: 6 servings 1x
- Category: Main Course
- Method: Pressure Cooker
- Cuisine: American
- Diet: Low Calorie
Ingredients
- 1 lb ground beef
- 1 tbsp olive oil
- 1 small onion, diced
- 2 cloves garlic, minced
- 1 tsp paprika
- 1 tsp salt
- 1/2 tsp black pepper
- 1 tbsp mustard
- 2 tbsp ketchup
- 2 cups beef broth
- 1 cup milk
- 2 cups elbow macaroni
- 2 cups shredded cheddar cheese
Instructions
- Turn the Instant Pot to saute mode. Add oil and cook ground beef until browned.
- Add onion and garlic. Cook for 2 minutes.
- Stir in paprika, salt, pepper, mustard, and ketchup.
- Pour in beef broth and milk. Scrape up any browned bits.
- Add macaroni. Press it down into the liquid.
- Close the lid and set to high pressure for 5 minutes.
- Do a quick release of pressure.
- Open the lid and stir in shredded cheese until melted.
- Let rest for 2 minutes before serving.
Notes
- Use sharp cheddar for stronger flavor.
- Add diced pickles or bacon bits for extra cheeseburger taste.
- If the sauce is too thin, stir in a cornstarch slurry (1 tbsp cornstarch + 2 tbsp water) and saute for 1 minute.
Nutrition
- Serving Size: 1 serving (about 1.5 cups)
- Calories: 520
- Sugar: 6g
- Sodium: 780mg
- Fat: 26g
- Saturated Fat: 12g
- Unsaturated Fat: 10g
- Trans Fat: 1g
- Carbohydrates: 42g
- Fiber: 2g
- Protein: 30g
- Cholesterol: 85mg
