
Oh my gosh, have I got the perfect summer dessert for you! My Lemon Raspberry Layer Cake is like sunshine on a plate – that gorgeous balance of tart lemon and sweet raspberries will make your taste buds dance. I’ve been perfecting this recipe for years, ever since my neighbor brought over a similar cake that instantly became my obsession. What makes mine special? The secret’s in the fresh lemon zest and juicy raspberries folded right into the batter (trust me, it makes all the difference). This isn’t one of those heavy, overly sweet cakes – it’s light, refreshing, and just begging to be served with an iced tea on your patio.
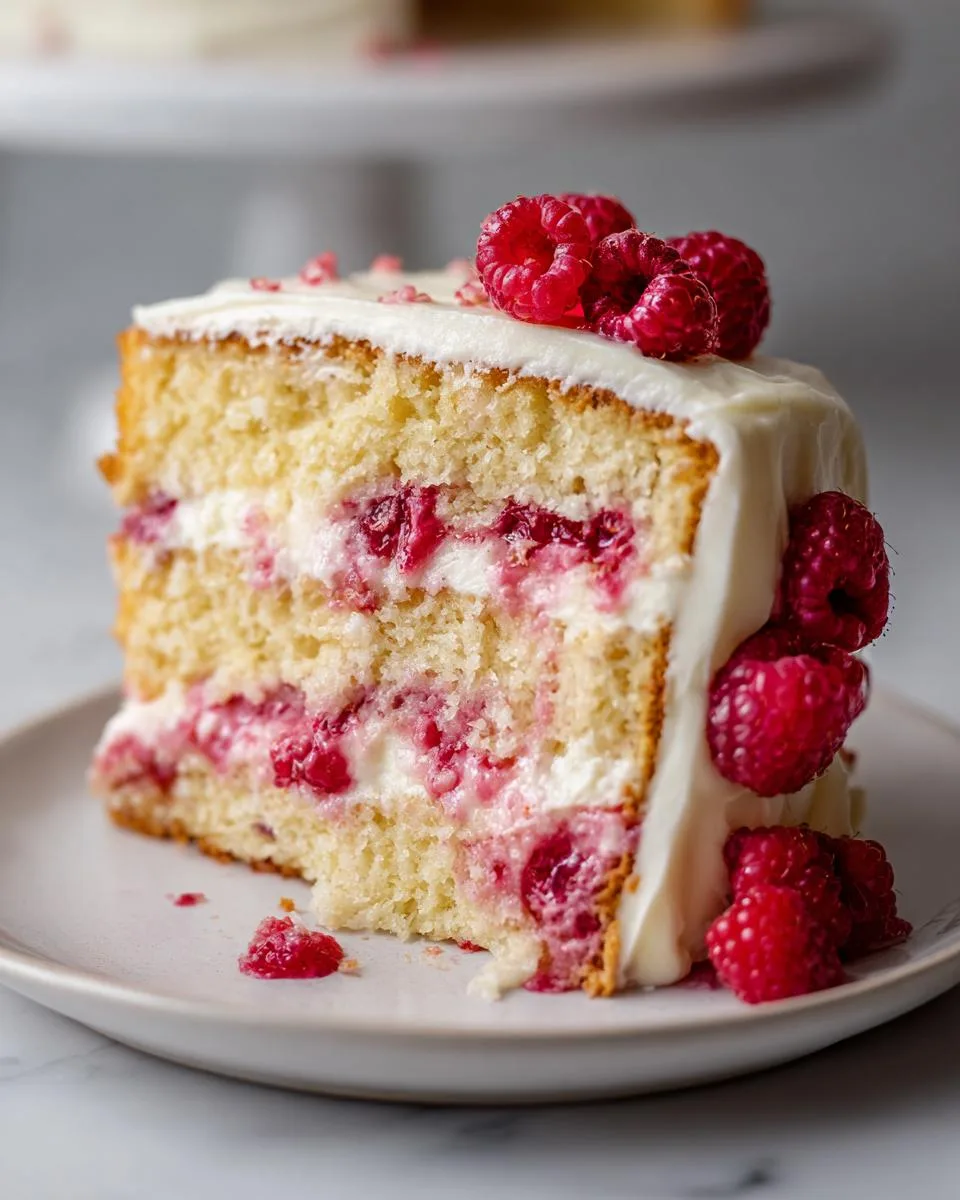
Ingredients for Lemon Raspberry Layer Cake
Okay, let’s gather our goodies! Here’s everything you’ll need to make this dreamy cake come to life. I’m super particular about a few of these – the fresher the better, especially when it comes to those raspberries and lemons. Pro tip: set everything out about an hour before you start baking so ingredients come to room temperature. It makes such a difference in how everything comes together!
- 2 cups (240g) all-purpose flour – spoon and level it, don’t scoop!
- 1 1/2 cups (300g) granulated sugar – yes, it seems like a lot but the tartness balances it out perfectly
- 1/2 cup (113g) unsalted butter, softened – and I mean REALLY softened (leave it out overnight if you can)
- 3 large eggs – room temperature is key here
- 1 cup (240ml) buttermilk – don’t have any? Mix 1 tbsp lemon juice with regular milk and let it sit for 5 minutes
- 1 tablespoon packed lemon zest – about 2 medium lemons’ worth (use a microplane for the best texture)
- 1/4 cup (60ml) fresh lemon juice – squeeze it yourself, the bottled stuff just doesn’t compare
- 1 teaspoon baking powder – make sure it’s fresh (test it with hot water if it’s been in your pantry awhile)
- 1/2 teaspoon baking soda
- 1/4 teaspoon salt – just a pinch to balance all the sweetness
- 1 cup (125g) fresh raspberries – gently rinsed and patted completely dry (wet berries will sink!)
- 2 cups whipped cream frosting – homemade or store-bought, but I’ll share my special recipe later
See? Nothing too crazy! Just good, simple ingredients that come together to create something magical. Now let’s get baking!
How to Make Lemon Raspberry Layer Cake
Alright, let’s dive into the fun part – making this gorgeous cake! I promise it’s easier than it looks, and the results will have everyone thinking you’re a professional baker. Just follow these steps carefully, and don’t skip the cooling time (I know it’s tempting, but trust me on this!).
Preparing the Batter
First things first – preheat that oven to 350°F (175°C) and grease your cake pans really well. I like to use butter and a light dusting of flour, but baking spray works too. Now, grab two bowls – one for dry ingredients and one for wet.
In the first bowl, whisk together your flour, baking powder, baking soda, and salt. Give it a good mix so everything’s evenly distributed. In your second bowl, cream the softened butter and sugar until it’s light and fluffy – this should take about 3-4 minutes with a hand mixer. Add your eggs one at a time, mixing well after each addition.
Now for the lemony goodness! Stir in the lemon zest and juice – oh, that smell is heavenly! Here’s where the magic happens: alternate adding your dry ingredients and buttermilk to the butter mixture, starting and ending with the dry ingredients. Mix just until combined after each addition – overmixing is the enemy of fluffy cake!
Gently fold in those beautiful raspberries last. I use a rubber spatula and do it by hand – the berries are delicate and we want to keep them whole. The batter will be thick but pourable, with lovely pink streaks from the berries.
Baking and Cooling the Cake
Divide the batter evenly between your prepared pans – I like to use a kitchen scale for precision, but eyeballing works too. Smooth the tops gently with your spatula.
Pop them in the oven and set your timer for 25 minutes. Don’t open the door before then! At 25 minutes, do the toothpick test – it should come out with just a few moist crumbs. If needed, bake another 2-5 minutes until done.
Here’s the hardest part: let the cakes cool in their pans for 10 minutes, then turn them out onto wire racks to cool completely. I mean COMPLETELY – at least an hour. Trying to frost warm cake is a disaster waiting to happen (learned that the hard way!).
Frosting and Assembling
Once cooled, it’s showtime! Place your first cake layer on a cake stand or plate. Spread about 3/4 cup of frosting evenly over the top – I like to use an offset spatula for this. Be generous but leave a small border around the edge so it doesn’t squish out when you add the top layer.
Carefully place the second layer upside down (this gives you a nice flat top). Now frost the sides and top with the remaining frosting. Want that bakery-perfect look? Hold your spatula at a slight angle and spin the cake stand as you smooth the frosting.
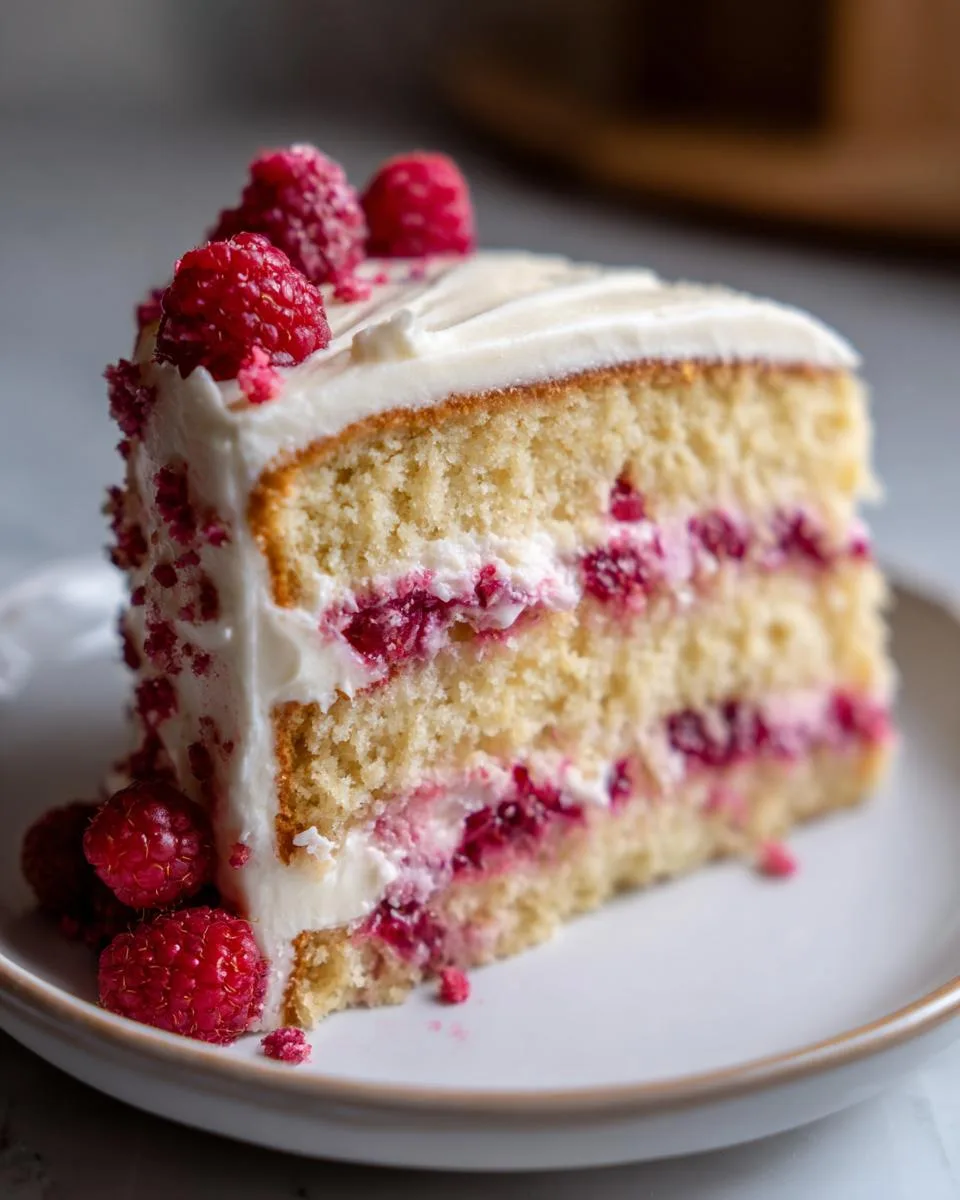
For extra flair, garnish with fresh raspberries and lemon slices or zest. Refrigerate for at least 30 minutes before serving to let everything set. Then slice, serve, and prepare for compliments!
Tips for the Perfect Lemon Raspberry Layer Cake
After making this cake more times than I can count (and eating even more slices!), I’ve picked up some foolproof tricks that’ll take your lemon raspberry layer cake from good to “oh my goodness, can I have the recipe?” Here are my absolute must-know tips:
- Room temp is your best friend – I can’t stress this enough! Cold butter won’t cream properly, and chilly eggs can make your batter separate. Take everything out at least an hour before baking.
- Zest before juicing – Trying to zest a lemon after it’s been juiced is like wrestling a wet fish. Trust me, do the zest first while the fruit is firm and easy to handle.
- The raspberry rinse-and-dry dance – Wash those berries gently, then pat them COMPLETELY dry with paper towels. Any extra moisture will make them sink straight to the bottom of your cake layers.
- Fold, don’t stir – When adding raspberries to the batter, use a gentle folding motion with a rubber spatula. Overmixing will break the berries and turn your batter pink (pretty, but not what we’re going for!).
- Oven thermometer for the win – My oven lies about its temperature like a kid caught with cookie crumbs on their face. A $5 oven thermometer ensures you’re baking at the right temp.
- Cooling patience pays off – I know it’s tempting to frost right away, but warm cake melts frosting into a sad, drippy mess. Wait until layers are completely cool to the touch.
- Crumb coat magic – For super smooth frosting, do a thin “crumb coat” first, chill for 15 minutes, then add your final layer. It’s like primer for cakes!
- Berry placement matters – When garnishing with fresh raspberries, press them gently into the frosting right before serving so they don’t bleed color everywhere.
There you have it – my hard-earned secrets for lemon raspberry cake success! Follow these, and you’ll be the star of every potluck, birthday party, or “just because” Tuesday dessert night.
Ingredient Substitutions and Notes
Okay, let’s talk substitutions – because we’ve all been there staring into the fridge realizing we’re missing one crucial ingredient! While I always recommend sticking to the original recipe for the best results, life happens. Here’s what you can swap in a pinch and what absolutely shouldn’t be replaced:
When fresh raspberries aren’t available
I’ll be honest – fresh raspberries make all the difference with their bright flavor and perfect texture. But if you’re in a bind, frozen raspberries can work. Just thaw them completely first, pat them DRY (I mean, seriously dry them like you’re prepping them for a desert expedition), and toss them in a tablespoon of flour before folding into the batter. They’ll still taste great but might bleed more color into the cake.
The butter debate
I know some folks ask about using margarine instead of butter. Please don’t! The flavor and texture just won’t be the same. If you must substitute, use high-quality European-style butter (it has more fat) or even coconut oil in a pinch, but expect a slightly different crumb.
Buttermilk alternatives
No buttermilk? No problem! My quick fix is 1 tablespoon lemon juice or white vinegar plus enough milk to make 1 cup – let it sit for 5 minutes until it curdles slightly. Greek yogurt thinned with milk works too (use 3/4 cup yogurt + 1/4 cup milk).
Lemon juice shortcuts
While fresh lemon juice is ideal, in an emergency you can use bottled – just reduce the amount slightly since it tends to be more concentrated and acidic. But please, please don’t skip the fresh zest! That’s where all the amazing lemon oil lives.
Flour options
All-purpose flour gives the perfect structure, but you can use cake flour for an even lighter texture (use 2 cups + 2 tbsp cake flour). For gluten-free, I’ve had success with a 1:1 gluten-free flour blend, though the texture will be slightly denser.
Remember – baking is part science, part art. Some substitutions will work better than others, but that’s how new favorite recipes are born! Just don’t tell my grandma I said that.
Serving and Storing Lemon Raspberry Layer Cake
Now comes the best part – enjoying your masterpiece! But before you dive in with a fork (no judgment here), let me share my tried-and-true tips for serving and storing this beauty. After all that work, you want every slice to taste as fresh as the first!
The Perfect Serving Moment
This cake shines brightest when served slightly chilled. About 30 minutes out of the fridge lets the frosting soften just enough while keeping those layers firm for clean slices. Use a sharp, thin-bladed knife dipped in hot water and wiped dry between cuts – it’ll glide through like butter!
My favorite way to serve? Small slices with extra fresh raspberries on the side and maybe a dollop of whipped cream. The tartness makes it surprisingly light, so people often go back for seconds (I always do!).
Keeping It Fresh
Here’s the scoop on storage: this cake stays delicious for up to 3 days if you treat it right. First, make sure it’s completely cooled before covering. I like to store mine in a cake carrier, but you can also:
- Cover loosely with plastic wrap (use toothpicks to keep it from touching the frosting)
- Place under a large overturned bowl
- Use those genius cake storage containers if you’ve got one
Keep it refrigerated because of the fresh fruit and dairy in the frosting. Pro tip: If your kitchen is warm, chill the cake for 15 minutes before covering to prevent condensation.
Can You Freeze It?
Absolutely! Freeze individual slices wrapped tightly in plastic wrap then foil for up to 2 months. Thaw overnight in the fridge – the texture stays surprisingly good. I don’t recommend freezing the whole assembled cake though – the raspberries get too mushy when thawed.
One last secret? The flavors actually deepen overnight, so don’t be afraid to make this a day ahead. Just wait to add fresh berry garnishes until right before serving. Now go enjoy every lemony, berry-filled bite – you’ve earned it!
Lemon Raspberry Layer Cake FAQ
I get asked the same questions about this cake every time I make it – and I love sharing all my little secrets! Here are the answers to the most common lemon raspberry cake mysteries:
Q1. Can I use frozen raspberries instead of fresh?
You can, but with some adjustments! Thaw them completely first, then pat them DRY with paper towels (I mean really dry – wet berries will make your cake soggy). Toss them in a tablespoon of flour before folding into the batter to help prevent sinking. They’ll taste great but might bleed more color into the cake.
Q2. How long does this cake stay fresh?
Stored properly in the fridge, it stays delicious for 3 days. Make sure it’s completely cooled before covering – I use a cake carrier or loosely tent it with plastic wrap (use toothpicks to keep the wrap from touching the frosting). The flavors actually get better on day two!
Q3. Can I make this cake ahead of time?
Absolutely! Bake the layers up to 2 days in advance – just wrap them tightly in plastic once cooled and keep at room temperature. Frost and assemble the day you’re serving for best results. You can even freeze unfrosted layers for up to 2 months!
Q4. My raspberries sank to the bottom – what went wrong?
Oh no! This usually happens if the berries were too wet or the batter was too thin. Next time, make sure berries are patted completely dry, toss them in flour, and fold them in gently as the very last step. Also check that your baking powder is fresh – old leavening agents can cause batter to not rise properly.
Q5. Can I use a different frosting?
Of course! While whipped cream frosting is light and perfect for summer, cream cheese frosting is amazing with the lemon-raspberry combo. For something richer, try Swiss meringue buttercream. Just avoid super sweet frostings – they’ll overpower the delicate fruit flavors.
Got more questions? Ask away in the comments! I’ve made every mistake possible with this cake (and learned how to fix them), so I’m happy to help troubleshoot.
Nutritional Information
Okay, let’s be real – we’re not eating cake for its health benefits! But I know some of you like to keep track, so here’s the nutritional breakdown per slice (based on 10 servings). Just remember – these are estimates and will vary depending on your exact ingredients and how thick you slice that cake (no judgment if you go for “generous” portions!).
- Calories: 320 – About what you’d burn walking your dog for 45 minutes!
- Total Fat: 12g (7g saturated) – Mostly from that glorious butter
- Cholesterol: 75mg – Eggs and butter doing their thing
- Sodium: 180mg – Pretty low for a dessert
- Total Carbohydrates: 48g – The sweet stuff
- Dietary Fiber: 2g – Thanks, raspberries!
- Sugars: 25g – Mostly from the granulated sugar
- Protein: 5g – Eggs and milk lending a hand
A little nutrition secret? The fresh raspberries actually give you a nice vitamin C boost (about 15% of your daily needs per slice) and antioxidants. So really, this is practically a health food… right? Right?! (Okay fine, it’s dessert – but a pretty darn good one!)
Note: These values are estimates only and will vary based on specific ingredients used and portion sizes. For precise nutritional information, I recommend using a calculator with your exact brands and measurements.
Alright, my fellow bakers – I want to hear all about your lemon raspberry cake adventures! Did yours turn out picture-perfect? Maybe you put your own spin on it? Or perhaps you had a hilarious kitchen mishap (we’ve all been there!). Drop me a comment below – I read every single one and love seeing your creations.
Snap a photo of your masterpiece and tag me on Instagram (I’m @LemonLoverBaker over there). There’s nothing more exciting than seeing my recipe come to life in your kitchens! Pro tip: natural lighting makes those layers look extra dreamy in photos.
Questions? Need troubleshooting? I’m here to help! After making this cake more times than I can count, I’ve probably encountered (and solved) every possible issue. Let’s keep the conversation going – because baking is always better when we share the experience.
PrintLuscious Lemon Raspberry Layer Cake Recipe with 2 Easy Tips

A light and refreshing lemon raspberry layer cake with creamy frosting.
- Prep Time: 20 minutes
- Cook Time: 30 minutes
- Total Time: 50 minutes
- Yield: 1 cake (8-10 servings) 1x
- Category: Dessert
- Method: Baking
- Cuisine: American
- Diet: Vegetarian
Ingredients
- 2 cups all-purpose flour
- 1 1/2 cups granulated sugar
- 1/2 cup unsalted butter, softened
- 3 large eggs
- 1 cup buttermilk
- 1 tbsp lemon zest
- 1/4 cup lemon juice
- 1 tsp baking powder
- 1/2 tsp baking soda
- 1/4 tsp salt
- 1 cup fresh raspberries
- 2 cups whipped cream frosting
Instructions
- Preheat oven to 350°F. Grease and flour two 9-inch cake pans.
- In a bowl, mix flour, baking powder, baking soda, and salt.
- In another bowl, cream butter and sugar until fluffy. Add eggs one at a time.
- Mix in lemon zest and juice.
- Alternate adding dry ingredients and buttermilk to the batter.
- Fold in raspberries gently.
- Divide batter between pans and bake for 25-30 minutes.
- Let cakes cool completely before frosting.
- Spread frosting between layers and on top.
Notes
- Use room-temperature ingredients for best results.
- Do not overmix the batter to keep the cake light.
- Fresh raspberries work best, but frozen can be used if thawed and drained.
Nutrition
- Serving Size: 1 slice
- Calories: 320
- Sugar: 25g
- Sodium: 180mg
- Fat: 12g
- Saturated Fat: 7g
- Unsaturated Fat: 4g
- Trans Fat: 0g
- Carbohydrates: 48g
- Fiber: 2g
- Protein: 5g
- Cholesterol: 75mg
