Oh my gosh, you have to try these Pumpkin Rice Krispie Treats! They’re my absolute favorite way to jazz up classic Rice Krispie treats for fall. I first made them when my niece begged for “something orange and pumpkin-y” for her Halloween class party – and wow, did they steal the show!
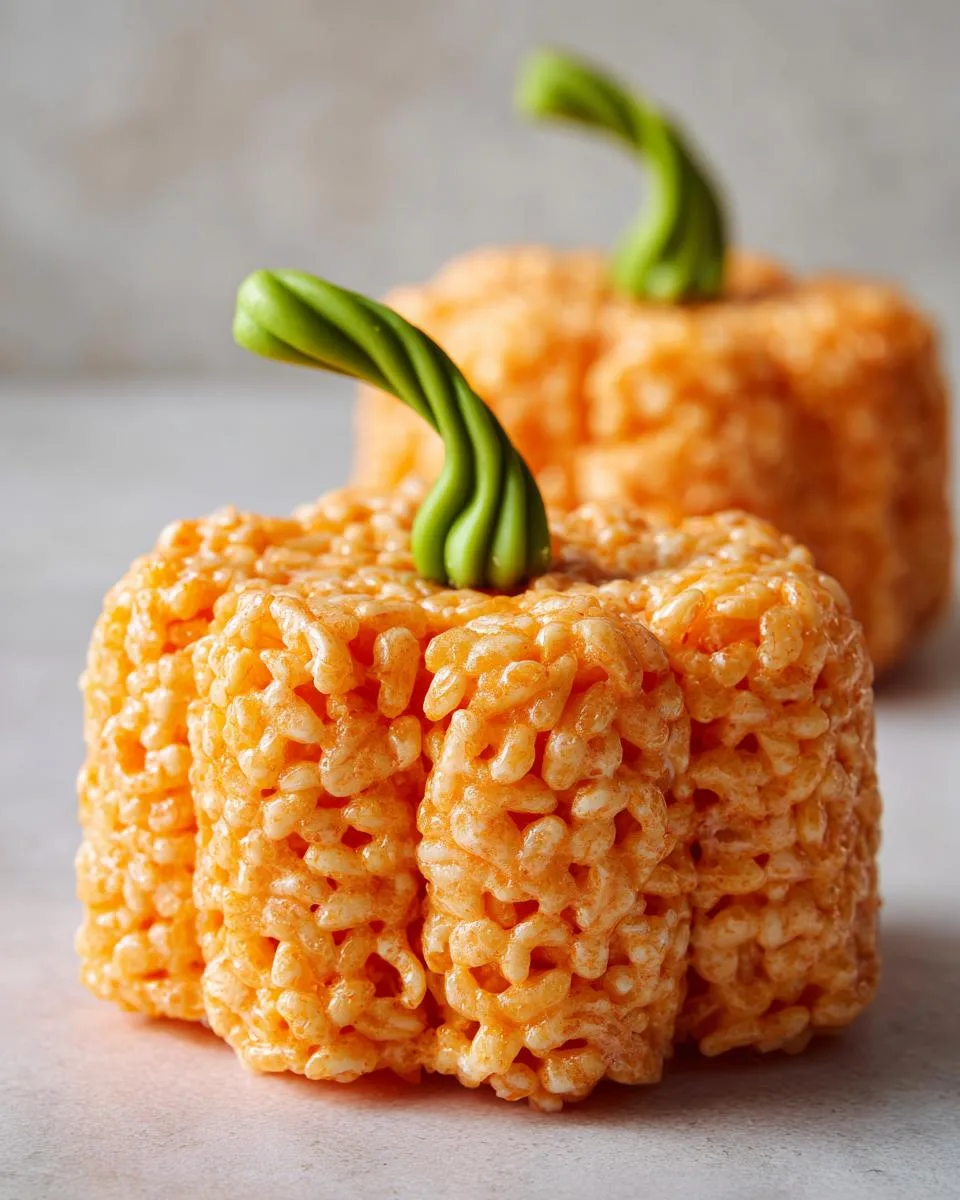
What I love most is how these adorable little pumpkin-shaped treats come together in minutes with just a few basic ingredients. The orange food coloring transforms them into the perfect festive snack, and those little green licorice stems? Pure magic! They look fancy but trust me, they’re easier than carving an actual pumpkin.
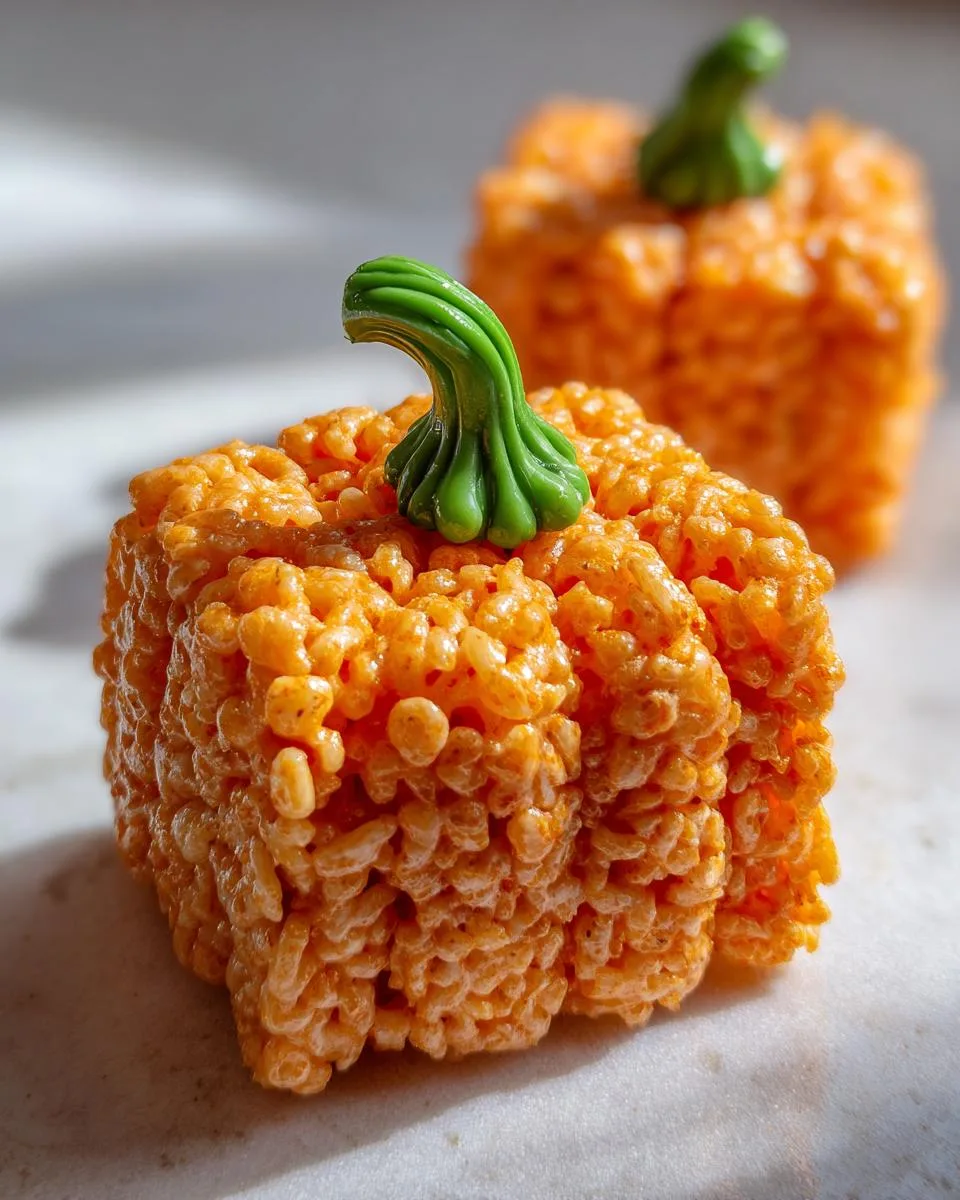
Every year now, these Pumpkin Rice Krispie Treats become our family’s official kickoff to autumn. The kids love helping shape them (and sneaking bites of marshmallow goo), and they disappear faster than leaves falling from the trees at our football tailgates. If you’re looking for a no-bake treat that screams fall fun, this is it!
Why You’ll Love These Pumpkin Rice Krispie Treats
Trust me, these little orange cuties will become your new fall obsession! Here’s why:
- Lightning-fast fun – Ready in under 30 minutes, no oven required!
- Kids go wild for the shaping and decorating – edible playdough vibes
- Party superstar that looks way fancier than the effort required
- Customizable colors – go neon orange for Halloween or softer peach for Thanksgiving
- No-bake magic means no waiting for the oven – instant gratification!
Seriously, the only problem? You’ll need to make a double batch – they vanish fast!
Ingredients for Pumpkin Rice Krispie Treats
Gather these simple ingredients – you probably have most in your pantry already! The magic happens when these basics come together:
- 6 cups Rice Krispies cereal – That satisfying “snap, crackle, pop” is key!
- 1 package (10 oz) marshmallows – The fresh, fluffy kind work best for that perfect sticky texture
- 3 tablespoons butter – Real butter makes all the difference in flavor
- Orange food coloring – Gel works better than liquid for vibrant orange (trust me, I learned the hard way!)
- Green licorice or candy for stems – Twizzlers work great, or get creative with green M&Ms or jelly beans
Quick tip: If you’re in a pinch, you can swap the food coloring for orange candy melts stirred into the melted marshmallow. And those green stems? A broken pretzel stick works in a pinch too – we bakers improvise!
Equipment You’ll Need
Don’t worry – you won’t need any fancy gadgets for these Pumpkin Rice Krispie Treats! Just grab:
- A large saucepan – Big enough to hold all that marshmallow goo without bubbling over
- Wooden spoon – Your trusty sidekick for stirring (and scraping every last bit of marshmallow!)
- Pumpkin-shaped molds – Or just your clean hands if you’re going freeform
- Measuring cups – Eyeballing the cereal never works – ask me how I know!
- Spatula – For pressing the mixture into molds without sticky fingers
That’s it! See? I told you this was easy-peasy pumpkin squeezy.
How to Make Pumpkin Rice Krispie Treats
Okay, let’s get to the fun part – making these adorable pumpkin treats! Follow these steps and you’ll have perfect little orange goodies in no time. Just remember: marshmallows wait for no one, so have everything ready before you start melting!
Melting the Marshmallow Mixture
First, melt your butter in a large saucepan over low heat – I can’t stress “low” enough! Burnt marshmallow smells awful and ruins everything. Once the butter’s melted, add all your marshmallows and stir constantly with a wooden spoon until they’re completely smooth and gooey. This takes about 3-4 minutes – patience pays off here!
Adding Color and Cereal
Now for the magic! Remove the pan from heat and stir in your orange food coloring. Start with a few drops – you can always add more! Once you’ve got that perfect pumpkin hue, immediately dump in all 6 cups of Rice Krispies. Fold gently but thoroughly until every single piece is coated in that gorgeous orange marshmallow. The cereal should be evenly colored with no white spots!
Shaping Your Pumpkin Treats
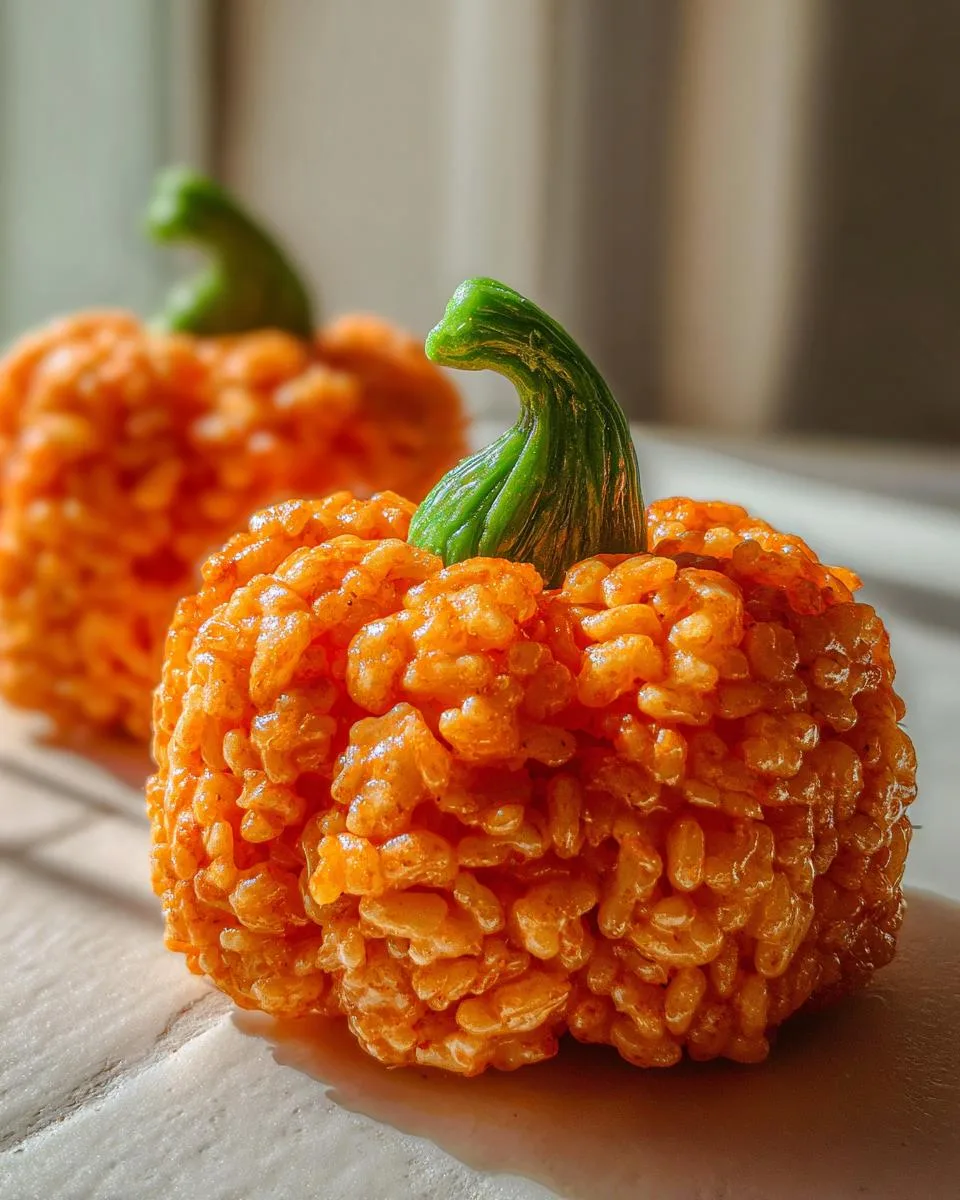
Here’s where the fun really begins! If you’re using pumpkin molds, lightly grease them first. Press the mixture firmly into each cavity. No molds? No problem! Grease your hands lightly with butter or cooking spray and roll golf-ball sized portions, then gently flatten the bottoms. Pro tip: Work quickly before the mixture cools!
Adding the Finishing Touches
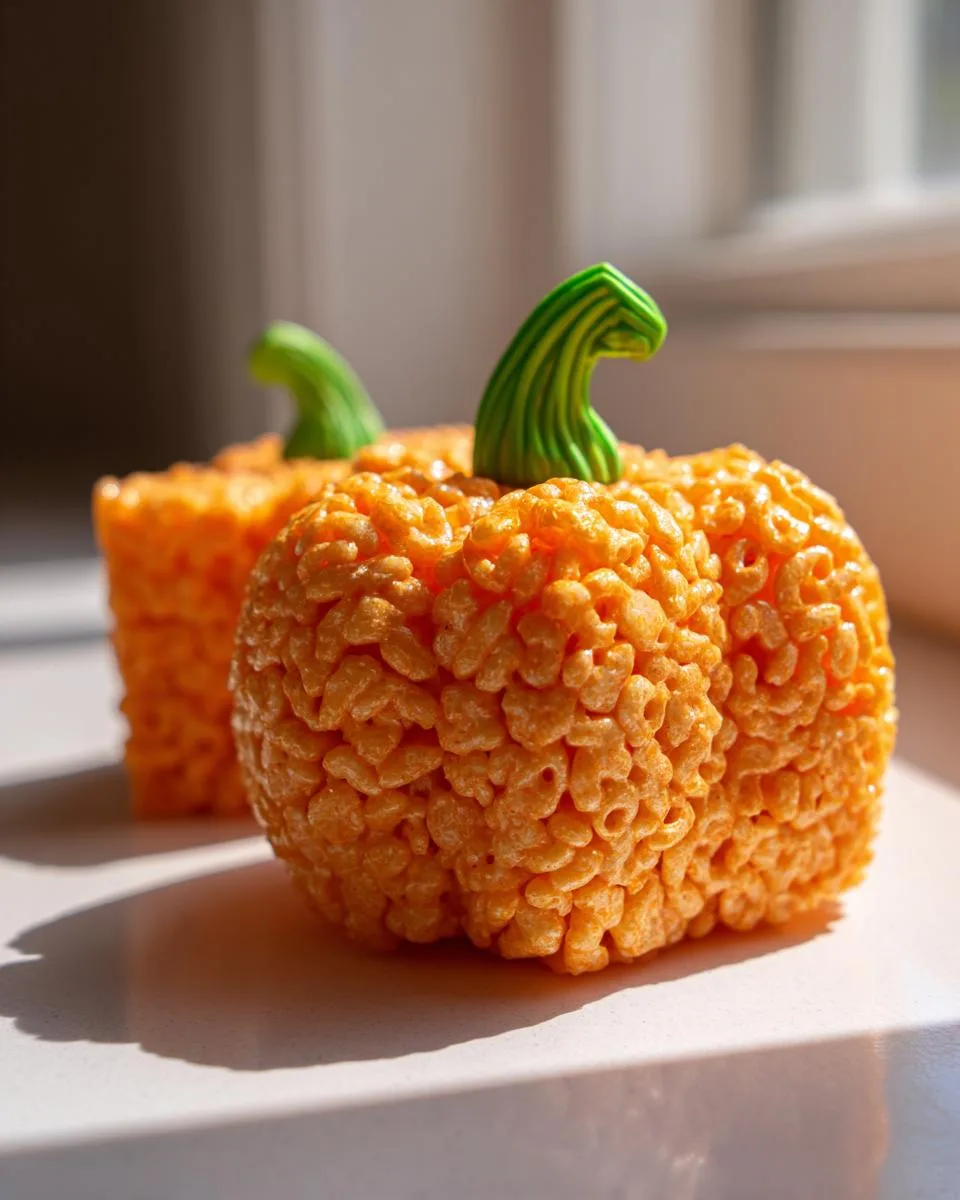
While the treats are still slightly warm (but firm enough to handle), poke your green licorice or candy pieces into the tops as stems. Arrange them on a platter and try not to eat them all before they fully set – about 15 minutes should do it!
Tips for Perfect Pumpkin Rice Krispie Treats
After making dozens of batches (okay, maybe hundreds!), here are my foolproof secrets for pumpkin treat perfection:
- Gel food coloring is king – Liquid makes the mixture too sticky and gives a washed-out color
- Grease everything – Lightly spray your hands, molds, and spatula with cooking spray for mess-free shaping
- Work fast – The marshmallow mixture sets quickly, so have all supplies ready before starting
- No pumpkin molds? Use a muffin tin or shape by hand – they’ll taste just as delicious!
- Store smart – Layer treats between parchment paper in an airtight container to prevent sticking
Bonus tip: If your mixture hardens too fast, pop the saucepan in the microwave for 10-second bursts to soften it up again!
Variations and Serving Ideas
Oh, the possibilities are endless with these little pumpkin treats! For extra pizzazz, try drizzling melted white chocolate over them to look like pumpkin veins – my kids call them “zombie pumpkins” when we do this for Halloween. Sprinkles in fall colors make them extra festive too!
I love serving these piled high on a rustic wooden board at autumn parties, or wrapping individual treats in cellophane with orange ribbons as sweet party favors. They’re perfect alongside caramel apples at fall festivals or as cute additions to Thanksgiving dessert tables. Honestly, they disappear so fast I should probably start making triple batches!
Storage and Reheating
Pop these pumpkin treats in an airtight container at room temperature – they’ll stay fresh and chewy for about 3 days. Just a heads up: unlike cookies, these little guys don’t need reheating (and trust me, melted marshmallow fingers aren’t fun to clean up!). If they do harden a bit, a quick zap in the microwave for 2-3 seconds can help – but any longer and you’ll have pumpkin puddles!
Nutritional Information
Here’s the scoop on what’s in these adorable Pumpkin Rice Krispie Treats:
- Serving Size: 1 treat
- Calories: 120
- Sugar: 8g
- Sodium: 90mg
- Fat: 3g (2g saturated)
- Carbs: 22g
- Protein: 1g
Quick note: These numbers can vary slightly depending on your exact ingredients – like if you go wild with extra candy stems or use different cereal brands!
Frequently Asked Questions
Can I use other cereals instead of Rice Krispies?
Absolutely! While Rice Krispies give that classic texture, you can get creative with other crispy rice cereals or even try corn flakes for a different crunch. Just stick to the same 6-cup measurement – though fair warning, the pumpkin shapes might not hold quite as perfectly!
How far in advance can I make these Halloween treats?
They’re best fresh, but you can make them up to 3 days before your party. Store them in an airtight container with parchment between layers to prevent sticking. The color stays vibrant, though they might lose a tiny bit of that fresh-made chewiness.
What if I don’t have pumpkin molds?
No worries! Some of my cutest pumpkin Rice Krispie treats were hand-shaped. Just grease your palms lightly with butter or cooking spray and roll them into balls, then gently flatten the bottoms. You can even use the back of a spoon to make pumpkin ridges!
Can I make these gluten-free?
Yes! Simply use gluten-free crispy rice cereal and double-check that your marshmallows are gluten-free too (some brands aren’t). All the other ingredients are naturally gluten-free, so you’re good to go!
Why did my treats turn out too hard?
Oh no! This usually happens if the marshmallow mixture cooked too long or at too high heat. Next time, keep it on low and remove from heat as soon as the marshmallows melt. Also, pressing too firmly when shaping can make them dense.
Final Thoughts
There you have it – my foolproof recipe for the cutest Pumpkin Rice Krispie Treats around! I can’t wait for you to experience the joy of making (and eating) these little orange gems. They’ve brought so much fun to our family’s fall traditions, and I hope they do the same for yours. Don’t be surprised if these become your new seasonal obsession – they’re just that good! I’d love to hear how yours turn out or see your creative twists on this simple but special treat.
Print3-Ingredient Pumpkin Rice Krispie Treats Kids Devour Instantly
Pumpkin Rice Krispie Treats are a fun and festive twist on the classic snack. These orange-colored, pumpkin-shaped treats are perfect for fall gatherings or Halloween parties.
- Prep Time: 15 minutes
- Cook Time: 10 minutes
- Total Time: 25 minutes
- Yield: 12-15 treats 1x
- Category: Dessert
- Method: No-Bake
- Cuisine: American
- Diet: Vegetarian
Ingredients
- 6 cups Rice Krispies cereal
- 1 package (10 oz) marshmallows
- 3 tablespoons butter
- Orange food coloring
- Green licorice or candy for stems
Instructions
- Melt butter in a large saucepan over low heat.
- Add marshmallows and stir until fully melted.
- Mix in orange food coloring until desired shade is reached.
- Remove from heat and stir in Rice Krispies cereal.
- Press mixture into greased pumpkin-shaped molds or form into small balls.
- Insert green licorice or candy pieces as stems.
- Let cool completely before serving.
Notes
- Use gel food coloring for more vibrant orange color.
- If you don’t have pumpkin molds, shape treats into balls and flatten slightly.
- Store in an airtight container for up to 3 days.
Nutrition
- Serving Size: 1 treat
- Calories: 120
- Sugar: 8g
- Sodium: 90mg
- Fat: 3g
- Saturated Fat: 2g
- Unsaturated Fat: 1g
- Trans Fat: 0g
- Carbohydrates: 22g
- Fiber: 0g
- Protein: 1g
- Cholesterol: 5mg

