
I’ve always loved apple pie—really, who doesn’t? But rolling out dough, making sure it doesn’t crack, and then dealing with a soggy bottom? Not my idea of a fun afternoon. That’s why I fell head over heels for these Apple Pie Bars. They give you all the buttery crust, spiced apple filling, and crumbly topping you crave, but in a way that’s so much easier to make and share. I brought a batch to our annual fall bonfire last year, and I swear they disappeared faster than the hot cider. One friend even asked for the recipe before she’d finished her first bite. Trust me, once you try these, you’ll never go back to fussy pie crusts. I’ve been baking for years, and this recipe is one of those rare gems that looks impressive but is almost foolproof. The key is keeping the butter cold and using firm apples—nothing complicated, just good technique. Let me show you how it’s done.
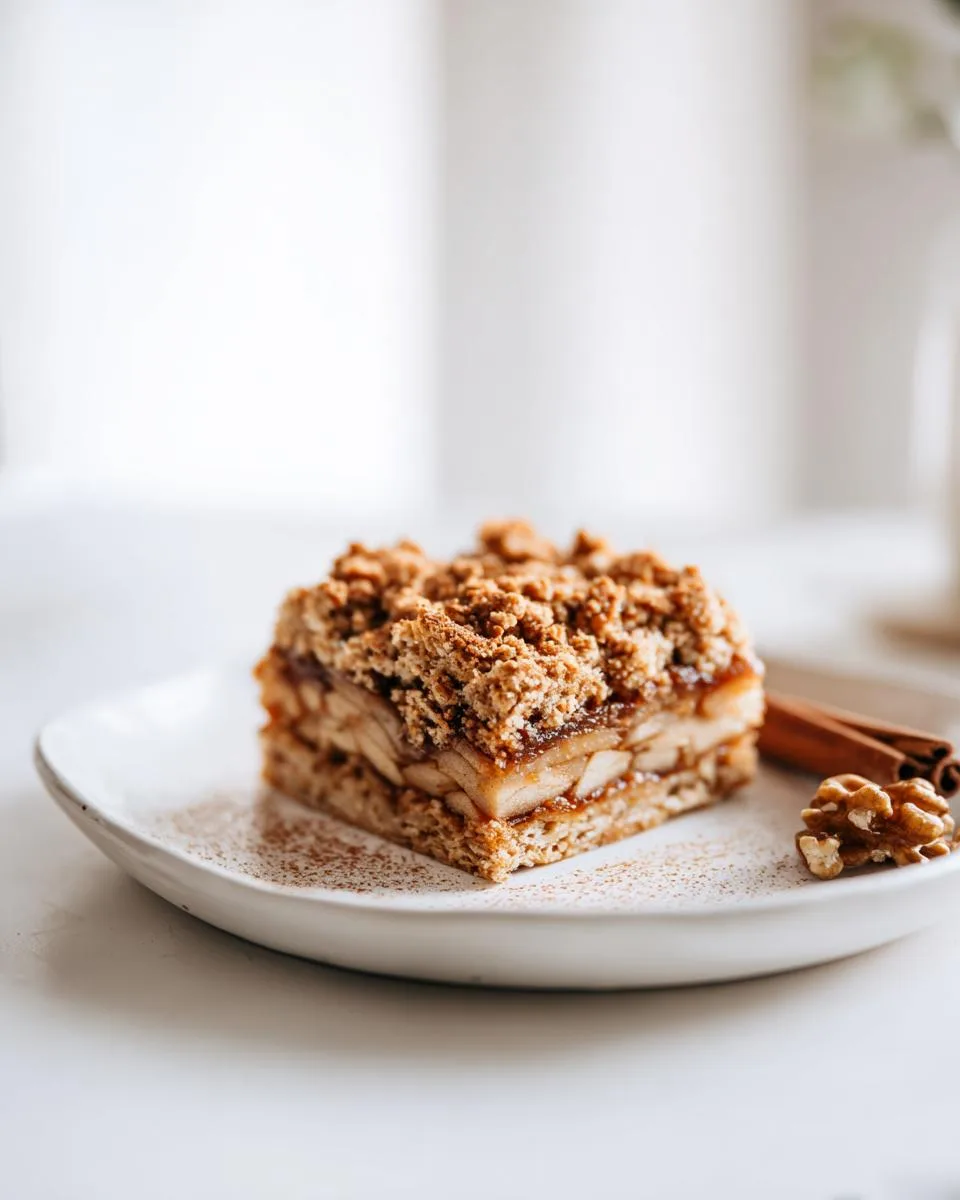
Why You’ll Love These Apple Pie Bars
You get all the cozy apple pie flavor without the hassle of rolling dough. That’s a win in my book. These Apple Pie Bars are:
- Quick to make – no pie crust wrestling required.
- Portable – perfect for potlucks, picnics, or just eating over the sink.
- Full of apple pie flavor – that buttery crust, spiced filling, and crumbly top in every bite.
- Easy to share – just cut and serve. No slicing drama.
Honestly, they’re the dessert you’ll turn to again and again. I’ve already made three batches this fall!
Ingredients for Apple Pie Bars
Here’s everything you’ll need to whip up these incredible Apple Pie Bars. I’ve kept the list simple, but I’m also giving you a few notes so you know exactly what to grab. Trust me, fresh ingredients make all the difference here.
- 2 cups all-purpose flour – gives the crust structure without being heavy.
- 1/2 cup granulated sugar – just the right sweetness for the base.
- 1 cup cold butter, cubed – keep it cold! That’s the secret to a flaky crust.
- 1 large egg – helps bind the dough together.
- 4 cups peeled and sliced apples – about 4 medium firm apples like Granny Smith or Honeycrisp, sliced about 1/4-inch thick.
- 1 cup packed brown sugar – adds deep, caramel-y sweetness to the filling.
- 1 teaspoon ground cinnamon – classic apple pie warmth.
- 1/4 teaspoon ground nutmeg – just a pinch to round out the spices.
- 1 tablespoon lemon juice – keeps the apples from browning and brightens the flavor.
- 1/2 cup rolled oats – for that crumbly topping texture.
- 1/4 cup chopped walnuts (optional) – adds a nice crunch, but you can leave them out.
I always use the freshest apples I can find – it really does make the bars taste better. And don’t skimp on the butter quality; it’s the star of the crust.
Apple Pie Bars Ingredient Notes and Substitutions
When I make these Apple Pie Bars, I pay close attention to a few key ingredients. Firm apples like Granny Smith or Honeycrisp are non-negotiable – they hold their shape during baking instead of turning into mush. The cold butter is crucial too; it creates steam pockets in the oven, giving you a tender, flaky crust. If you’re out of walnuts, pecans work beautifully. For a gluten-free version, swap the all-purpose flour with a good 1:1 gluten-free baking blend – still tastes amazing. Quick oats can replace rolled oats if that’s what you have, though the texture will be slightly finer. And don’t skip the lemon juice – it prevents the apples from turning brown and adds a little zing that balances the sweetness.
Equipment You’ll Need
You don’t need anything fancy to make these bars. Grab a 9×13-inch baking pan and line it with parchment paper for easy removal. A couple of large mixing bowls, a pastry cutter or fork to cut in the butter, and standard measuring cups and spoons are all you’ll need. Oh, and a cooling rack – that’s important for letting the bars set properly. No electric mixer required, just your hands and a little patience.
How to Make Apple Pie Bars Step by Step
Now let’s get into the actual making of these Apple Pie Bars. I’ll walk you through every step so you feel confident, even if you’re new to baking bars. First things first—preheat your oven to 350°F (175°C) and line a 9×13-inch baking pan with parchment paper. Leave a little overhang on the sides; that’ll make lifting the whole batch out later a breeze. I’ve divided the process into four simple parts, so you’re never overwhelmed. Ready? Let’s go!
Preparing the Crust for Apple Pie Bars
Start by whisking the flour and granulated sugar together in a large bowl. Then add your cold, cubed butter. I use a pastry cutter or my fingers—work quickly so the butter stays cold. You want the mixture to look like coarse crumbs, with some pea-sized butter bits still visible. That’s what gives the crust its flaky tenderness. Crack in the egg and stir until a shaggy dough forms. Don’t overmix; it’s okay if it’s not perfectly smooth. Press half of this dough evenly into the bottom of your prepared pan. I use my fingertips or the bottom of a glass to get it flat and even. Set the remaining dough aside—it’ll become the crumbly topping later. This crust for Apple Pie Bars is seriously forgiving, so don’t stress if it looks a little rough.
Making the Apple Filling
In a separate bowl, toss the sliced apples with the brown sugar, cinnamon, nutmeg, and lemon juice. I like to use my hands to make sure every slice is coated—it’s the most efficient way. The lemon juice does double duty: it keeps the apples from browning and adds a little brightness to the sweetness. Spread this mixture evenly over the crust in the pan. Don’t worry if it seems piled high; the apples will soften and settle as they bake. This apple filling is the heart of your Apple Pie Bars, so take your time getting it even.
Assembling and Baking the Apple Pie Bars
Now grab the reserved dough. Add the rolled oats and chopped walnuts (if using) and mix until everything is crumbly. You might need to use your fingers again—it can be a bit stiff. Sprinkle this mixture evenly over the apples. Try to cover them completely, but a few apple slices peeking through is totally fine. Bake for 40 minutes, or until the topping is golden brown and the apples are tender when pierced with a fork. If your oven runs hot, rotate the pan halfway through for even browning. Your kitchen is going to smell like pure fall heaven. That’s the sign that your Apple Pie Bars are almost ready.
Cooling and Cutting the Apple Pie Bars
This is the hardest part—waiting. Let the bars cool completely in the pan on a wire rack. I know it’s tempting to dig in, but if you cut them while they’re warm, they’ll fall apart. Full cooling lets the filling set and the crust firm up. Once they’re cool, use the parchment overhang to lift the whole slab onto a cutting board. Use a sharp knife to cut into 12 even bars. Clean cuts are so much easier when the bars are fully set. Trust me, these Apple Pie Bars are worth the patience.
Tips for Perfect Apple Pie Bars
I’ve learned a few things from making these Apple Pie Bars over and over, and I want to share them so yours turn out amazing every time. Here are my top tips:
- Keep the butter cold. Warm butter makes a dense crust. Pop it back in the fridge if your kitchen is warm.
- Use firm apples. Granny Smith or Honeycrisp hold their shape and don’t turn mushy.
- Don’t overmix the dough. Stop as soon as it comes together—overworking makes the crust tough.
- Press the crust firmly into the pan. This keeps it from lifting up when you add the filling.
- Cool completely before cutting. I know it’s hard, but it lets the bars set so you get clean, neat slices.
- Always line the pan with parchment paper. It makes lifting the whole batch out a breeze—no sticking, no mess.
Variations and Serving Suggestions for Apple Pie Bars
One of the best things about these Apple Pie Bars is how easy they are to tweak. Swap the walnuts for pecans—they add a buttery crunch that’s just as delicious. I’ve also tossed in a handful of raisins or dried cranberries when I wanted a little extra chewiness and tartness. For a gluten-free version, just use a 1:1 gluten-free flour blend; it works perfectly. Now, for serving—I love these bars warm with a scoop of vanilla ice cream. The cold creaminess against the warm spiced apples is pure magic. Drizzle some caramel sauce on top, and you’ve got a real showstopper. Or keep it simple with a dusting of powdered sugar. Honestly, these Apple Pie Bars are delicious any way you slice them.
Storing and Reheating Apple Pie Bars
If you somehow have leftovers (it happens!), these Apple Pie Bars keep beautifully. Pop them in an airtight container and they’ll stay fresh at room temperature for up to 3 days. For longer storage, stick them in the fridge for up to a week, or freeze them for up to 3 months. To reheat, just zap a bar in the microwave for 15–20 seconds, or warm it in a 300°F oven for 5–8 minutes. That buttery crust and spiced apple filling come right back to life.
Frequently Asked Questions About Apple Pie Bars
I’ve been getting a lot of questions about these Apple Pie Bars, so I figured I’d round up the answers right here. This is exactly the kind of stuff I wish I’d known when I first started making them.
Can I use pre-made pie crust?
You totally can, but the texture will be different. The crust in this recipe is more of a shortbread-style base—it’s sturdy, buttery, and holds up perfectly to the spiced apples. A pre-made pie crust is much flakier and might get soggy underneath all that filling. If you’re in a pinch, you could press a refrigerated pie crust into the pan, but I really think the homemade version is what makes these Apple Pie Bars so special.
What if I don’t have a 9×13 pan?
No worries! You can absolutely use an 8×8 or 9×9 square pan. Just keep in mind that the layers will be thicker, so you’ll need to add about 10-15 minutes to the baking time. I’ve also made these in a 10-inch cast iron skillet before, and it looks gorgeous. Just keep an eye on the edges so they don’t burn.
Can I reduce the sugar?
Sure, you can cut back a little. I’d start by reducing the brown sugar in the apple filling by a couple of tablespoons—the apples are naturally sweet, especially if you use Honeycrisps. If you reduce the sugar in the crust, it might be a bit less tender. Just keep in mind that sugar helps with browning and moisture, so don’t cut it out completely.
How do I know when the bars are done?
Look for a golden-brown topping and the edges of the filling bubbling up slightly. That’s your first clue. Then, stick a fork or a toothpick into the apples—they should be tender without being mushy. And honestly, your kitchen will smell like the best apple dessert you’ve ever made. That’s how you know they’re close!
Got another question? Drop it in the comments below—I love helping you out with these delicious dessert bars.
Apple Pie Bars Nutrition
If you’re keeping an eye on what you’re eating, here’s the nutritional breakdown for these Apple Pie Bars. Each bar, based on the recipe making 12 servings, comes in at approximately 250 calories, 12g of fat, 35g of carbohydrates, 3g of protein, 15g of sugar, 150mg of sodium, and 2g of fiber. Keep in mind these values are just estimates that change depending on the brands you use and any swaps you make, like choosing pecans instead of walnuts or going gluten-free. Either way, it’s a solid option for a dessert that gives you the classic fall flavor without the guilt.
I’d love to hear how your batch turned out! Drop a comment below, rate the recipe, and tag me in your photos on social media—nothing makes my day like seeing your bakes. Thanks so much for trying these Apple Pie Bars! Happy baking!
PrintPerfect Apple Pie Bars in 40 Minutes
These apple pie bars combine a buttery crust, spiced apple filling, and a crumbly topping. They are easy to make and perfect for sharing.
- Prep Time: 20 minutes
- Cook Time: 40 minutes
- Total Time: 1 hour
- Yield: 12 bars 1x
- Category: Dessert
- Method: Baking
- Cuisine: American
- Diet: Vegetarian
Ingredients
- 2 cups all-purpose flour
- 1/2 cup granulated sugar
- 1 cup cold butter, cubed
- 1 large egg
- 4 cups peeled and sliced apples (about 4 medium)
- 1/2 cup brown sugar
- 1 teaspoon ground cinnamon
- 1/4 teaspoon ground nutmeg
- 1 tablespoon lemon juice
- 1/2 cup rolled oats
- 1/4 cup chopped walnuts (optional)
Instructions
- Preheat your oven to 350°F (175°C). Line a 9×13-inch baking pan with parchment paper.
- In a large bowl, mix flour and granulated sugar. Cut in cold butter until mixture resembles coarse crumbs. Add egg and stir until dough forms.
- Press half of the dough evenly into the prepared pan. Set aside the remaining dough.
- In another bowl, combine sliced apples, brown sugar, cinnamon, nutmeg, and lemon juice. Toss well.
- Spread the apple mixture over the crust.
- To the remaining dough, add rolled oats and walnuts (if using). Mix until crumbly. Sprinkle over the apples.
- Bake for 40 minutes, or until topping is golden and apples are tender.
- Cool completely in the pan before cutting into bars.
Notes
- Use firm apples like Granny Smith or Honeycrisp for best texture.
- Store bars in an airtight container at room temperature for up to 3 days.
- You can replace walnuts with pecans or omit them.
Nutrition
- Serving Size: 1 bar
- Calories: 250
- Sugar: 15g
- Sodium: 150mg
- Fat: 12g
- Saturated Fat: 7g
- Unsaturated Fat: 4g
- Trans Fat: 0g
- Carbohydrates: 35g
- Fiber: 2g
- Protein: 3g
- Cholesterol: 30mg
