
There’s nothing quite like the smell of an apple pie baking in the oven—it’s the scent of autumn, of cozy Sundays, of my grandmother’s kitchen. I still remember standing on a little step stool, watching her pare apples with that same well-worn peeler, her hands moving fast while she told me stories. That’s where my love for this classic apple pie began. Over the years, I’ve tested and tweaked her recipe until I landed on the version I’m sharing today: a foolproof, flaky crust that shatters at the touch, and a perfectly spiced filling that uses firm, tart apples so every slice holds its shape. I’ve made this pie for Thanksgiving, for potlucks, and just because it’s Tuesday—and it never fails. The crust stays tender, the cinnamon and nutmeg are just right, and the sweetness is balanced by a bright squeeze of lemon. I’ve been baking this apple pie for over a decade, and I promise, if you follow these steps, you’ll get the same golden, bubbling result every single time. Let’s get started.
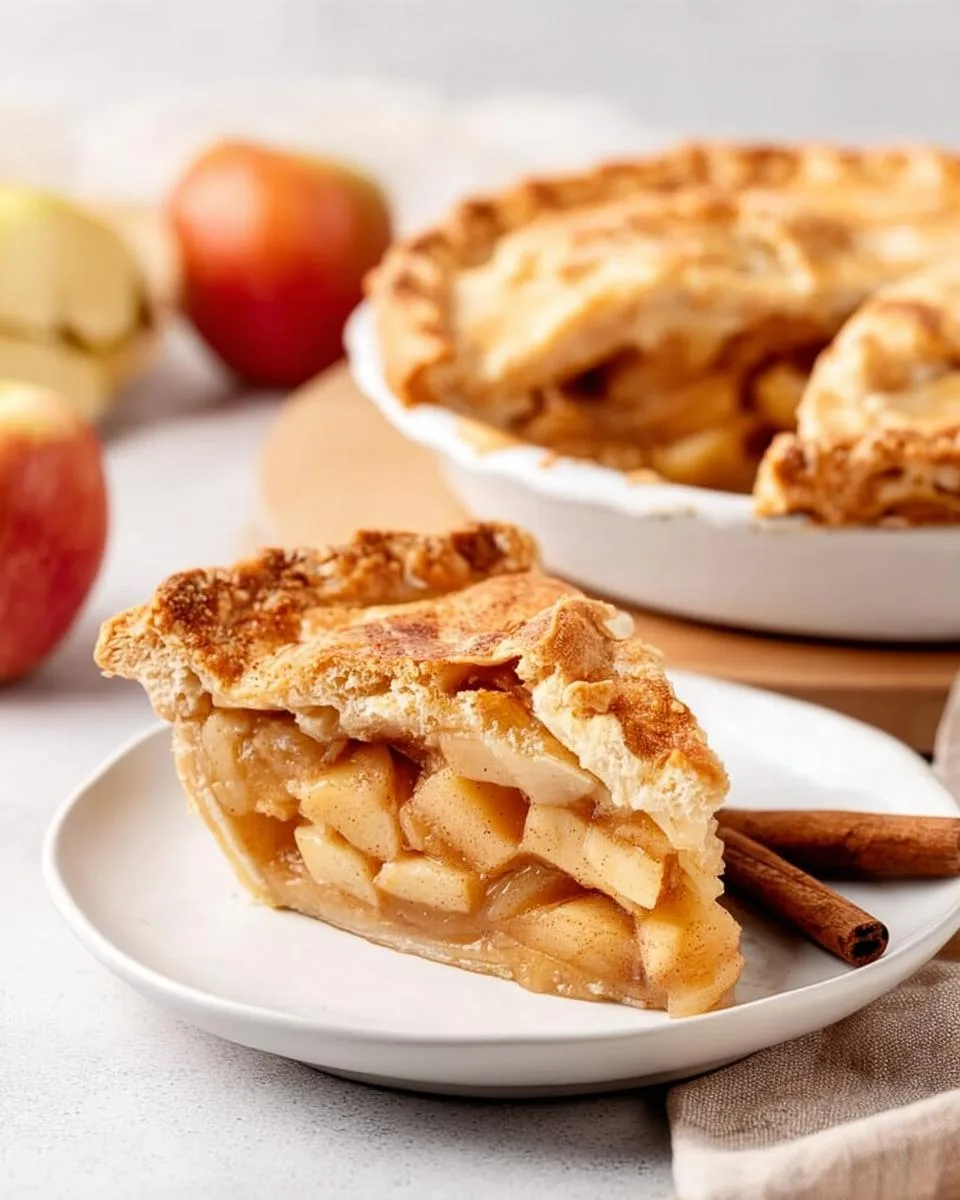
Why You’ll Love This Apple Pie Recipe
This isn’t just another pie recipe—it’s the one I turn to every single time I need a dessert that impresses without the stress. Here’s why it works so well:
- Easy-to-follow steps – I’ve broken everything down so you never feel lost, even if it’s your first time making pie from scratch.
- Uses common pantry ingredients – No fancy stuff. Just flour, butter, apples, and spices you probably already have.
- Ideal for fall gatherings – That warm cinnamon-nutmeg smell fills the house and makes everyone feel welcome.
- Produces a beautiful golden crust – The egg wash gives it that glossy, bakery-worthy finish, and the edges stay crisp.
- Balanced sweet-tart flavor – Firm apples and a squeeze of lemon keep the filling from being cloying. It’s the perfect bite every time.
Ingredients for the Perfect Apple Pie
Let’s talk about what you’ll need. I’ve tested this recipe more times than I can count, and I’ve learned that the right ingredients make all the difference. Here’s exactly what I use — no guesswork, no substitutes (unless you want the ones I list later).
For the crust, you’ll need 2 1/2 cups all-purpose flour and 1 teaspoon salt. The butter is key: 1 cup cold, unsalted butter, cubed — and I mean ice-cold, straight from the fridge. Don’t even think about using salted or softened butter here. Then you’ll have 6 to 8 tablespoons ice water — start with 6 and add more if the dough feels dry.
For the filling, grab 6 cups peeled and sliced apples — I always go with Granny Smith or Honeycrisp because they hold their shape and give that perfect sweet-tart punch. Slice them about 1/4-inch thick so they cook evenly. You’ll also need 3/4 cup granulated sugar, 2 tablespoons all-purpose flour (to thicken the juices), 1 teaspoon ground cinnamon, 1/4 teaspoon ground nutmeg, and 1 tablespoon fresh lemon juice — it keeps the apples from browning and brightens the flavor.
And don’t forget the egg wash: 1 large egg, beaten. That’s what gives the crust that shiny, golden finish. That’s it — everything is vegetarian, totally simple, and zero alcohol or bacon anywhere near this pie. Trust me, you don’t need it.
How to Make Apple Pie Step by Step
Alright, let’s get our hands a little floury! I’m going to walk you through this just like my grandmother walked me through it — slow and steady, with a few of her best tricks along the way.
Start with the dough. In a large bowl, whisk together 2 1/2 cups all-purpose flour and 1 teaspoon salt. Drop in your cold, cubed butter. Now, here’s the important part: use a pastry cutter or your fingertips to work the butter into the flour until it looks like coarse crumbs with some pea-sized butter pieces still visible. Those little bits are what create flaky layers, so don’t overdo it. Drizzle in 6 tablespoons of ice water, stirring with a fork just until the dough starts coming together. If it feels too dry, add the remaining water a tablespoon at a time. Gather the dough into a ball, divide it in half, flatten each into a disc, wrap in plastic, and refrigerate for at least 1 hour. I know it’s tempting to skip this, but trust me — a good chill is the secret to a tender crust.
Preheat your oven to 425°F while you prep the filling. In a big bowl, toss together 6 cups sliced apples, 3/4 cup sugar, 2 tablespoons flour, 1 teaspoon cinnamon, 1/4 teaspoon nutmeg, and 1 tablespoon lemon juice. Give everything a good stir so the apples are evenly coated.
Now, assemble the pie. Lightly flour your work surface and roll out one dough disc into a 12-inch circle — about 1/8-inch thick. Gently lift it into your 9-inch pie dish, pressing it into the bottom and sides without stretching. Pour in the apple filling and spread it even. If you want, dot the top with a few small pieces of butter for extra richness.
Roll out the second disc the same way and place it over the filling. Trim the excess overhang to about 1/2 inch, then fold the edges under and crimp them however you like — I use my thumb and forefinger to make a fluted edge. Cut 4 or 5 slits in the top crust so steam can escape. Brush the whole top with the beaten egg and sprinkle with coarse sugar if you’re feeling fancy.
Bake at 425°F for 15 minutes. Without opening the oven, reduce the temperature to 375°F and bake for another 40 to 45 minutes. You’ll know it’s done when the crust is deep golden brown and you can see the filling bubbling through the vents. That bubbling means the juices have thickened — perfect!
Finally, let the pie cool on a wire rack for at least 2 hours before slicing. I know it’s hard to wait, but cutting early will make the filling run everywhere. Patience pays off, I promise.
Apple Pie Ingredient Notes and Substitutions
One of my favorite things about this apple pie is how forgiving it is. You can definitely play around with the ingredients and still end up with a gorgeous dessert. Let me walk you through my favorite swaps—and trust me, I’ve tested them all!
Let’s start with the apples. I usually reach for Granny Smith or Honeycrisp because they hold their shape so beautifully. But hey, if you’ve got Golden Delicious or Braeburn in your fruit bowl, go for it! They’ll soften a little more as they bake, almost like a cozy chunky applesauce, which is honestly lovely. And please, don’t skip the lemon juice. It keeps the apples from turning brown and brightens up the entire filling.
For the crust, all-purpose flour gives you that perfect flaky crumb. Need it to be gluten-free? A good 1-to-1 gluten-free baking blend works like a charm—just handle the dough gently, as it’s a touch more tender. As for the butter, I’m a total purist. Real cold butter is what creates those shatteringly flaky layers. That said, I’ve heard from readers who’ve used a high-quality vegan butter and loved the result. The texture won’t be quite the same (a bit more delicate), but it’s still a mighty fine pie.
As for the sweet stuff, feel free to cut the sugar back by a couple of tablespoons if your apples are super sweet or you just prefer a less sugary dessert. Out of cinnamon? Apple pie spice is a direct 1-to-1 swap and adds a lovely, warm complexity. See? Simple changes, no stress.
Tips for the Best Apple Pie
Over the years, I’ve learned a few tricks that turn a good pie into a showstopper. First, keep everything cold—your butter, your water, even your hands if you can. Warm ingredients make a tough crust, so pop the bowl in the fridge for a few minutes if your kitchen feels hot. Second, don’t overwork the dough. Mix just until it comes together; those little butter lumps are what create flaky layers.
Another biggie: preheat your oven fully. That initial blast of heat sets the crust and prevents sogginess. And once your pie is assembled, chill it again for 15–20 minutes before baking. This helps the edges hold their shape. I also swear by a pie shield or a ring of foil to keep the crust from burning before the filling is done. Finally, resist the urge to slice early—let it cool at least 2 hours, or the filling will run everywhere. Patience really is the secret ingredient!
Apple Pie Variations
Sometimes I like to switch things up a little. The classic apple pie is perfect as-is, but these simple variations are so fun when you want to try something new without any fuss. Toss in 1/2 cup of dried cranberries or raisins along with the apples for a nice pop of tartness — my family loves the cranberry version around the holidays. Or stir 1/2 teaspoon of vanilla extract into the filling; it rounds out the cinnamon and nutmeg beautifully. Want an even easier topping? Skip the top crust entirely and sprinkle a buttery crumb topping over the apples instead. And for a real treat, drizzle a thin layer of caramel sauce over the bottom crust before adding the filling. Each one takes just a few extra minutes but makes the pie feel brand new. Try them all!
Serving Suggestions for Apple Pie
I’ll be honest—I hardly ever serve this pie plain. There’s just something magical about a warm slice of apple pie with a scoop of vanilla ice cream melting into all those cinnamon-spiced crevices. That first bite, with the cold cream mixing with the warm, juicy filling? Absolute heaven. A dollop of fresh whipped cream is my second favorite, especially if I’ve sweetened it just a little. And if I’m feeling extra fancy, I’ll drizzle some caramel sauce right over the top—it makes the whole thing taste like a special occasion. For something to sip alongside, a cup of strong coffee or a mug of hot apple cider is the perfect match. Trust me, you’ll want to cozy up with this combination all autumn long.
How to Store Apple Pie
If you somehow have leftovers—which, let’s be honest, doesn’t happen often in my house—here’s how to keep that pie tasting fresh. Just cover it loosely with foil and leave it at room temperature for up to 2 days. The crust stays crisp, and the filling stays perfect. For longer storage, pop it in the fridge for up to 5 days. When you’re ready for another slice, reheat it in a 350°F oven for about 10 minutes—that’ll bring back the flaky crust and warm filling. In a pinch, the microwave works too, just 30 seconds per slice. Want to save one for later? Wrap the whole pie tightly in plastic wrap and foil, then freeze for up to 3 months. Thaw it overnight in the fridge before reheating, and it’ll taste almost as good as the day you baked it.
Apple Pie Nutrition Information
I know we’re all here for the taste, but if you’re curious about what’s in a slice, here’s the breakdown. One serving (that’s 1/8 of the pie) comes out to about 410 calories, 28g of sugar, 18g of fat, and 55mg of cholesterol. It also has 3g of fiber and 4g of protein, so hey, it’s not all indulgence! Just a heads-up: nutrition values are estimates and will vary depending on the exact ingredients and brands you use. I always say, enjoy every bite—it’s worth it.
I’d love to hear how your apple pie turned out! Drop a comment below and let me know—did you add any fun twists? Or just snap a photo and tag me on social media; I always get so excited seeing your beautiful bakes. Happy pie-making, friend!
PrintEasy Classic Apple Pie: 1 Foolproof Recipe
A classic apple pie with a flaky crust and sweet cinnamon-spiced apple filling.
- Prep Time: 30 minutes
- Cook Time: 55 minutes
- Total Time: 1 hour 25 minutes
- Yield: 8 servings 1x
- Category: Dessert
- Method: Baking
- Cuisine: American
- Diet: Vegetarian
Ingredients
- 2 1/2 cups all-purpose flour
- 1 teaspoon salt
- 1 cup cold butter, cubed
- 6–8 tablespoons ice water
- 6 cups peeled and sliced apples (Granny Smith or Honeycrisp)
- 3/4 cup granulated sugar
- 2 tablespoons all-purpose flour
- 1 teaspoon ground cinnamon
- 1/4 teaspoon ground nutmeg
- 1 tablespoon lemon juice
- 1 egg, beaten (for egg wash)
Instructions
- Mix flour and salt in a bowl. Cut in cold butter until crumbly. Add ice water gradually until dough forms. Divide into two discs, wrap, and refrigerate for 1 hour.
- Preheat oven to 425°F (220°C).
- In a large bowl, combine sliced apples, sugar, flour, cinnamon, nutmeg, and lemon juice. Toss to coat.
- Roll out one dough disc on a floured surface to fit a 9-inch pie dish. Place dough in dish, pressing gently.
- Pour apple filling into the crust. Dot with small pieces of butter (optional).
- Roll out second dough disc. Place over filling. Trim and crimp edges. Cut slits in top for steam vents.
- Brush top with beaten egg. Sprinkle with coarse sugar if desired.
- Bake at 425°F for 15 minutes. Reduce heat to 375°F (190°C) and bake 40-45 minutes until golden and filling bubbles.
- Cool on a wire rack for at least 2 hours before slicing.
Notes
- Use firm apples like Granny Smith for best texture.
- Chill dough well to keep crust flaky.
Nutrition
- Serving Size: 1 slice (1/8 of pie)
- Calories: 410
- Sugar: 28g
- Sodium: 320mg
- Fat: 18g
- Saturated Fat: 11g
- Unsaturated Fat: 6g
- Trans Fat: 0.5g
- Carbohydrates: 58g
- Fiber: 3g
- Protein: 4g
- Cholesterol: 55mg
