
There’s just something about the smell of an apple pie baking in the oven that feels like a warm hug, isn’t there? It’s the kind of aroma that pulls everyone into the kitchen, asking, “How long until it’s ready?” This apple pie recipe is the one I turn to every single time I want that classic, nostalgic dessert—the one with a perfectly balanced sweet-tart filling that isn’t runny, tucked inside a flaky, buttery crust that shatters with each bite. I learned to make it standing on a stool next to my grandmother, who never measured a thing and somehow always got it perfect. This version captures all that magic, with clear steps so you can nail it on your very first try.
Why You’ll Love This Apple Pie Recipe
Trust me, I’ve tested a lot of apple pies over the years, and this one wins every time. Here’s why I keep coming back to it:
- Simple ingredients – nothing fancy, just pantry staples you probably already have.
- Clear, no-fuss steps – even if you’re new to pie-making, you’ll feel like a pro.
- A foolproof crust – it’s buttery, flaky, and actually easy to work with (no crying over crumbly dough here!).
- Super adaptable – use whatever apples you’ve got on hand, from tart Granny Smith to sweet Honeycrisp.
This apple pie delivers that classic, nostalgic flavor with minimal fuss – exactly what a homemade dessert should be.
Ingredients for the Perfect Apple Pie
Alright, let’s talk about what you’ll need. It’s a short, humble list of pantry staples, but each one matters. Grab 2 cups all-purpose flour (plain, nothing fancy), ½ cup cold unsalted butter, cubed small (keep it cold!), and ¼ cup ice water – add it gradually, a tablespoon at a time. For the filling: 6 cups Granny Smith apples, peeled and sliced about ¼-inch thick, ¾ cup granulated sugar (or packed light brown sugar for a deeper flavor), 2 tablespoons lemon juice, 1 teaspoon cinnamon, ¼ teaspoon nutmeg, and 1 large egg, beaten for that gorgeous golden wash. That’s it – simple, honest ingredients for a pie that tastes like home.
Key Ingredients for Apple Pie
Every ingredient here plays a starring role. The apples are the heart – I love using tart Granny Smiths because they hold their shape and balance the sweetness, but a mix with Honeycrisp adds lovely complexity. Butter is non-negotiable for that flaky, tender crust; cold butter creates steam pockets as it bakes, giving you those dreamy layers. Cinnamon and nutmeg bring warmth and that classic apple pie spice – don’t skip them! And lemon juice does double duty: it keeps the apples from browning while you work, and its acidity cuts through the sugar, making every bite perfectly balanced.
Substitutions for Apple Pie
Need to tweak things? No problem. You can swap up to half the all-purpose flour with whole wheat pastry flour for a nuttier flavor. Use coconut sugar instead of granulated – it’ll be a little less sweet but still delicious. For a dairy-free version, vegan butter works great, just make sure it’s cold. And if you’re gluten-free, a good 1-to-1 gluten-free flour blend can do the trick. Just a heads-up: the texture might be a bit more delicate, so handle the dough gently. I’ve tried them all, and while nothing beats the original, these swaps still make a darn good pie.
How to Make Apple Pie Step by Step
Okay, let’s get our hands dirty! I’m going to walk you through every single step so you feel totally confident. Trust me, it’s easier than you think – and the smell that fills your kitchen will be worth every second. Pay attention to the little details, and you’ll end up with a pie that looks like it came from a bakery.
Prepare the Apple Pie Dough
Start by tossing your 2 cups flour and cold butter cubes into a big bowl. Use a pastry blender or just your fingertips (I prefer my hands – you can really feel the texture) and work the butter into the flour until you’ve got pea-sized crumbs. Don’t overdo it; a few bigger butter bits are fine – they make the crust flaky. Now add the ice water one tablespoon at a time, mixing gently with a fork after each addition. Stop when the dough just holds together when you squeeze it. It should look shaggy, not smooth. Divide it in half, shape into two discs, wrap each in plastic, and pop them in the fridge for at least 30 minutes. This chill time is non-negotiable – it relaxes the gluten and keeps the butter cold, which means a tender, flaky crust later.
Make the Apple Pie Filling
While the dough chills, get the filling ready. In a large bowl, toss your 6 cups sliced apples with sugar, lemon juice, cinnamon, and nutmeg. Use your hands to make sure every slice is coated. Now comes the hard part: let it sit for 10 minutes. Seriously, walk away. The apples will release their juices – that’s exactly what you want. Do not drain them! I know it looks like a lot of liquid, but that’s the secret to a syrupy, not-too-runny filling. Those juices will thicken as the pie bakes and turn into pure magic.
Assemble and Bake the Apple Pie
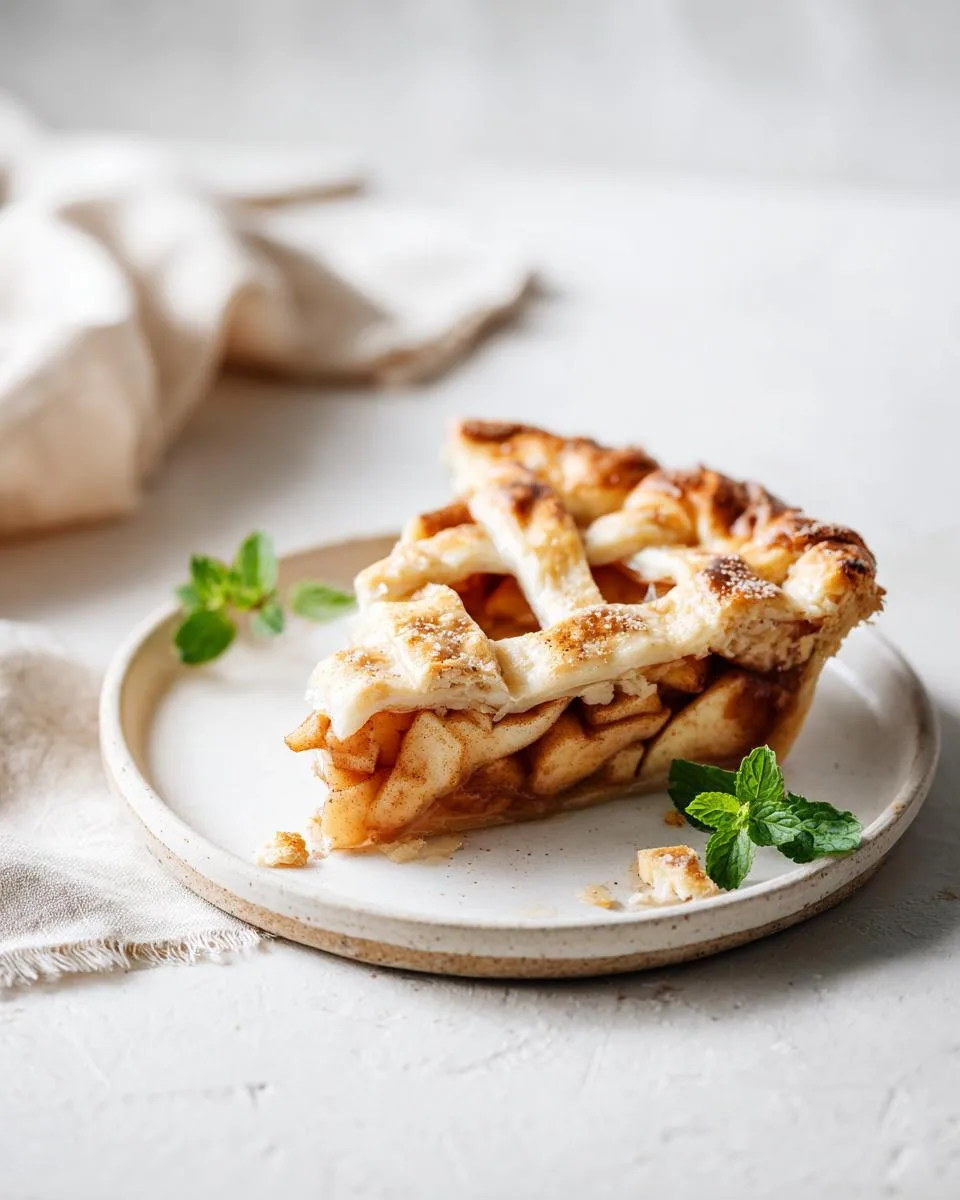
Preheat your oven to 375°F. Take one dough disc out of the fridge and roll it on a lightly floured surface into a 12-inch circle – about ⅛-inch thick. Gently lift it into your 9-inch pie dish and press it into the corners without stretching. Pile in all that apple filling (juices and all) and dot the top with a few small pats of extra butter – about a tablespoon. Roll out the second disc and lay it on top. Trim the overhang to about ½ inch, then fold the edges under and crimp them however you like – I use my thumb and forefinger to make a fluted edge. Cut 4–5 slits in the top crust for steam to escape (otherwise your pie might burst). Brush the whole top with beaten egg for a gorgeous golden sheen. Bake for 50 minutes, but check halfway through – if the edges are browning too fast, tent them with foil. When it’s done, the crust will be deep golden and the filling will be bubbling through the slits. Let it cool on a wire rack for at least 2 hours. I know waiting is torture, but if you cut too soon, that beautiful filling will run everywhere. Trust me on this one – patience pays off!
Tips for the Best Apple Pie
I’ve learned a few things the hard way over the years, so let me save you some trouble. First, use a mix of apple varieties—I like two-thirds tart Granny Smith and one-third sweet Honeycrisp or Braeburn. That little bit of complexity makes all the difference. Second, don’t skip chilling the dough; a cold crust shrinks way less in the oven and bakes up flakier. Third, for the most gorgeous golden crust, brush the edges with milk or cream instead of water before baking—it gives you that deep, bakery-style color. And finally, the hardest tip of all: let the pie cool completely. I know you’ll want to dig in while it’s warm, but giving it at least 2 hours sets the filling so you get clean, beautiful slices instead of a soupy mess. Patience, my friend!
Apple Pie Variations
Once you’ve mastered the classic, it’s so fun to play around! Sometimes I’ll toss in a handful of raisins or dried cranberries for little bursts of sweetness. Feeling adventurous? Swap the cinnamon for cardamom – it gives the pie a warm, almost floral twist that’s incredible. For a prettier presentation, try a lattice top instead of a solid crust – it’s easier than it looks, I promise. And on busy days, I skip the top crust entirely and pile on a buttery crumble topping (just flour, brown sugar, and cold butter rubbed together). Oh, and mini hand pies are perfect for lunchboxes – just cut the dough into rounds, fill, fold, and bake for half the time. Each twist keeps the heart of the recipe but makes it feel brand new.
Serving Suggestions for Apple Pie
Now for the best part – eating it! Honestly, there’s no wrong way to serve this apple pie, but I have my favorites. I love it warm with a scoop of melty vanilla ice cream dripping down the sides; that cold-and-hot combo is pure heaven. Whipped cream works beautifully too. And if you’re feeling bold like my grandpa, try a slice of sharp cheddar cheese on top – the salty tang against the sweet apples is surprisingly amazing. For an extra spice kick, cinnamon ice cream is a game-changer. Take your pick!
Storing and Reheating Apple Pie
Got leftovers? Lucky you! This apple pie keeps beautifully. Just cover it loosely with foil or plastic wrap and leave it at room temperature for up to 2 days – the crust stays crisp that way. If you need it to last longer, pop it in the fridge for up to 5 days.
When you’re ready for round two, reheat slices in a 350°F oven for about 10 minutes – that brings back the flaky crust and warm filling perfectly. In a pinch, 30 seconds in the microwave works, but the crust will be softer. For longer storage, freeze the whole baked pie (tightly wrapped) for up to 3 months. Just thaw overnight in the fridge and reheat as above. Easy peasy!
Frequently Asked Questions
I get asked these questions all the time, so let me clear up the most common ones. Trust me, I’ve been there too!
How do I prevent a soggy bottom crust on my apple pie?
Oh, the dreaded soggy bottom – I’ve been there! A few tricks work like a charm. First, preheat a baking sheet on the lowest rack and place your pie dish right on it – that extra heat from below helps the bottom crust crisp up. Second, use a glass or metal pie dish instead of ceramic; they conduct heat better. Third, don’t overfill with liquid – let the apples sit for 10 minutes, but don’t drain them all; just the right amount. And my favorite hack: brush the bottom crust with a little beaten egg white before adding the filling. That creates a barrier so the moisture doesn’t soak in. Works like a dream!
Can I use pre-made pie crust for this apple pie?
Absolutely! Store-bought crust is a lifesaver on busy days. Just make sure you chill it for about 10 minutes before rolling it out – it’ll be less sticky and tear less easily. Also, keep an eye on the baking time; pre-made crusts can brown a bit faster, so you might want to tent the edges with foil a little earlier. No shame in taking a shortcut – the filling is still homemade and amazing!
What are the best apples for apple pie?
I always go with Granny Smith for that tart kick that balances the sugar – they hold their shape beautifully. But don’t stop there! Mix in some Honeycrisp or Braeburn for natural sweetness and a more complex flavor. A 2:1 ratio of tart to sweet gives you the perfect apple pie filling – not too tangy, not too sweet. Trust me, that little mix makes a world of difference.
How long does homemade apple pie last?
If you’ve got leftovers (lucky you!), here’s the scoop: keep it covered at room temperature for up to 2 days – the crust stays crispest that way. For longer, refrigerate for up to 5 days. And if you want to save it for later, freeze the whole baked pie for up to 3 months – just wrap it tightly. When you’re ready to enjoy, reheat slices in a 350°F oven for about 10 minutes. So good it’s almost like fresh-baked!
Apple Pie Nutritional Information
Just so you know what you’re getting into with this homemade apple pie, here’s a quick look at the numbers per slice. Based on my recipe, each slice has about 350 calories, 15g total fat (9g saturated), 35mg cholesterol, 150mg sodium, 50g carbs (3g fiber, 25g sugar), and 4g protein. Keep in mind these are just estimates – they’ll shift a bit depending on the exact brands and any swaps you make. But hey, it’s pie! Totally worth it.
Rate and Review
Alright, friends—I’d love to hear how your pie turned out! Drop a comment below with your rating, any little tweaks you made, or just tell me how fast your family devoured it. And hey, if you’re loving this apple pie as much as I do, share it with someone who needs a slice of comfort today. Happy baking!
PrintApple Pie: 1 Foolproof Recipe for Flaky Perfection
A classic American dessert with a buttery crust and sweet apple filling.
- Prep Time: 30 minutes
- Cook Time: 50 minutes
- Total Time: 1 hour 20 minutes
- Yield: 1 pie (8 servings) 1x
- Category: Dessert
- Method: Baking
- Cuisine: American
- Diet: Vegetarian
Ingredients
- 2 cups all-purpose flour
- 1/2 cup cold butter, cubed
- 1/4 cup ice water
- 6 cups peeled and sliced apples
- 3/4 cup granulated sugar
- 2 tablespoons lemon juice
- 1 teaspoon cinnamon
- 1/4 teaspoon nutmeg
- 1 egg, beaten for wash
Instructions
- Mix flour and butter until crumbly. Add ice water and form dough. Chill for 30 minutes.
- Combine apples, sugar, lemon juice, cinnamon, and nutmeg in a bowl.
- Roll half the dough into a circle. Place in a 9-inch pie dish.
- Fill with apple mixture. Dot with extra butter.
- Roll remaining dough and cover filling. Crimp edges and cut slits.
- Brush top with beaten egg. Bake at 375°F for 50 minutes.
- Cool for 2 hours before serving.
Notes
- Use tart apples like Granny Smith for best flavor.
- Chill dough to prevent shrinking.
- Cover edges with foil if browning too fast.
Nutrition
- Serving Size: 1 slice
- Calories: 350
- Sugar: 25g
- Sodium: 150mg
- Fat: 15g
- Saturated Fat: 9g
- Unsaturated Fat: 5g
- Trans Fat: 0g
- Carbohydrates: 50g
- Fiber: 3g
- Protein: 4g
- Cholesterol: 35mg
