
I’ll never forget the first time I brought this Buffalo Chicken Dip to a Super Bowl party. I was a little nervous – I mean, everyone’s got their go-to game day snack, and I wasn’t sure mine would stack up. But the moment I set that baking dish down, people started circling like it was the main event. Within twenty minutes, the dish was scraped clean, and I had three people asking for the recipe. That’s when I knew this dip was something special.
This Buffalo Chicken Dip is everything you want in a party appetizer: creamy, spicy, ridiculously easy to throw together, and made with ingredients you probably already have in your fridge. We’re talking shredded chicken, cream cheese, hot sauce, ranch dressing, and plenty of melty cheddar. That’s it. No complicated steps, no fancy techniques – just pure, crowd-pleasing flavor. Whether you’re hosting a game day gathering, a holiday potluck, or just need a comforting snack on a cozy night in, this dip delivers every single time.
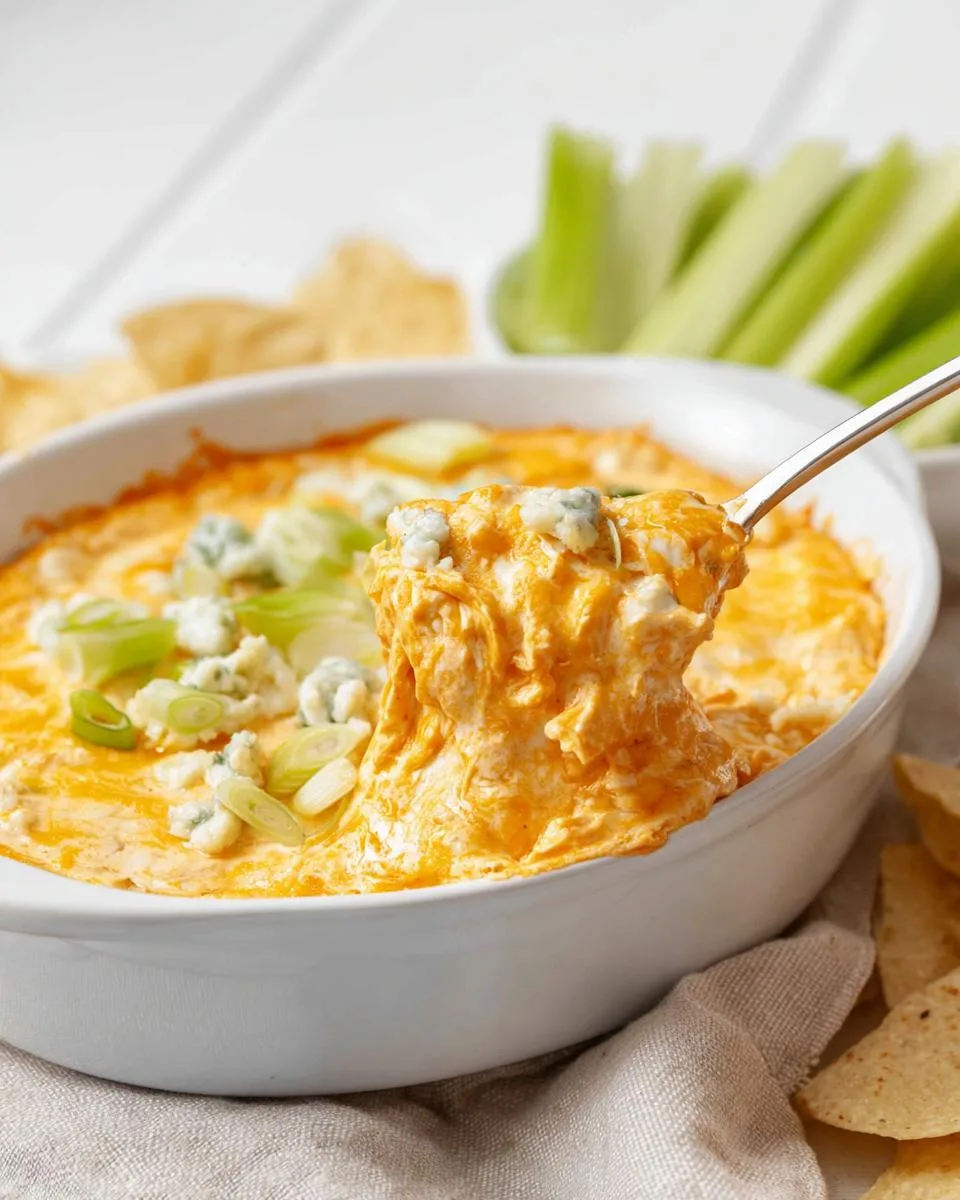
Why You’ll Love This Buffalo Chicken Dip
Honestly, this dip checks all the boxes for me. Here’s why it’s become my go-to:
- 10-minute prep. Seriously, you can have this in the oven before the pregame show even starts. No chopping, no fuss.
- Rich and creamy, not greasy. The cream cheese and ranch make it so luscious, it’s like a warm hug in every bite.
- Spice is totally up to you. Like it mild? Use less hot sauce. Want to feel the burn? Go wild. You’re in control.
- The ultimate party hero. It’s the first thing to disappear at every gathering – I’ve seen it happen again and again.
- Low-carb friendly. Serve it with celery or carrot sticks, and you’ve got a guilt-free indulgence that still feels super satisfying.
It’s comfort food that actually works for real life, and that’s why I keep coming back to it.
Ingredients for Buffalo Chicken Dip
Let me walk you through exactly what you’ll need – and why each ingredient matters. Here’s my tried-and-true lineup:
- 2 cups cooked chicken, shredded. I usually grab a rotisserie chicken from the store – it’s a huge time-saver. Just pull the meat off and shred it with two forks. Leftover grilled chicken works great too.
- 8 ounces cream cheese, softened. And I mean really softened – leave it on the counter for at least an hour. Full-fat is non-negotiable here; low-fat gets grainy and won’t give you that silky texture.
- 1/2 cup buffalo hot sauce. Frank’s RedHot is my go-to. It’s got that classic vinegary kick without being overwhelming. Any standard buffalo sauce works, but avoid super-thin vinegary hot sauces like Tabasco – they’ll throw off the consistency.
- 1/2 cup ranch dressing. Go full-fat for the creamiest result. Light ranch can make the dip watery. I’m partial to Hidden Valley, but any brand you like will do.
- 1 cup shredded cheddar cheese. Please, please shred it yourself from a block. Pre-shredded cheese has anti-caking agents that stop it from melting smoothly. That’s a real bummer when you want that gooey, stretchy finish.
- 1/2 cup crumbled blue cheese (optional). I love the tangy bite it adds, but not everyone’s a fan. Totally fine to skip it or swap for extra cheddar.
- 1/4 cup chopped green onions (for garnish). These add a fresh pop of color and a mild oniony crunch. Don’t skip ’em – they make the dip look gorgeous.
Ingredient Notes and Substitutions
Here’s the thing about this recipe – it’s super forgiving. Here are my favorite swaps:
- Ranch out? Use plain Greek yogurt for a tangy, protein-packed swap, or blue cheese dressing if you want that bolder flavor.
- Want more heat? Swap the cheddar for pepper jack cheese, or add a pinch of cayenne to the mix. Just be warned – it gets spicy fast!
- Blue cheese not your thing? Leave it out entirely. No harm, no foul. The dip is still incredible without it.
- Chicken shortcuts: Rotisserie chicken is my hero. Canned chicken works too, but drain it really well first – you don’t want a watery dip.
- Gluten-free concerns? Most buffalo sauces are naturally gluten-free, but double-check the label on your hot sauce and ranch dressing just to be safe.
Equipment You’ll Need for This Buffalo Chicken Dip
Good news – you don’t need any fancy gadgets for this one. Just grab a large mixing bowl (big enough to really stir things around without making a mess), a whisk or spatula for getting that cream cheese perfectly smooth, and a baking dish – an 8×8 or similar size works great. That’s honestly it. No stand mixer, no food processor, no special tools. Just your everyday kitchen basics, and you’re all set to make something amazing.
How to Prepare Buffalo Chicken Dip Step by Step
Let me walk you through it – it’s almost too easy. First things first: preheat your oven to 350°F (175°C). I always do this before I even start mixing, so the oven’s nice and hot by the time the dip’s ready to go in. Nothing worse than standing there with a full baking dish waiting for the beep.
Grab your largest mixing bowl and toss in that softened cream cheese. And I mean really softened – if it’s still cold in the middle, you’re going to end up with little white lumps, and nobody wants that. Pour in the hot sauce and ranch dressing, then grab a whisk or spatula and go to town. Mix until it’s completely smooth – no streaks, no bumps. This is where patience pays off.
Now fold in your shredded chicken and half of that cheddar cheese. Stir gently until everything’s evenly coated. The mixture should look thick and creamy, almost like a chunky dip already. Pour it into your baking dish and spread it even. Sprinkle the rest of the cheddar on top, and if you’re using blue cheese, scatter that over too.
Bake it uncovered for 20-25 minutes. You’re looking for the edges to get bubbly and the cheese on top to turn golden in spots. Every oven’s a little different, so start checking at 20 minutes. Pull it out when it’s hot all the way through and the middle is bubbling. Let it rest on the counter for about five minutes – this lets it set up just enough so it doesn’t slide off your chip. Sprinkle those green onions on top and dig in while it’s still warm.
Mixing the Base for Buffalo Chicken Dip
This first step is where the magic happens, but it’s also where things can go wrong if you rush. That cream cheese must be at room temperature – I usually set it out an hour before. Drop it in a bowl with the hot sauce and ranch, then stir until it’s velvet-smooth. If you see lumps, grab a hand mixer and give it a quick whirl. Trust me, taking an extra minute here saves you from weird texture later. I’ve made that mistake before, and it’s just not the same.
Baking and Finishing Your Buffalo Chicken Dip
Once your base is smooth and the chicken’s folded in, spread it into your dish and pile on that extra cheese. Bake it uncovered – that’s key – so the top gets all melty and slightly browned. Watch for the edges to start bubbling; that’s your cue it’s ready. Every oven runs a little hot or cold, so peek at 20 minutes. Pull it when it’s bubbly and golden, then let it rest about five minutes. I know it’s tempting to dive right in, but that short rest keeps it from being runny. Perfection.
Tips for Perfect Buffalo Chicken Dip Every Time
After making this dip more times than I can count, I’ve picked up a few tricks that really make a difference. First, shred that chicken finely – big chunks just don’t distribute well, and you want a little bit of everything in every bite. Two forks work great, or if you’re in a hurry, a hand mixer on low speed shreds chicken in seconds.
Always taste the mixture before it goes in the oven. Yeah, I know it’s raw-ish, but it’s perfectly safe since there’s no egg in here. Dip a chip in and adjust the hot sauce or ranch right then. Once it’s baked, you’re stuck with whatever spice level you chose.
And don’t even think about low-fat cream cheese. I tried it once – never again. It turns grainy and watery, and the whole dip loses that lush, creamy texture that makes it so addictive. Full-fat all the way.
Here’s a pro move: stir the dip halfway through baking. Just give it a quick stir about 12 minutes in, then top with more cheese and finish baking. This keeps the heat even and prevents that weird layer of congealed cheese on top while the bottom’s still cold. And for heaven’s sake, don’t overbake it – pull it when the edges are bubbly and it’s hot through, or it’ll dry out and get greasy.
Variations of Buffalo Chicken Dip
Once you’ve mastered the classic, it’s fun to play around a little. Here are my favorite twists when I’m feeling creative:
- Add some crunch. Toss in a handful of chopped celery before baking. It gives you that classic Buffalo wing experience right in the dip.
- Bacon makes everything better. Cook up a few strips, crumble ’em, and mix half in with a sprinkle on top. Salty, smoky, and absolutely irresistible.
- Switch up the dressing. Use blue cheese dressing instead of ranch for a tangier, bolder flavor. It’s a whole different vibe, and I love it for a change of pace.
- Turn up the heat. Drizzle extra hot sauce over the top before serving, or stir in a teaspoon of cayenne. Just be sure you’ve got plenty of cold drinks nearby!
These are all super easy to do, and they keep the dip feeling fresh every time you make it.
Serving Suggestions for Buffalo Chicken Dip
This dip is at its absolute best served warm, right when it comes out of the oven. I always set out a big platter with celery sticks and carrot sticks on one side – the cool, crunchy veggies are the perfect contrast to all that creamy, spicy goodness. Of course, you can’t go wrong with tortilla chips (the scoop kind are my favorite) or a pile of crackers for dipping.
For drinks, a cold beer is my go-to – something light and crisp cuts through the richness beautifully. If you’re not into beer, a soda or even a tall glass of iced tea works great too. And if you’re feeling a little fancy for your next party, try scooping the dip into a hollowed-out bread bowl. It looks amazing, and people go wild for it. Trust me, it’s always the first thing to disappear.
Storage and Reheating Instructions
If you somehow have leftovers (it doesn’t happen often in my house!), just scoop the dip into an airtight container and pop it in the fridge. It’ll keep for up to three days, though honestly, it never lasts that long around here.
When you’re ready for round two, you’ve got options. The microwave’s fastest – just heat it in 30-second bursts, stirring in between, until it’s warmed through. Or if you want that melty, bubbly top again, spread it in a baking dish and reheat at 350°F for about 10 minutes. Easy.
One thing though: don’t freeze this dip. I’ve tried it, and the cream cheese gets all grainy and separates when it thaws. The texture just isn’t the same. Better to make a fresh batch – it’s so quick anyway!
Frequently Asked Questions About Buffalo Chicken Dip
Can I make this dip ahead of time? Absolutely. Assemble everything in the baking dish, cover it, and stash it in the fridge for up to 24 hours. When you’re ready, just pop it in the oven and add a few extra minutes to the bake time since it’s starting cold. Easy.
How do I make it less spicy? Simple – just cut back on the hot sauce. Start with half the amount and taste as you go. Or, add an extra ounce or two of cream cheese to mellow out the heat without losing the flavor. I’ve done that plenty of times for friends who can’t handle the fire, and it works like a charm.
Can I use canned chicken? Sure, it’s fine in a pinch. But here’s the key: drain it really, really well. Canned chicken holds a lot of extra liquid, and if you skip that step, your dip will end up watery and sad. Pat it dry with paper towels after draining for best results.
What if I don’t have ranch dressing? No problem. Blue cheese dressing is a classic swap – it gives the dip a tangier, bolder flavor that some people actually prefer. Or use plain Greek yogurt for a lighter, tangy alternative. Both work great, so use whatever you’ve got in the fridge.
Nutritional Information for Buffalo Chicken Dip
Here’s the rough breakdown per serving (about 1/8 of the recipe): around 280 calories, 22g fat, 16g protein, and just 5g carbs. Keep in mind these are estimates – they’ll shift depending on the exact brands you use and whether you go heavy on the blue cheese or light on the ranch. But it’s a solid ballpark if you’re keeping an eye on things. And honestly? For something this indulgent, it’s not half bad!
Alright, now it’s your turn! I’d love to hear how this Buffalo Chicken Dip turned out for you. Did you stick with the classic recipe, or did you try one of those fun variations? Drop a comment below and let me know – and don’t forget to give it a star rating if you loved it!
And hey, if you snap a photo before it disappears (good luck with that!), tag me on social media – I’m always so excited to see your creations. If you ran into any snags or have questions about substitutions, just ask. I read every comment and I’m happy to help troubleshoot. Happy dipping!
PrintBuffalo Chicken Dip 5 Game Day Tips

This Buffalo Chicken Dip is a creamy, spicy appetizer perfect for parties and game days. It combines shredded chicken, cream cheese, hot sauce, and cheese for a rich, flavorful dip. Serve it warm with celery sticks, tortilla chips, or crackers.
- Prep Time: 10 minutes
- Cook Time: 25 minutes
- Total Time: 35 minutes
- Yield: 8 servings 1x
- Category: Appetizer
- Method: Baking
- Cuisine: American
- Diet: Low Carbohydrate
Ingredients
- 2 cups cooked chicken, shredded
- 8 ounces cream cheese, softened
- 1/2 cup buffalo hot sauce
- 1/2 cup ranch dressing
- 1 cup shredded cheddar cheese
- 1/2 cup crumbled blue cheese (optional)
- 1/4 cup chopped green onions (for garnish)
Instructions
- Preheat your oven to 350°F (175°C).
- In a large bowl, mix the softened cream cheese, hot sauce, and ranch dressing until smooth.
- Stir in the shredded chicken and half of the cheddar cheese.
- Transfer the mixture to a baking dish.
- Sprinkle the remaining cheddar cheese and blue cheese (if using) on top.
- Bake for 20-25 minutes, until hot and bubbly.
- Garnish with green onions before serving.
Notes
- Use rotisserie chicken for convenience.
- Adjust the amount of hot sauce to control spiciness.
- Serve with celery sticks, carrot sticks, tortilla chips, or crackers.
- Store leftovers in an airtight container in the refrigerator for up to 3 days.
Nutrition
- Serving Size: 1/8 of recipe
- Calories: 280
- Sugar: 2g
- Sodium: 680mg
- Fat: 22g
- Saturated Fat: 10g
- Unsaturated Fat: 9g
- Trans Fat: 0g
- Carbohydrates: 5g
- Fiber: 0g
- Protein: 16g
- Cholesterol: 65mg
