
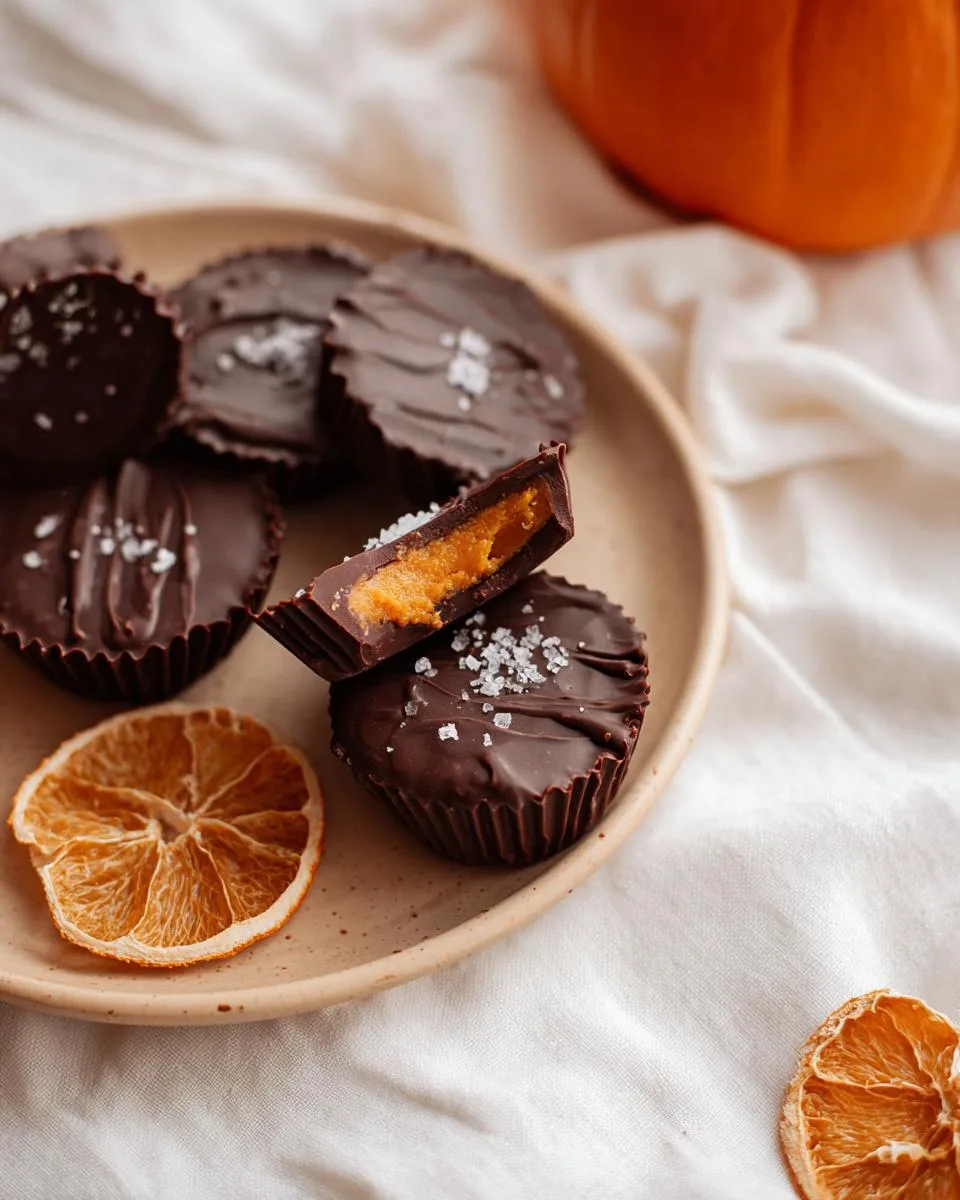
There’s something truly magical about a homemade fall treat, and these Chocolate Pumpkin Butter Cups have become my absolute favorite. I’ve perfected this no-bake method through multiple test batches (my family was happy to help!), and the result is just incredible – creamy, spiced pumpkin meets rich, dark chocolate in every single bite. Trust me, this little taste of autumn is way easier to make than you’d think, and it’s so rewarding to pull a batch out of the fridge knowing you made them yourself.
Why You Will Love These Chocolate Pumpkin Butter Cups
I’m honestly a little obsessed with these, and I think you will be too. Here’s why they’ve earned a permanent spot in my fall baking rotation:
- Seriously no-bake. You won’t even turn on the oven. That’s a win in my book.
- Ready in just 15 minutes of prep. The hardest part is waiting for them to chill.
- They’re vegan-friendly if you use dairy-free chocolate chips. No one will ever know the difference.
- Perfect flavor balance. Sweet, cozy pumpkin butter meets rich, dark chocolate in every single bite. It’s like autumn in a cup.
- A healthier swap. Way less sugar and no weird ingredients compared to the store-bought stuff. Just real, simple foods you can feel good about.
- Totally vegetarian. Made with clean, whole ingredients you probably already have in your pantry.
Equipment You Will Need for Chocolate Pumpkin Butter Cups
You don’t need a fancy kitchen to pull these off, which is one of the things I love most about this recipe. Here’s what you’ll want on hand:
- A mini muffin tin – standard size is fine, but mini is perfect for these little bites.
- Paper mini muffin liners – trust me on this, they make removal so much easier.
- A small microwave-safe bowl for melting your chocolate.
- A spoon – just a regular old spoon for spooning and spreading.
- A measuring cup – for getting your ingredients right.
If you prefer, you can use a double boiler to melt the chocolate instead of the microwave. Both work great, so go with whatever feels easier for you.
Ingredient Notes for Your Chocolate Pumpkin Butter Cups
Let me walk you through what each ingredient does, because getting them right makes all the difference. First up, the pumpkin puree needs to be 100% pure pumpkin, not pumpkin pie filling. That pre-sweetened stuff will totally throw off your filling, and trust me, I learned that the hard way.
The coconut oil is honestly the secret here. It gives the chocolate that perfect snap when you bite into it, and it keeps the pumpkin filling creamy and smooth. If you need to swap the maple syrup, go with agave or honey (just know that honey makes it non-vegan). The dark chocolate chips are my go-to, but semi-sweet or dairy-free chips work beautifully too. And for the pumpkin pie spice, you can totally DIY it with a mix of cinnamon, nutmeg, and ginger if that’s what you have on hand.
The Best Chocolate to Use
I always reach for high-quality dark chocolate chips or a chopped chocolate bar here. The higher cocoa content does this amazing thing where it balances out the sweetness of the pumpkin filling, so you get that perfect bittersweet contrast. Skip the milk chocolate – it’ll make your cups way too sweet and kind of overpower the pumpkin.
How to Make Chocolate Pumpkin Butter Cups
Okay, here’s where the magic happens. This process is super straightforward, but a few little tricks make all the difference between okay cups and absolutely perfect ones. The key is timing, especially with the chilling steps, so don’t rush them. You’ll want to work pretty quickly when spooning the chocolate layers so nothing sets up before you’re ready. And please, I’m begging you, make sure that first chocolate layer is nice and firm before you add the pumpkin filling – otherwise, it all just blobs together. That final 30-minute chill? Non-negotiable if you want clean, beautiful cups that pop right out of the liners.
Step 1: Melt the Chocolate Base
Start by tossing your dark chocolate chips and 1 tablespoon of coconut oil into a small microwave-safe bowl. Pop it in the microwave in short 20-second bursts, stirring well after each one. Usually, it takes about 45 to 60 seconds total. Watch it closely – you don’t want it to overheat or burn. You’re looking for a smooth, glossy, completely melted mixture.
Step 2: Form the First Chocolate Layer
Spoon a thin, even layer of that melted chocolate into each mini muffin liner. Give the tin a little tilt to coat the sides a bit – just a light swipe is fine. Slide the whole thing into the refrigerator and let it chill for exactly 10 minutes. You want the chocolate to be firm to the touch but not rock hard or brittle.
Step 3: Create the Pumpkin Filling
While that’s setting up, grab a separate bowl and stir together your pumpkin puree, maple syrup, pumpkin pie spice, salt, and that last tablespoon of coconut oil. Stir until everything is well combined and you’ve got a thick, creamy mixture. If it looks a little too runny for your liking, just mix in a tiny pinch more pumpkin puree to tighten it up. Then, spoon that filling evenly over your set chocolate layer in each cup.
Step 4: Top and Set the Cups
Spoon the remaining melted chocolate right over that beautiful pumpkin filling. Gently spread it around until the filling is completely covered. Give the muffin tin a light tap on the counter – this pops up any sneaky air bubbles. Pop it back in the refrigerator for at least 30 minutes. You’ll know they’re ready when the top feels completely firm to the touch and the cups slide out of the liners like a dream.
Tips for Perfect Chocolate Pumpkin Butter Cups
I’ve made these enough times to know where things can go sideways, so here are my best tips for nailing them every single time. First, keep water far away from your melting chocolate – even a tiny drop will make it seize up into a grainy, unusable mess. I use a piping bag or a small spoon for the cleanest layers, but honestly, a spoon works great if you’re patient. Before you eat them, let the cups sit at room temperature for about 2 minutes – it softens the texture just enough to be incredible. And please, use paper liners. They make removal so easy you won’t even believe it.
Variations for Your Pumpkin Butter Cups
One of the best things about this recipe is how easy it is to play around with. Before that final chill, try sprinkling a pinch of flaky sea salt on top – that sweet-salty thing is just killer. If you want to switch up the flavor, swap the pumpkin pie spice for chai spice or a little cardamom. Feeling indulgent? Use white chocolate instead of dark for a sweeter, creamier cup. And if you’re a peanut butter fan like me, stir a tablespoon right into the pumpkin filling for a nutty twist that’s absolutely irresistible.
How to Store Chocolate Pumpkin Butter Cups
These little guys are happiest in the fridge, so always store them in an airtight container there. They’ll stay perfect for up to a week—if they last that long in your house. You can also freeze them for up to three months, which is great for make-ahead treats. Just layer the cups between sheets of parchment paper in a freezer-safe container so they don’t stick together. When you’re ready to eat, let them thaw in the refrigerator for about 15 minutes, and they’ll be just as creamy and delicious as the day you made them.
Frequently Asked Questions
I get a lot of questions about these cups, so I thought I’d tackle the most common ones right here. If you run into a snag, chances are someone else has too, and I want to make sure you get perfect results every time.
Can I use pumpkin pie filling instead of pumpkin puree?
No, please don’t! Pumpkin pie filling is already sweetened and spiced, so it’ll make your filling way too sweet and throw off the whole texture. Stick with 100% pure pumpkin puree for the best results.
Why did my chocolate not set properly?
That’s almost always because the chocolate got too hot or a tiny bit of water snuck in. Melt it slowly in short bursts, and make sure your bowls and spoons are bone-dry. Using refined coconut oil also helps give it that firm, snappy set.
Can I make these without coconut oil?
You bet! For the chocolate layer, you can swap in cocoa butter or a neutral-flavored non-dairy butter. For the filling, you can skip the oil entirely, but just know the texture will be a little denser and less creamy. Still delicious, though!
Are these Chocolate Pumpkin Butter Cups gluten-free?
Yes, as written, this recipe is naturally gluten-free. Just double-check your chocolate chip label to make sure they’re certified gluten-free if that’s a strict requirement for you. Most dark chocolate chips are, but it’s always worth a quick peek.
Nutritional Information
I always get asked about the nutrition info, so here you go. Just remember, these are estimates—they’ll vary a bit depending on the brands you use. For one little cup, you’re looking at about 120 calories, 8 grams of fat, 12 grams of carbs, and 1 gram of protein. Not too shabby for a cozy fall treat, right?
Your Turn to Make This Recipe
Alright, now it’s your turn to get in the kitchen and whip up a batch of these little beauties! When you do, I’d love to hear how they turned out — please come back and rate the recipe, and maybe even snap a photo to share on social media (tag me so I can see!). And I’m genuinely curious: what’s your favorite fall spice combination? Is it classic pumpkin pie spice, or do you lean more toward chai or cardamom? Drop a comment below and let me know — I read every single one!
PrintIncredibly Easy 15-Min Chocolate Pumpkin Butter Cups
Rich dark chocolate cups filled with creamy pumpkin butter. A seasonal treat combining sweet pumpkin and smooth chocolate.
- Prep Time: 15 minutes
- Cook Time: 0 minutes
- Total Time: 45 minutes
- Yield: 12 cups 1x
- Category: Dessert
- Method: No-bake
- Cuisine: American
- Diet: Vegetarian
Ingredients
- 1 cup dark chocolate chips
- 1/2 cup pumpkin puree
- 2 tablespoons coconut oil
- 1 tablespoon maple syrup
- 1/2 teaspoon pumpkin pie spice
- Pinch of salt
Instructions
- Melt chocolate chips and 1 tablespoon coconut oil together.
- Spoon a thin layer into mini muffin liners. Chill for 10 minutes.
- Mix pumpkin puree, maple syrup, pumpkin pie spice, salt, and remaining coconut oil.
- Spoon pumpkin mixture over set chocolate layer.
- Top with remaining melted chocolate. Chill for 30 minutes.
- Remove from liners. Serve cold.
Notes
- Store in refrigerator for up to one week.
- Use dairy-free chocolate for vegan option.
Nutrition
- Serving Size: 1 cup
- Calories: 120
- Sugar: 10g
- Sodium: 30mg
- Fat: 8g
- Saturated Fat: 5g
- Unsaturated Fat: 2g
- Trans Fat: 0g
- Carbohydrates: 12g
- Fiber: 2g
- Protein: 1g
- Cholesterol: 0mg
