
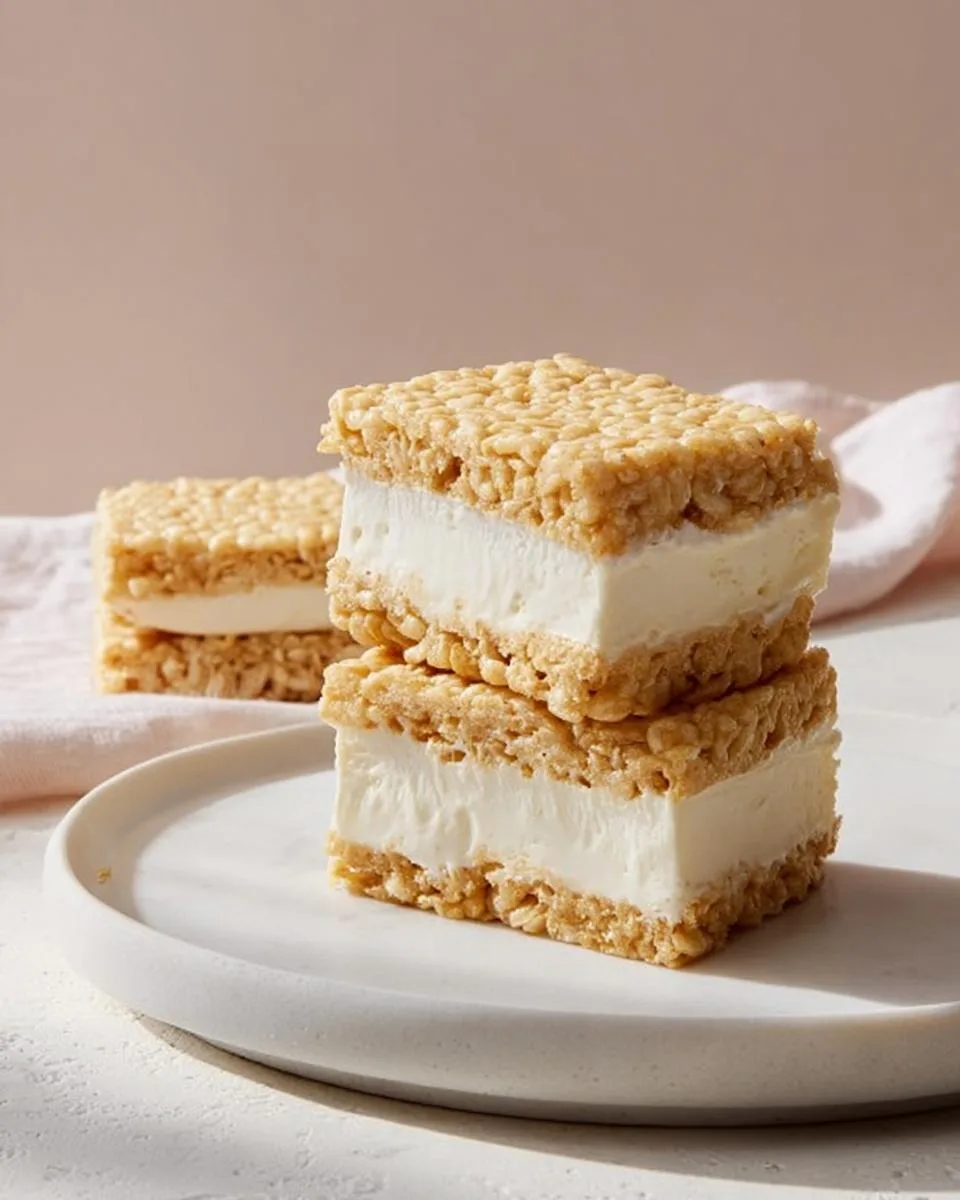
I’ll never forget the sticky mess of making Rice Krispies treats as a kid—my fingers glued together, the pan a disaster, but that first warm, gooey bite was pure magic. These Copycat Rice Krispies Treats Ice Cream Sandwiches take that childhood favorite and turn it into the ultimate frozen dessert. No more wrestling with warm, sticky bars that fall apart. Instead, you get a perfectly crunchy, creamy sandwich that holds together beautifully—even by the pool on a hot summer day. Trust me, this no-bake hack is a game-changer for anyone who loves a cold treat with serious nostalgia.
Why These Copycat Rice Krispies Treats Ice Cream Sandwiches Work
Let me tell you why this recipe is a total winner in my book. It checks all the boxes for a dessert that’s both impressive and ridiculously easy. Here’s what makes it so great:
- No oven required. Seriously, you won’t even need to turn it on. This keeps your kitchen cool, which is a lifesaver during those scorching summer months when the last thing you want is more heat.
- Just four simple ingredients. Butter, marshmallows, cereal, and ice cream. That’s it. You probably have most of them in your pantry and freezer right now.
- That amazing textural contrast. The crunchy, buttery cereal bar against the cold, creamy ice cream is pure magic. Every bite gives you that satisfying snap followed by a smooth, melty finish.
- So easy, kids can help. This is a perfect project for little hands. They can stir the marshmallows, press the cereal into the pan, and spread the ice cream. It builds confidence and creates sweet memories.
The Perfect No-Bake Dessert for Summer
When the temperature hits 90 degrees, the last thing I want to do is stand over a hot oven. That’s where these Copycat Rice Krispies Treats Ice Cream Sandwiches come to the rescue. You simply melt, stir, press, and freeze. No baking, no sweating, no fuss. You can whip up the cereal base in about 10 minutes, then let the freezer do the rest of the work. It’s the kind of dessert that lets you spend more time with your family and less time stuck in a hot kitchen.
A Crunchy and Creamy Texture Combination
The secret to a sandwich that doesn’t fall apart? Pressing that cereal mixture firmly into the pan. I mean really pack it in there. Use a piece of parchment paper on top and press down with your hands or the bottom of a measuring cup. This creates a dense, sturdy bar that holds its shape when you cut it and won’t crumble under the weight of the ice cream. That firm base gives you the perfect crunch, while the ice cream stays cold and creamy. It’s a texture dream team.
Ingredients You Will Need for Copycat Rice Krispies Treats Ice Cream Sandwiches
Let me walk you through the exact lineup. You’ll need 3 tablespoons unsalted butter (cubed) so it melts evenly, 1 package (10 oz) mini marshmallows—they melt way faster than the big ones, trust me—and 6 cups Rice Krispies cereal. For the creamy part, grab 1 quart of your favorite vanilla bean ice cream. Just make sure it’s softened to a spreadable consistency, which means leaving it out at room temp for about 10 to 15 minutes. You want it soft enough to spread, not melted into a puddle.
Ingredient Notes and Substitutions
If you only have salted butter on hand, go ahead and use it—just skip any extra salt in the recipe. For a vegan version, I’ve had good luck with dairy-free butter and a good-quality vegan vanilla ice cream. The texture will be a tiny bit different, but still totally delicious. Want to switch up the flavor? Swap the Rice Krispies for Fruity Pebbles or Cocoa Krispies. It’s a fun twist that my kids absolutely love, and it gives the bars a whole new personality without changing the method.
Equipment You Need for the Best Results
You don’t need a fancy kitchen for this one—just a few basics. Grab a 9×13-inch baking dish, parchment paper (for easy lifting), a large pot (at least 5-quart so the cereal has room to mix), a rubber spatula, a sharp chef’s knife for clean cuts, and an airtight freezer container. That’s the whole lineup. Trust me, having the right tools makes this project feel like a breeze.
How to Prepare Copycat Rice Krispies Treats Ice Cream Sandwiches
Alright, let’s get to the fun part. I’ll walk you through every step so you end up with perfect sandwiches that hold together and taste amazing. The big trick? You’ve got to let that cereal slab cool completely before you even think about adding the ice cream. I’m talking about 45 to 60 minutes at room temperature, or about 20 minutes in the fridge. Patience pays off big time here.
Step 1: Make and Shape the Cereal Base
Start by lining your 9×13-inch dish with parchment paper, leaving some overhang for easy lifting. Melt the butter in a large pot over low heat, then add the mini marshmallows. Stir constantly until they’re just melted and smooth—don’t let them bubble or you’ll end up with hard bars. Remove from the heat, dump in the cereal, and stir until every piece is coated. Transfer the mixture to your prepared dish. Here’s the key: lay a second piece of parchment on top and press down firmly with your hands. Really pack it in there to create a flat, even layer. Let it cool completely before moving on.
Step 2: Assemble the Ice Cream Layer
Once the cereal slab is completely cool, lift it out of the dish using the parchment handles. Cut it in half crosswise so you have two equal rectangles. Place one rectangle back in the dish (or on a parchment-lined baking sheet). Now work quickly—take your softened ice cream and spread it evenly over that bottom rectangle. Use a rubber spatula and smooth it out to the edges. The ice cream should be soft enough to spread but not melted. You want a nice, even layer about 1 inch thick. If it starts to get too runny, pop it in the freezer for a few minutes.
Step 3: Sandwich and Freeze
Gently place the second cereal rectangle on top of the ice cream, pressing down just a little to make it stick. Cover the whole thing with plastic wrap or parchment paper. Now for the hard part: freeze it for at least 4 to 6 hours, or until the ice cream is rock solid. I know it’s tempting to sneak a slice early, but trust me, patience is non-negotiable here. If you cut too soon, the ice cream will squish out and you’ll have a mess. Overnight is even better.
Step 4: Slice and Serve
When you’re ready to serve, grab a sharp chef’s knife. For the cleanest cuts, wipe the blade with a hot, damp cloth between each slice. Cut the whole slab into 12 even rectangles—I usually do 4 rows by 3 rows. Let the sandwiches sit at room temperature for about 2 to 3 minutes before eating. That little rest makes them easier to bite into without cracking the cereal or freezing your teeth. Then dig in and enjoy that perfect crunch and creamy coldness.
Tips for Success With Copycat Rice Krispies Treats Ice Cream Sandwiches
I’ve learned a few things the hard way so you don’t have to. First up—don’t overheat those marshmallows! Keep the heat low and stir until they’re just melted. If they bubble or get too hot, your bars will turn out rock hard instead of chewy. When it’s time to slice, use a sharp knife for clean cuts. If the ice cream is sticking to the blade, dip it in warm water and wipe it dry between slices. And here’s my favorite trick: let the sandwiches sit out for about 2 minutes before serving. That little rest makes them easy to bite into without shattering the cereal bar. Trust me, it’s worth the wait.
Variations to Try
Once you’ve mastered the classic, the fun really begins. Swap out that vanilla bean ice cream for chocolate or strawberry—it completely changes the vibe. I love drizzling melted chocolate or caramel right on top of the ice cream layer before I add the top cereal piece. It creates these little fudge pockets that melt in your mouth. Another trick? Toss in 1/2 cup of mini chocolate chips into the marshmallow mixture right after you stir in the cereal. They get all melty and speckled through the bars. Go wild—your freezer is your playground.
How to Store and Reheat
I always stash these sandwiches in an airtight container in the freezer—they’ll stay perfect for up to two weeks. No reheating is really needed, but if you want that softer, almost gooey texture, just pop a single sandwich in the microwave for about 10 seconds. It’s my little cheat for when I’m craving that warm-cold combination. Trust me, you’ll be glad you have a stash ready for sudden cravings.
Frequently Asked Questions About Copycat Rice Krispies Treats Ice Cream Sandwiches
I’ve been making these homemade ice cream sandwiches for years, and people always have the same questions. Let me answer the most common ones so you can nail these frozen rice krispies treats on your first try.
Can I use store-brand marshmallows or cereal?
Sure, you can, but I’ll be honest—name brands usually give you a better texture. I’ve found that generic marshmallows can be a little gummy when melted, and off-brand cereal tends to get soggy faster. If you want that perfect, chewy crunch that holds up to the ice cream, stick with the classic stuff. It’s worth it, I promise.
Why are my cereal bars too hard?
This is the number one mistake I see, and I’ve definitely been there myself. You overheated the marshmallows. Seriously, keep the heat on low and stir constantly until they’re just melted. The second they get bubbly or start to brown, you’ve gone too far. Remove the pot from the heat immediately after the marshmallows turn smooth and glossy. Your bars will come out soft and chewy every time.
Can I make these ahead of time?
Absolutely! That’s actually my favorite thing about this recipe. You can assemble the whole sandwich, wrap it tightly in plastic wrap or parchment, and freeze it for up to two weeks. It’s a lifesaver for parties, cookouts, or just having a stash ready for a hot afternoon. Just make sure it’s well-wrapped so the ice cream doesn’t pick up any weird freezer flavors.
The ice cream is oozing out the sides. How do I fix this?
I’ve had this happen more times than I’d like to admit. The easiest fix? Work on a rimmed baking sheet to catch any drips. Also, make sure your ice cream is softened but not melted—you want it spreadable, not runny. If it still gets a little messy, don’t worry. After it’s fully frozen, you can trim the edges with a sharp knife for a perfectly clean, bakery-style look. Nobody will ever know.
Nutritional Information
I always get asked for the exact numbers, but the truth is, nutritional information is an estimate and will vary based on the specific ingredients and brands you use. So I don’t list precise values here—what matters is that these are a fun, homemade treat you can feel good about enjoying in moderation.
Your Turn to Make These Copycat Rice Krispies Treats Ice Cream Sandwiches
Alright, now it’s your turn to get sticky and happy in the kitchen! I can’t wait to hear how these turn out for you. Seriously, drop a comment and rate the recipe—tell me if your family fought over the last one like mine does. And if you’re feeling proud (you should be), snap a photo and share it on social media. Tag me so I can cheer you on. Go on, get to it!
PrintCopycat Rice Krispies Treats Ice Cream Sandwiches 4-Ing Best

This recipe combines the classic taste of Rice Krispies treats with creamy vanilla ice cream for a fun, no-bake dessert. You make crispy cereal bars, then sandwich them with ice cream for a cool, crunchy treat.
- Prep Time: 20 minutes
- Cook Time: 10 minutes
- Total Time: 4 hours 30 minutes
- Yield: 12 sandwiches 1x
- Category: Dessert
- Method: No-Bake
- Cuisine: American
- Diet: Vegetarian
Ingredients
- 3 tablespoons unsalted butter
- 1 package (10 oz) marshmallows
- 6 cups Rice Krispies cereal
- 1 quart vanilla ice cream, softened
Instructions
- Line a 9×13-inch baking dish with parchment paper.
- Melt butter in a large pot over low heat.
- Add marshmallows and stir until completely melted.
- Remove from heat. Stir in Rice Krispies cereal until well coated.
- Press mixture evenly into the prepared dish. Let cool completely.
- Cut the cereal slab in half crosswise to make two equal rectangles.
- Spread softened ice cream evenly over one rectangle.
- Place the second rectangle on top to form a sandwich.
- Freeze for at least 4 hours, until firm.
- Slice into individual sandwiches and serve.
Notes
- Use a sharp knife to cut clean slices.
- Let sandwiches sit at room temperature for 2 minutes before eating for easier biting.
- Store leftovers in an airtight container in the freezer.
Nutrition
- Serving Size: 1 sandwich
- Calories: 320
- Sugar: 28g
- Sodium: 210mg
- Fat: 14g
- Saturated Fat: 8g
- Unsaturated Fat: 5g
- Trans Fat: 0g
- Carbohydrates: 46g
- Fiber: 0g
- Protein: 4g
- Cholesterol: 35mg
