
I still remember the first time I tried making a pumpkin pie from scratch, only to end up with a soggy, frustrating crust that I’d spent way too much time on. That’s when I discovered this Crustless Pumpkin Pie. It’s all the creamy, spiced, comforting flavor you love, without the hassle. After years of tweaking and countless holiday dinners, this simple recipe has become my absolute go-to—so much easier, and it frees you up to enjoy the baking (and the eating).
Why You’ll Love This Crustless Pumpkin Pie
This pie has completely changed my fall baking game, and I think you’re going to feel the same way. Here’s why it’s become such a staple in my kitchen:
- It’s incredibly simple—no rolling, no chilling dough, no fiddly crust to mess with at all.
- You only need a handful of basic pantry ingredients, which means you can whip it up anytime a craving hits.
- The texture is silky, smooth, and perfectly firm—everything you want from a classic pumpkin pie.
- Plus, it’s naturally gluten-free and lower in carbs than a traditional pie, so everyone at the table can enjoy a slice.
Ingredients for Crustless Pumpkin Pie
The best part about this recipe? You probably already have everything sitting in your pantry. Here’s what you’ll need to grab:
- 1 can (15 ounces) pumpkin puree (not pumpkin pie filling!)
- 3/4 cup granulated sugar
- 1/2 teaspoon salt
- 1 teaspoon ground cinnamon
- 1/2 teaspoon ground ginger
- 1/4 teaspoon ground cloves
- 2 large eggs, at room temperature
- 1 can (12 ounces) evaporated milk
Now, I know some of you don’t keep a whole spice rack around, so here’s a shortcut: you can swap the cinnamon, ginger, and cloves for 2 teaspoons of pumpkin pie spice. And one little confession—I’ve been guilty of packing my sugar in, so trust me on this one: measure your dry ingredients level for the best results.
Substitutions for Your Crustless Pumpkin Pie
We all have those moments when we’re missing an ingredient, right? No worries. If you don’t have evaporated milk, mix equal parts half-and-half and milk for a 1:1 swap, or grab a dairy-free evaporated milk alternative. Got a super sweet pumpkin puree on hand? Cut the sugar down by 1/4 cup. And if you’re watching carbs, a cup-for-cup sugar substitute does the trick beautifully. Just be prepared—the texture might be a tiny bit different, but it’s still going to be wonderful.
How to Prepare Crustless Pumpkin Pie
Alright, let’s get baking! This part is seriously foolproof, and I’m going to walk you through every little step so you feel totally confident.
First things first, preheat your oven to 350°F (175°C). While that’s warming up, grab a 9-inch pie dish and give it a good greasing with butter or non-stick spray. I like to use a glass pie dish because it’s easy to see the crust (well, the no-crust!) and check how the edges are doing.
Now, grab a large mixing bowl and add your pumpkin puree, sugar, salt, cinnamon, ginger, and cloves. Give it all a good whisk until everything is nicely combined. The smell at this point is already amazing, honestly.
Next, crack in your eggs one at a time. And I really mean one at a time—beat each egg fully into the pumpkin mixture before adding the next. This keeps your filling nice and smooth. Then, pour in the evaporated milk slowly, stirring gently as you go. You want everything to come together into a silky, pourable custard without over-mixing it.
Once it’s all smooth, pour the filling into your prepared pie dish and pop it in the oven. Bake for 40 to 45 minutes. Here’s the thing to look for: the center should be set but still have a slight jiggle when you gently shake the dish. That jiggle is totally normal, and it’ll firm up as the pie chills, so don’t panic and think it’s underdone!
When it’s ready, pull it out and let it cool on a wire rack for a full hour. Then, transfer it to the fridge and let it chill for at least 2 hours before you even think about slicing into it. Trust me, this step is non-negotiable if you want those clean, beautiful slices.
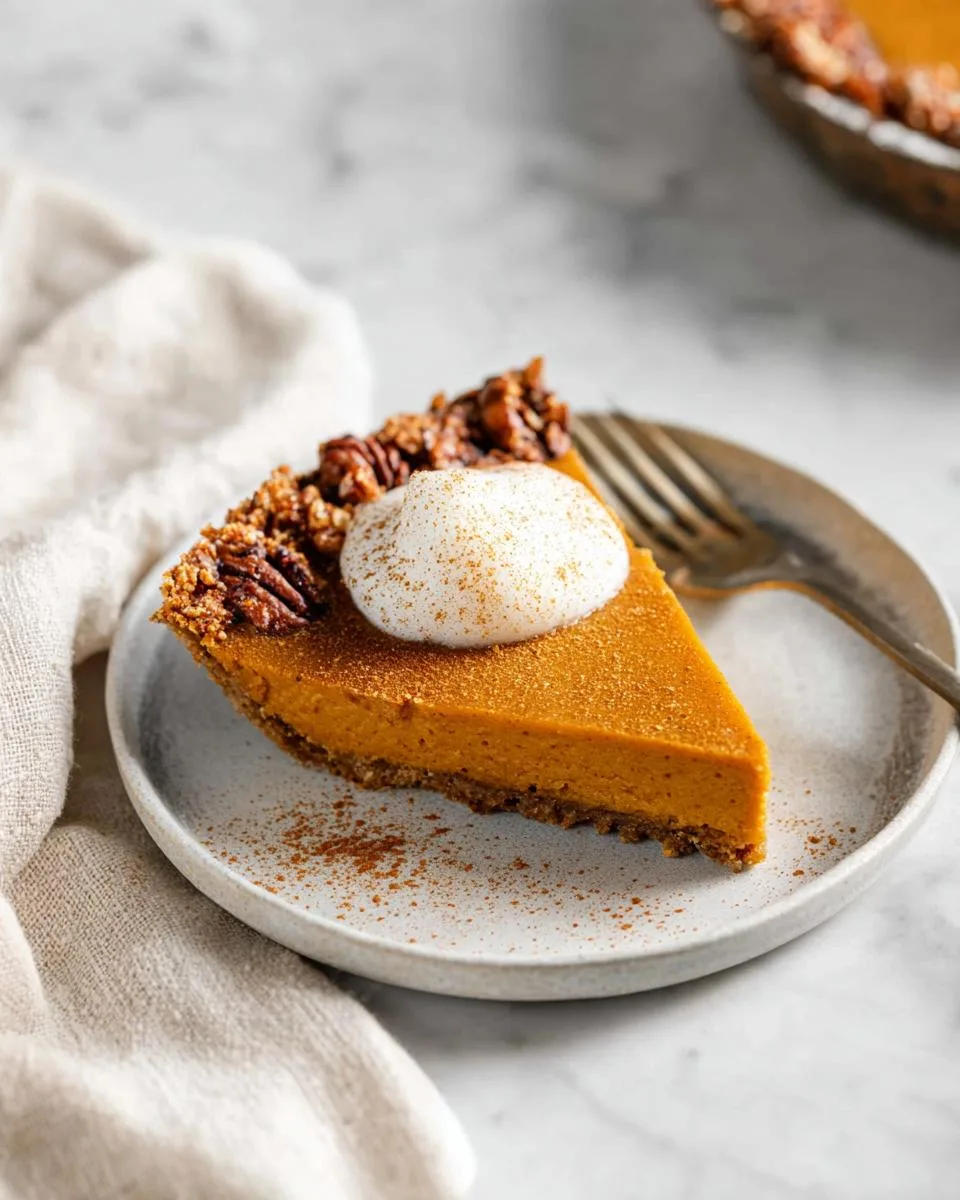
Baking and Cooling Your Crustless Pumpkin Pie
Since the filling is dense and custardy, baking times can be a bit picky. I always check my crustless pumpkin pie at the 35-minute mark, because every oven runs differently. You’ll know it’s done when the edges look completely set and the center is only slightly jiggly, like a set pudding. Cooling gradually on a wire rack is key—it prevents steam from creating condensation that can make the surface soggy. And please, don’t skip that full 2-hour refrigerator time. It’s the secret to getting that firm, perfect custard texture that slices like a dream.
Tips for the Perfect Crustless Pumpkin Pie
Over the years, I’ve picked up a few little tricks that really make a difference with this crustless pumpkin pie. These are the things I wish someone had told me the first time I made it!
- Use room-temperature eggs for a smoother custard. I always set mine out on the counter about 30 minutes before I start mixing—it helps everything blend together without any lumps.
- Don’t over-mix the filling. I know it’s tempting to keep whisking, but too much air creates bubbles that can leave little holes in your finished pie. I whisk just until everything comes together, then I stop.
- Grease your pie dish really well. Since there’s no crust to hold onto, a good coating of butter or non-stick spray makes all the difference when it’s time to slice and serve.
- Use a damp kitchen towel under your mixing bowl to keep it from sliding around. I learned this one after a near-disaster with a spinning bowl—it’s such a simple fix and makes whisking so much easier.
- Serve it chilled or at room temperature. I personally love it straight from the fridge with a dollop of whipped cream, but it’s also lovely after sitting out for about 20 minutes.
- Slice with a clean, dry knife for neat pieces. I run the knife under hot water, wipe it dry, and make one smooth cut. Repeat between slices—trust me, it makes all the difference for those Instagram-worthy servings.
Crustless Pumpkin Pie Variations
One of the best things about this crustless pumpkin pie? It’s so easy to make it your own. Here are a few of my favorite little twists, depending on my mood or what’s in the pantry:
Cozy Vanilla
Add 1 teaspoon of vanilla extract to the filling before baking. That tiny splash adds such warmth and somehow makes the whole pie taste even more homemade.
Brown Sugar Depth
Swap the granulated sugar for the same amount of brown sugar. The molasses in brown sugar gives the pie a deeper, almost caramel-like flavor that’s absolutely gorgeous with the pumpkin.
Nutmeg Kick
Add a pinch of ground nutmeg along with your other spices for an extra classic fall feel. Your whole kitchen will smell incredible while it bakes.
Festive Caramel Swirl
Right before the pie goes in the oven, spoon a few spoonfuls of caramel sauce over the top and give it a gentle swirl with a knife. It turns out looking so pretty, and honestly, it tastes even better.
And hey, since there’s no crust, this pie is naturally gluten-free. Just double-check that your spices and any add-ins are certified gluten-free if that’s something you need to watch for. For more gluten-free baking tips, check out this guide to gluten-free baking.
Serving Your Crustless Pumpkin Pie
Okay, here’s where the fun really begins. I love serving this crustless pumpkin pie with a generous dollop of freshly whipped cream—the way it melts into that silky custard is just pure heaven. Or, if I’m feeling extra indulgent, a scoop of vanilla ice cream on the side does the trick beautifully.
For a little flair, I’ll dust the top with a light sprinkle of cinnamon or nutmeg right before serving. It makes the whole thing look so pretty, and that extra hint of spice is always welcome. This pie is also fantastic with a hot cup of coffee or a mug of spiced cider—honestly, it’s my favorite fall pairing.
And if you’re bringing this to a holiday gathering, present it on a festive plate or cake stand. It’s such a simple touch, but it makes the pie feel extra special, and your guests will be so impressed.
Storing Your Crustless Pumpkin Pie
If you somehow end up with leftovers (which honestly rarely happens in my house!), storing this pie is super easy. Just cover it loosely with plastic wrap or foil and pop it in the fridge—it’ll stay fresh and delicious for up to 4 days.
Want to save it for later? I love doing this before the holidays. Once the pie has completely cooled, wrap it tightly in plastic wrap, then again in aluminum foil, and freeze it for up to 2 months. When you’re ready to enjoy it, just thaw it overnight in the refrigerator. The texture might soften just a tiny bit after freezing, but trust me, it’s still absolutely wonderful—and no one at your table will ever know the difference.
Crustless Pumpkin Pie FAQs
I get asked a lot of questions about this pie, so here are the answers to the ones I hear most often.
Q1. Can I use fresh pumpkin puree instead of canned? Absolutely! If you’re using fresh pumpkin, just make sure you strain it really well to remove any excess water. I like to line a colander with a few layers of cheesecloth and let it drain for a bit—too much moisture is the enemy of a good custard.
Q2. Can I make this crustless pumpkin pie ahead of time? Yes, and honestly, it’s perfect for that! You can prepare it up to 2 days in advance and keep it covered in the fridge. That extra chill time actually helps the custard set even firmer, which is a win when you’re juggling holiday prep.
Q3. Why is my crustless pumpkin pie watery? I’ve been there, and nine times out of ten, it comes down to over-mixing or under-baking. Whisking too vigorously adds air that weakens the structure, so keep your mixing gentle. And if the center hasn’t fully set before chilling, it won’t firm up properly—so give it the full bake time.
Q4. Can I use a different milk? You sure can! Evaporated milk gives this pie its signature creamy texture, so it’s my top pick. But if you’re in a pinch, half-and-half works beautifully. The texture might be slightly less rich, but it’ll still be absolutely delicious.
Nutritional Information
Per slice (based on 8 servings), you’re looking at about 190 calories, 6g fat, 30g carbs, and 5g protein. Keep in mind these are just estimates—your actual numbers might shift a little depending on the brands and exact portions you use.
I’d love to hear how yours turns out! Leave a comment, rate the recipe, and share your photos on social media—it makes my day seeing your creations.
PrintPerfect Crustless Pumpkin Pie in 2 Hours
A simple crustless pumpkin pie that is creamy and spiced. It bakes into a firm custard without a crust.
- Prep Time: 10 minutes
- Cook Time: 45 minutes
- Total Time: 55 minutes
- Yield: 8 servings 1x
- Category: Dessert
- Method: Baking
- Cuisine: American
- Diet: Vegetarian
Ingredients
- 1 15-ounce can pumpkin puree
- 3/4 cup granulated sugar
- 1/2 teaspoon salt
- 1 teaspoon ground cinnamon
- 1/2 teaspoon ground ginger
- 1/4 teaspoon ground cloves
- 2 large eggs
- 1 can 12 ounces evaporated milk
Instructions
- Preheat your oven to 350 degrees Fahrenheit.
- Grease a 9-inch pie dish.
- In a large bowl, whisk together pumpkin puree, sugar, salt, cinnamon, ginger, and cloves.
- Beat in eggs one at a time.
- Slowly stir in evaporated milk until smooth.
- Pour mixture into prepared pie dish.
- Bake for 40 to 45 minutes. Center should be set.
- Cool on a wire rack for 1 hour.
- Refrigerate for at least 2 hours before serving.
Notes
- You can use pumpkin pie spice instead of individual spices.
- Chill time helps the pie set firmly.
- Serve with whipped cream.
Nutrition
- Serving Size: 1 slice
- Calories: 190
- Sugar: 24g
- Sodium: 260mg
- Fat: 6g
- Saturated Fat: 3g
- Unsaturated Fat: 2g
- Trans Fat: 0g
- Carbohydrates: 30g
- Fiber: 3g
- Protein: 5g
- Cholesterol: 55mg
