
I don’t know about you, but the second the leaves start turning, I’m craving all things maple. These Glazed Maple Leaf Cookies have become my absolute fall baking obsession. They’re soft, tender cookies with that deep, real maple flavor—none of that fake stuff—topped with a sweet glaze that sets up just perfectly. I first made a batch for our annual family apple-picking trip, and they disappeared before we even got to the orchard. Honestly, I tested this recipe four times to get the texture just right: soft in the middle, slightly chewy edges, and that glaze that makes them look like they came from a bakery. Trust me, once you try these, you’ll be making them every autumn.
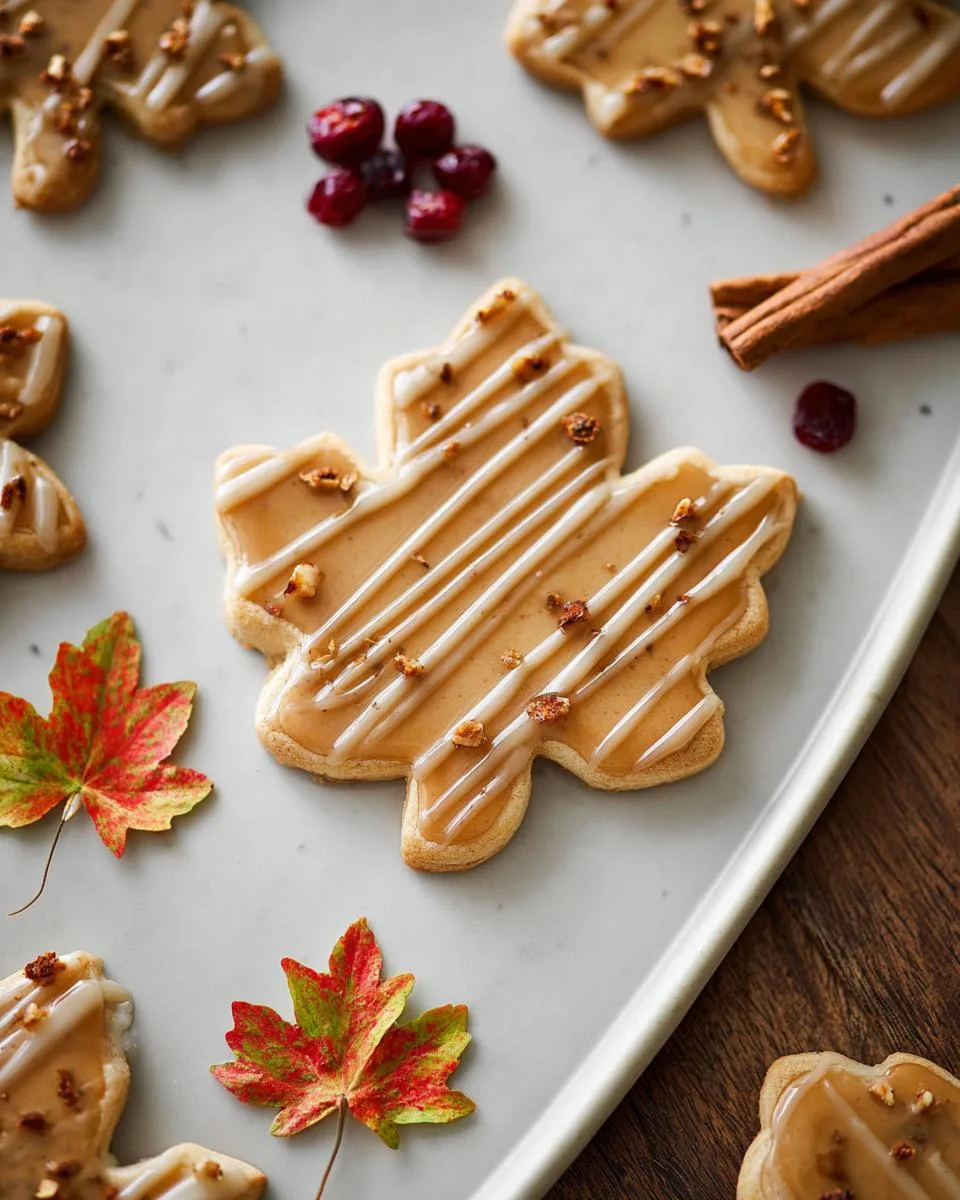
Why You’ll Love These Glazed Maple Leaf Cookies
Let me tell you why these Glazed Maple Leaf Cookies are about to become your go‑to fall treat. First off, they’re *soft* – not cakey, not crunchy, just that perfect tender bite that melts in your mouth. The maple flavor is front and center because we use pure maple syrup, so every cookie tastes like a warm autumn hug. They’re also ridiculously easy to throw together – no chilling, no fancy equipment. And honestly? They’re the star of any gathering. I’ve brought them to potlucks and Thanksgiving dinners, and people always ask for the recipe. You’ll love how simple they are to make and how impressive they look with that glossy glaze.
Ingredients for Glazed Maple Leaf Cookies
Alright, let’s talk about what you’ll need to whip up a batch of these Glazed Maple Leaf Cookies. I’m a big believer that simple ingredients make the best cookies, and this list is all about quality over quantity. You’ll want to grab:
- 1 cup unsalted butter, softened to room temperature – it’s the foundation for that soft, tender crumb.
- 1 cup packed brown sugar (light or dark works – I usually go with dark for a deeper molasses note).
- ½ cup pure maple syrup – please, no imitation stuff here; it makes all the difference.
- 1 large egg, also at room temperature – helps everything blend smoothly.
- 1 teaspoon vanilla extract – just a little boost of warmth.
- 2½ cups all-purpose flour, spooned and leveled – don’t scoop straight from the bag or you’ll get dry cookies.
- 1 teaspoon baking soda and ½ teaspoon salt – for lift and balance.
- ½ teaspoon ground cinnamon and ¼ teaspoon ground nutmeg – that cozy fall spice duo.
And for the glaze (my favorite part): 1 cup powdered sugar, sifted, 3 tablespoons pure maple syrup, and 2 tablespoons milk (whole or 2% works great). That’s it – everything you need to make these Glazed Maple Leaf Cookies shine.
How to Make Glazed Maple Leaf Cookies (My Foolproof Method)
Okay, let’s get into the nitty‑gritty of making these Glazed Maple Leaf Cookies. I’ve broken it down into three simple steps so you don’t miss a thing. First things first – preheat your oven to 350°F and line your baking sheets with parchment paper. Trust me, parchment makes cleanup a breeze and helps the cookies bake evenly. One note: if your dough feels a little sticky after mixing, just pop it in the fridge for 20–30 minutes. It’s totally optional, but it makes scooping easier and keeps the cookies from spreading too much. Now, let’s bake!
Prepare the Glazed Maple Leaf Cookie Dough
Here’s where the magic starts. In a large bowl, beat your softened butter and brown sugar together until they’re light and fluffy – about 2–3 minutes with a hand mixer. You want it to look like whipped honey, just like my grandma used to say. Then add the maple syrup, egg, and vanilla, and mix until everything’s smooth. In a separate bowl, whisk the flour, baking soda, salt, cinnamon, and nutmeg. Gradually add the dry mixture to the wet, stirring just until combined. Don’t overmix! A few flour streaks are fine – overworking the dough will make your Glazed Maple Leaf Cookies tough. Scrape down the sides of the bowl once to make sure everything’s incorporated.
Bake the Maple Leaf Cookies
Now for the fun part. Drop rounded tablespoons of dough onto your prepared baking sheets, spacing them about 2 inches apart – they’ll spread a little. Bake for 10 to 12 minutes, until the edges are just starting to turn golden brown. The centers will still look soft, and that’s exactly what you want. Let the cookies cool on the baking sheet for 5 minutes before transferring them to a wire rack. That little rest on the hot sheet helps them set without overbaking. You’ll end up with perfectly soft Maple Leaf Cookies every time.
Make the Maple Glaze
While the cookies cool, whisk together the sifted powdered sugar, maple syrup, and milk until it’s smooth and glossy. If it’s too thick, add a tiny splash more milk; if it’s too thin, whisk in a little extra powdered sugar. Drizzle the glaze over the completely cooled cookies – I like to use a spoon and let it drip naturally. Let the glaze set for about 15 minutes before serving. That sweet, shiny finish is what makes these Glazed Maple Leaf Cookies absolutely irresistible.
Tips for Perfect Glazed Maple Leaf Cookies
After making these Glazed Maple Leaf Cookies what feels like a million times, I’ve picked up a few tricks that make all the difference. First and most important: use pure maple syrup, not the pancake stuff. I learned that one the hard way when my first batch came out tasting like artificial sugar water – yuck! If your dough feels sticky after mixing, don’t panic – just chill it for 30 minutes. That little rest makes scooping so much easier and prevents the cookies from turning into flat puddles. Always line your pans with parchment paper; it’s non‑negotiable for even baking and zero sticking. And please, please don’t overbake. Pull them out when the edges are just golden, even if the centers look soft. They’ll continue setting on the hot sheet, and you’ll get that perfectly tender texture that makes these Glazed Maple Leaf Cookies so special.
Variations for Glazed Maple Leaf Cookies
Once you’ve mastered the basic recipe, it’s so fun to play around with these Glazed Maple Leaf Cookies. My favorite swap is folding in ½ cup of chopped pecans or walnuts right at the end – the crunch against that soft cookie is *chef’s kiss*. If you’re a maple fanatic (like me!), add ¼ teaspoon of maple extract along with the vanilla for an even punchier flavor. And for holiday baking? Roll the dough out about ¼-inch thick and use a maple leaf cookie cutter. Just keep an eye on the oven – shaped cookies usually need a minute or two less baking time. Each twist still gives you those amazing Glazed Maple Leaf Cookies, just with your own personal spin.
Serving Suggestions for Glazed Maple Leaf Cookies
These Glazed Maple Leaf Cookies are perfect for so many cozy occasions. I love piling them on a little fall-themed platter next to a steaming mug of hot apple cider or coffee – it’s pure autumn bliss. For a fun dessert, try sandwiching a scoop of vanilla ice cream between two cookies for an instant maple ice cream sandwich. They’re also a total showstopper on a Thanksgiving dessert table, sitting pretty next to the pies. Trust me, set them out and watch them vanish!
How to Store Glazed Maple Leaf Cookies
So you’ve made a big batch of these Glazed Maple Leaf Cookies – good call! To keep them soft and delicious, store them in an airtight container at room temperature. I like to layer them with parchment paper between each row so the glaze doesn’t stick to the cookie above. They’ll stay perfect for up to 5 days (if they last that long in your house). If you want to save some for later, freeze the cookies before glazing – they’ll keep for up to 3 months. Then just thaw them on the counter, whip up a fresh batch of glaze, and drizzle away. That way you’ve got Glazed Maple Leaf Cookies ready whenever a craving hits!
Frequently Asked Questions about Glazed Maple Leaf Cookies
I get asked about these Glazed Maple Leaf Cookies all the time, so I figured I’d answer the most common questions right here. Whether you’re a first-timer or a seasoned baker, these tips should help you nail ’em every single time.
Can I freeze Glazed Maple Leaf Cookies?
Absolutely! Freeze the unglazed cookies in an airtight container for up to 3 months. When you’re ready for them, just thaw on the counter, whip up a fresh batch of glaze, and drizzle away. That way you’ve got Glazed Maple Leaf Cookies ready whenever a craving hits!
Why are my Glazed Maple Leaf Cookies dry?
Oh, that’s usually from overbaking or too much flour. Pull them out of the oven when the edges are just golden – they keep setting on the hot sheet. And make sure you’re spooning the flour into your measuring cup, then leveling it off. Scooping straight from the bag packs it down and dries out your soft cookies every time.
Can I use pancake syrup instead of maple syrup?
Please don’t! Pancake syrup is mostly corn syrup and artificial flavoring, so your maple cookies will taste fake and the texture might get weird. Pure maple syrup gives you that deep, real flavor that makes these cookies so special. Trust me on this one – I’ve been down that road, and it’s not worth it.
How do I get the glaze to set?
The trick is making sure your cookies are completely cool before you glaze them – any warmth will make the glaze run right off. If your glaze is too thin and won’t set, just whisk in a bit more powdered sugar until it’s thick and glossy. It should drizzle nicely but hold its shape once it hits the cookie.
Nutritional Information for Glazed Maple Leaf Cookies
I know we’re all about that sweet, maple-y goodness, but here’s the breakdown in case you’re keeping track. For one cookie, you’re looking at about 180 calories, 8 grams of fat, 26 grams of carbs, 2 grams of protein, and 18 grams of sugar. Keep in mind these numbers are just estimates—they can shift a bit depending on the brands you use or if you sneak in extra nuts (which I fully support). So enjoy every bite without stressing too much!
Alright, now it’s your turn! I’d love to hear how your Glazed Maple Leaf Cookies turned out. Did you stick with the classic recipe or try one of those variations? Drop a comment below and let me know—did you add nuts? Did the glaze set just right? And hey, if you snap a photo of your batch, tag me on social media so I can cheer you on. Your feedback and photos make my day, and it helps other bakers too. Happy baking!
PrintGlazed Maple Leaf Cookies: 3 Steps to Perfect Softness

Soft maple cookies topped with a sweet glaze. Perfect for fall baking.
- Prep Time: 20 minutes
- Cook Time: 12 minutes
- Total Time: 32 minutes
- Yield: 24 cookies 1x
- Category: Dessert
- Method: Baking
- Cuisine: American
- Diet: Vegetarian
Ingredients
- 1 cup unsalted butter, softened
- 1 cup packed brown sugar
- 1/2 cup maple syrup
- 1 large egg
- 1 teaspoon vanilla extract
- 2 1/2 cups all-purpose flour
- 1 teaspoon baking soda
- 1/2 teaspoon salt
- 1/2 teaspoon ground cinnamon
- 1/4 teaspoon ground nutmeg
- For the glaze: 1 1/2 cups powdered sugar
- 3 tablespoons maple syrup
- 2 tablespoons milk
Instructions
- Preheat your oven to 350°F (175°C). Line baking sheets with parchment paper.
- In a large bowl, beat butter and brown sugar until light and fluffy. Add maple syrup, egg, and vanilla. Mix well.
- In a separate bowl, whisk flour, baking soda, salt, cinnamon, and nutmeg. Gradually add to butter mixture. Stir until just combined.
- Drop rounded tablespoons of dough onto prepared baking sheets, spacing 2 inches apart.
- Bake for 10 to 12 minutes, until edges are golden. Cool on sheets for 5 minutes, then transfer to wire racks.
- For the glaze: whisk powdered sugar, maple syrup, and milk until smooth. Drizzle over cooled cookies.
Notes
- Use pure maple syrup for best flavor.
- Store cookies in an airtight container for up to 5 days.
Nutrition
- Serving Size: 1 cookie
- Calories: 180
- Sugar: 18g
- Sodium: 95mg
- Fat: 8g
- Saturated Fat: 5g
- Unsaturated Fat: 2g
- Trans Fat: 0g
- Carbohydrates: 26g
- Fiber: 0g
- Protein: 2g
- Cholesterol: 25mg
