
You know that feeling when you’re craving that perfect, cinnamon-spiked applesauce, but the thought of standing over a hot stove stirring for an hour just makes you want to order takeout instead? I’ve been there more times than I can count. That’s exactly why this Instant Pot Applesauce has become my absolute go-to. It’s the ultimate hands-off hack—just five simple ingredients, eight minutes of pressure cooking, and you get the most incredible, cozy applesauce without any of the work. I seriously make a batch of this every single week during apple season, and I’ve tested it so many times that I can promise you it works perfectly every time. Trust me, your kitchen is about to smell amazing.
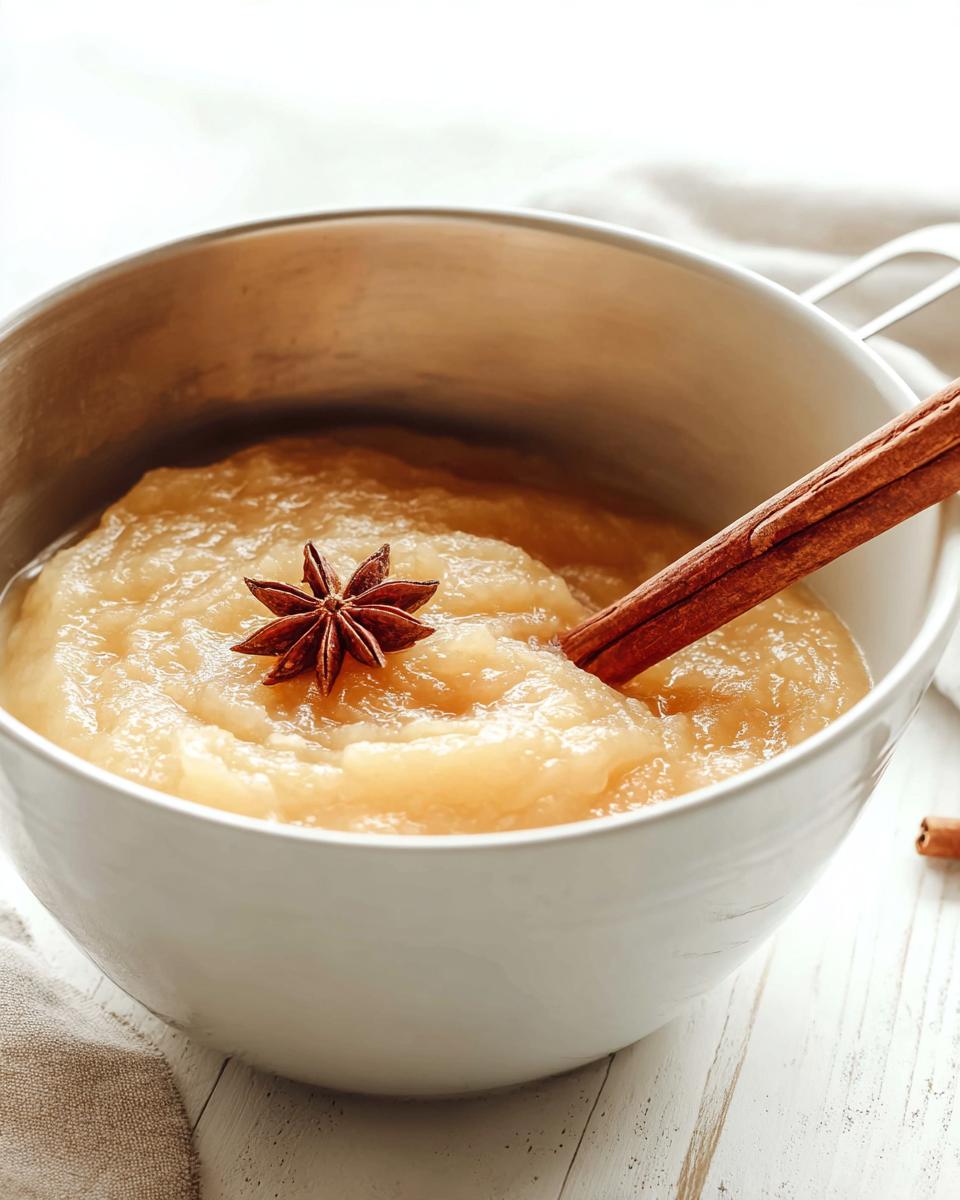
Why You’ll Love This Instant Pot Applesauce
Let me tell you why this recipe has completely won me over—and I think you’ll feel the same way.
- No stirring over the stove. You just toss everything in the pot, close the lid, and walk away. No babysitting, no splatters, no tired arms.
- Quick clean-up. One pot, that’s it. No sticky saucepan to scrub, no burnt-on mess. Your future self will thank you.
- You control the sweetness and spice. Want it tart? Skip the sweetener. Craving extra cinnamon? Go wild. It’s totally up to you.
- Your house will smell like cinnamon heaven. Seriously, the aroma that fills your kitchen while this cooks is pure comfort. It’s like a warm hug for your senses.
- It’s cheaper than store-bought. A bag of apples costs way less than those fancy jars, and you get way more sauce. Your wallet will notice the difference.
Ingredients for Instant Pot Applesauce
Here’s what you’ll need for this super simple applesauce. The ingredient list is short and sweet, which is exactly how I like it.
- 4 pounds of apples – peeled, cored, and chopped into 1-inch chunks. I love using a mix of sweet apples like Fuji or Gala and tart ones like Granny Smith. It gives the sauce such a nice, balanced flavor.
- 1/2 cup water – just enough to get the pressure cooking started without drowning the apples.
- 1 tablespoon lemon juice – a little splash to brighten things up and keep the apples from browning.
- 1 teaspoon ground cinnamon – the star of the show, in my opinion. That warm, cozy spice is what makes it feel like fall in a bowl.
- 2 to 3 tablespoons maple syrup or granulated sugar – totally optional. I only add it if my apples aren’t sweet enough. Taste first, then decide.
Peeling and chopping the apples takes about 10 minutes, and 4 pounds of apples will give you roughly 4 cups of finished sauce. Not bad for such little effort, right?
Equipment Needed for Instant Pot Applesauce
One of the best things about this recipe is how little gear you actually need. Here’s what I grab from my kitchen drawers:
- A 6-quart Instant Pot (or any electric pressure cooker) – this is your workhorse.
- Measuring cups and spoons – for the water, lemon juice, and cinnamon.
- A potato masher or immersion blender – depending on whether you like your applesauce chunky or silky smooth.
- Airtight containers – for stashing your finished sauce in the fridge or freezer.
- A wooden spoon and a ladle – not strictly required, but they make stirring and serving a whole lot easier. I always keep mine handy.
How to Make Instant Pot Applesauce
Alright, let’s get cooking! I promise this is the easiest applesauce you’ll ever make. Here’s exactly how I do it, step by step.
- Prep your apples. Peel, core, and chop those apples into roughly 1-inch chunks. Don’t stress about making them perfect—they’re going to get mushy anyway!
- Combine everything in the pot. Toss the chopped apples, water, lemon juice, cinnamon, and sweetener (if you’re using it) right into your Instant Pot. Give it a quick stir to coat everything.
- Lock the lid and seal the valve. This is crucial—make sure the steam release valve is turned to Sealing. If you leave it on Venting, you’ll end up with a mess and undercooked apples. Trust me, I’ve learned that one the hard way.
- Cook on high pressure. Hit the Manual or Pressure Cook button and set the timer for 8 minutes. The pot will take about 8 to 10 minutes to come to pressure, so the total cook time is closer to 18 minutes. Just let it do its thing.
- Let the pressure release naturally. When the timer beeps, don’t touch that valve! Let the pressure release naturally for 10 minutes. This extra time lets the apples get perfectly tender. After 10 minutes, carefully switch the valve to Venting to release any remaining steam. Stand back—that steam is hot!
- Open the lid away from your face. Seriously, point that lid away from you. The steam can give you a nasty burn.
- Mash or blend to your liking. For chunky applesauce, grab a fork or potato masher and give it a few good presses. For silky smooth sauce, use an immersion blender right in the pot. I usually go somewhere in between—a few mashes, then a quick buzz with the blender.
- Let it cool. Give the sauce a chance to cool down before you dig in or store it. It’ll thicken up a bit as it cools, so don’t worry if it looks a little thin at first.
That’s it! From start to finish, you’re looking at about 28 minutes—10 minutes of prep, 8 minutes of pressure cooking, and 10 minutes of natural release. Way faster than standing over a stove, right?
Instant Pot Applesauce Cooking Time
Here’s a quick breakdown of the timing so you know exactly what to expect:
- Prep time: 10 minutes (peeling and chopping)
- Pressure cooking time: 8 minutes
- Natural release time: 10 minutes
- Time to come to pressure: About 8 to 10 minutes (this happens automatically)
So from the moment you start prepping to the moment you’re mashing, it’s about 28 minutes total. Easy peasy!
Tips for Perfect Instant Pot Applesauce
Over the many batches I’ve made, I’ve picked up a few tricks that really make a difference. Here’s what I’ve learned so you can nail it on your first try.
- Use a mix of sweet and tart apples. This is my number one tip. Sweet apples like Fuji or Gala give you natural sugar, while tart ones like Granny Smith add structure and a little tang. The balance is just perfect.
- Don’t add extra water. I know it’s tempting, but trust me—the apples release plenty of juice as they cook. Stick with the 1/2 cup. Any more and you’ll end up with watery sauce.
- Taste before you sweeten. After cooking, give it a taste. You might find your apples were sweet enough on their own. I only add maple syrup or sugar if the sauce tastes a little flat.
- Remember, it thickens as it cools. Don’t panic if your sauce looks thin right out of the pot. As it sits, it’ll thicken up nicely. Give it time!
- For ultra-smooth sauce, blend in batches. If you’re using an immersion blender, work in small batches to get that silky texture without overworking the motor. For chunky sauce, just mash a few times with a potato masher and call it done.
These little tweaks will take your applesauce from good to absolutely perfect.
Pick the Right Apples for Instant Pot Applesauce
Honestly, the apples you choose make all the difference. I swear by a mix of Fuji, Gala, Honeycrisp, and Granny Smith. The sweet ones bring natural sugar, and the tart ones keep the sauce from being one-note. One thing I’d avoid? Red Delicious. They’re just too mealy and turn into mush without any real flavor. Stick with firm, crisp apples and you’ll be golden.
Instant Pot Applesauce Variations
One of the best things about this recipe is how easy it is to switch things up. Once you’ve got the basic method down, you can play around all you want. Here are some of my favorite ways to change the flavor:
- Vanilla bean dreams: Stir in 1 teaspoon of vanilla extract right after you open the lid. The heat will bloom the flavor beautifully, and it won’t get cooked off during pressure cooking.
- Spice swap: Instead of cinnamon, try 1/2 teaspoon of ground nutmeg or ginger. Both give the applesauce a totally different, cozy vibe. I love ginger for a little zing.
- Pear-perfect blend: Swap half the apples for ripe pears. The pears break down even faster and add a lovely, delicate sweetness. It’s like a whole new sauce.
- Sugar-free version: Just skip the maple syrup or sugar entirely. If your apples are sweet enough—and they often are—you won’t miss it at all.
- Berry burst: After pressure cooking, fold in a handful of mashed blueberries or strawberries. It turns the sauce a gorgeous color and adds a fresh, fruity pop.
A quick note: any add-ins like vanilla or berries should go in after cooking. The pressure cooker can dull their flavor, so adding them at the end keeps everything bright and bold.
Fun Flavor Twists for Instant Pot Applesauce
If you want to get creative, try one of these combos. Just start with the base recipe and stir in your chosen twist after cooking:
- Vanilla bean and cinnamon: A classic, warm, and comforting duo.
- Ginger and nutmeg: Spicy and aromatic, perfect for fall.
- Mixed berry: A handful of mashed blueberries and strawberries for a fruity, colorful sauce.
Storage and Serving Suggestions
Once you’ve made this delicious applesauce, you’ll want to know how to keep it fresh and all the fun ways to enjoy it. Let me walk you through both.
For storing: Let your applesauce cool completely, then transfer it to airtight containers. It’ll keep in the fridge for up to 1 week. If you want to save some for later, you can freeze it for up to 3 months—just use freezer-safe jars or bags and leave about half an inch of headroom for expansion. When you’re ready to use it, thaw it overnight in the refrigerator. Easy!
For serving: This is the fun part. You can enjoy it warm, cold, or right at room temperature. I love spooning it over a bowl of oatmeal or yogurt for breakfast, or spreading it on pancakes instead of syrup. It’s also amazing baked into muffins or quick breads for extra moisture and flavor. Honestly, you’ll find yourself reaching for it all the time.
Storing Your Homemade Applesauce
Here’s the quick version: keep it in the fridge for up to a week, or freeze it for up to three months. Just remember to always leave a little headroom in your freezer containers so they don’t burst. Simple as that!
Nutritional Information
Here’s the estimated nutrition breakdown for a 1/2-cup serving of this applesauce, just so you have an idea of what you’re working with. Keep in mind, these numbers are rough estimates and can change depending on the exact apples you use and whether you add sweetener.
- Calories: 100
- Total Fat: 0g
- Saturated Fat: 0g
- Trans Fat: 0g
- Cholesterol: 0mg
- Sodium: 0mg
- Total Carbohydrates: 26g
- Dietary Fiber: 4g
- Total Sugars: 20g
- Protein: 0g
I always say, take these numbers with a grain of salt—they’re just a guide, not a medical fact. Your actual values will vary, so don’t stress over them too much. Enjoy your applesauce!
FAQ: Instant Pot Applesauce Questions Answered
I get asked a lot of questions about this recipe, so let me clear up the most common ones for you. Here’s everything you need to know about making the best homemade applesauce in your pressure cooker.
Can I leave the peels on the apples?
Absolutely, you can! If you’re going for a rustic, textured homemade applesauce, just give your apples a really good wash first and blend everything well after cooking. The peels will break down a bit and add fiber. But if you want that silky smooth, classic easy applesauce, I’d peel them. It’s totally up to you.
Why did my applesauce turn out watery?
Oh, I’ve been there! This usually happens if you added extra water or if your apples were just super juicy. No worries, though—it’s an easy fix. Just pour the sauce into a pan and let it simmer on low for a few minutes, stirring occasionally. The extra liquid will cook off, and you’ll be back to perfect pressure cooker applesauce in no time.
Can I serve this to a baby?
Yes, definitely! This is a fantastic homemade applesauce for little ones. Just skip the maple syrup or sugar entirely—your apples are sweet enough on their own. Then blend it until it’s completely smooth, and you’ve got a perfect, natural baby food. My niece loved it!
How long can I keep it?
Your easy applesauce will stay fresh in the fridge for up to 1 week in an airtight container. For longer storage, you can freeze it for up to 3 months. Just leave a little headroom in your freezer jars or bags so they don’t burst. Thaw it overnight in the fridge, and you’re good to go.
I hope that answers all your questions! If you try this recipe, I’d love to hear how it turned out. Leave a comment below, give it a rating, or share it with your friends on social media. Happy cooking!
Print8-Minute Instant Pot Applesauce for Fall Perfection

Make homemade applesauce in your Instant Pot with minimal effort. This recipe uses fresh apples, cinnamon, and a touch of sweetener.
- Prep Time: 10 minutes
- Cook Time: 8 minutes
- Total Time: 28 minutes
- Yield: 4 cups 1x
- Category: Sauce
- Method: Pressure Cooking
- Cuisine: American
- Diet: Vegan
Ingredients
- 4 pounds apples (mix of sweet and tart), peeled, cored, and chopped
- 1/2 cup water
- 1 tablespoon lemon juice
- 1 teaspoon ground cinnamon
- 2 to 3 tablespoons maple syrup or sugar (optional)
Instructions
- Place all ingredients in the Instant Pot. Stir to combine.
- Close the lid and set the valve to sealing. Cook on high pressure for 8 minutes.
- Allow the pressure to release naturally for 10 minutes, then quick release any remaining steam.
- Use a fork or potato masher to mash the apples to your desired consistency. For smoother applesauce, use an immersion blender.
- Let cool before serving or storing in the refrigerator.
Notes
- Store leftovers in an airtight container in the fridge for up to 1 week.
- You can freeze applesauce for up to 3 months.
Nutrition
- Serving Size: 1/2 cup
- Calories: 100
- Sugar: 20g
- Sodium: 0mg
- Fat: 0g
- Saturated Fat: 0g
- Unsaturated Fat: 0g
- Trans Fat: 0g
- Carbohydrates: 26g
- Fiber: 4g
- Protein: 0g
- Cholesterol: 0mg
