
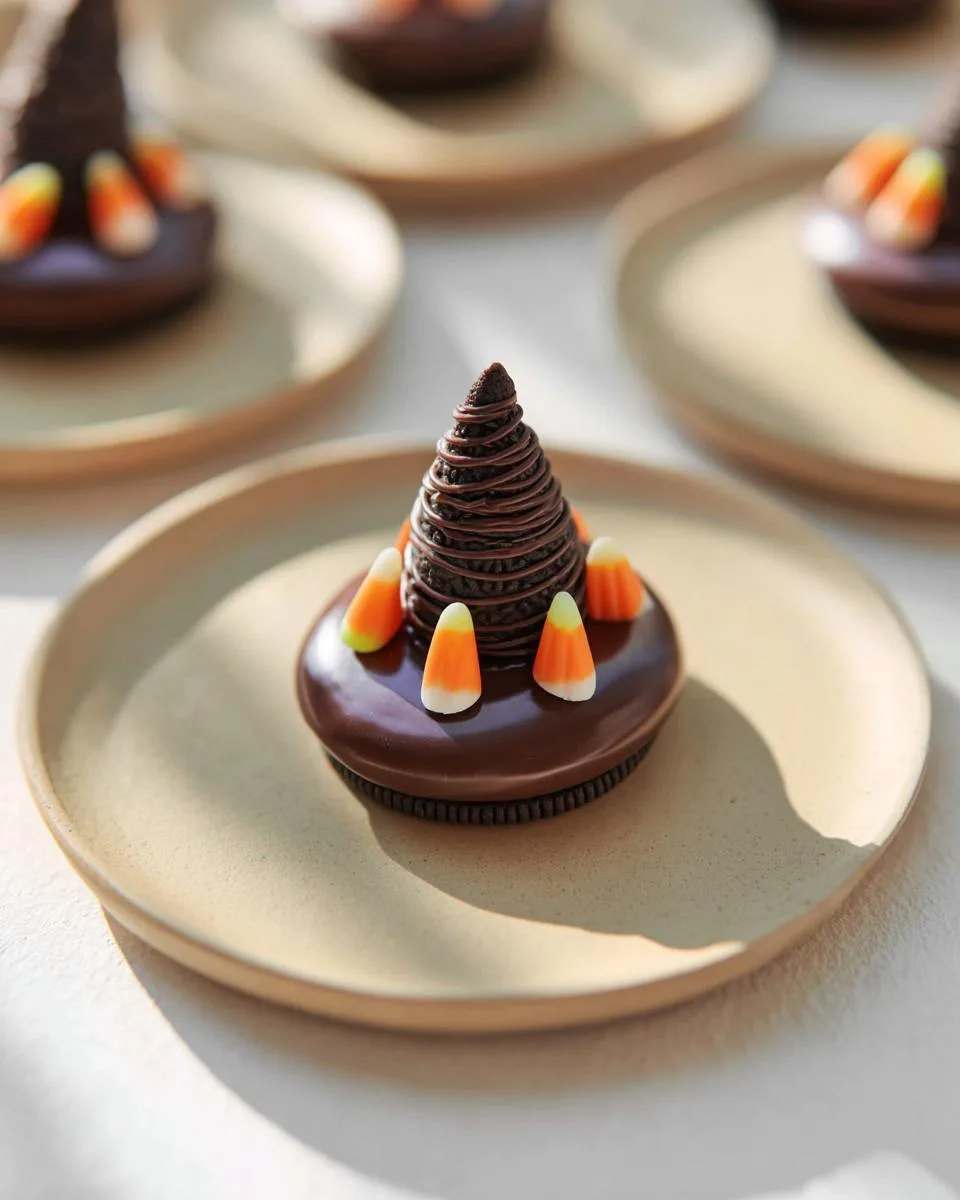
These Oreo Witch Hat Cookies are my favorite last-minute Halloween trick—and I mean that in the best way. I remember making them with my niece when she was five; she kept giggling as we pressed candy corn into the chocolate, calling each one a “magic hat.” The best part? No oven, no fuss, just three ingredients and ten minutes of prep. Perfect for parties, classroom treats, or a spooky afternoon snack. Trust me, you’ll be reaching for another “hat” before the chocolate even sets.
Why You’ll Love These Oreo Witch Hat Cookies
I’m telling you, these little hats are a Halloween game-changer. Here’s why they’re my go-to:
- No-bake magic: Zero oven time—just melt, dip, and chill.
- 10-minute prep: Seriously, you can whip these up between handing out candy.
- Only 3 ingredients: Oreos, candy corn, chocolate—that’s it!
- Perfect for parties: They look spooky-cute and disappear fast.
Ingredients for Oreo Witch Hat Cookies
- 24 Oreo cookies (regular size, not Double Stuf)
- 24 candy corn pieces (standard size)
- 1 cup semi-sweet chocolate chips (I recommend Ghirardelli or Guittard)
- 1 tablespoon coconut oil (unrefined, melted)
How to Make Oreo Witch Hat Cookies
Okay, let me walk you through these. The first time I tried making them, I got a little cocky—I thought, “How hard can it be?” Well, let’s just say my candy corn was sliding off sideways because I took too long. So here’s exactly what to do so your hats stand tall and proud.
Step 1 – Melt the Chocolate
Pop your chocolate chips and coconut oil into a microwave-safe bowl. I use a deep one—trust me, it makes dipping way easier. Microwave in 30-second bursts, stirring each time, until it’s smooth and glossy. Don’t rush this! If you overheat it, the chocolate will seize up and turn grainy. I learned that the hard way and had to start over.
Step 2 – Dip and Place the Cookies
Grab an Oreo (regular size, not the thick ones) and dip just one side into the melted chocolate. I use my fingers for this—it’s faster and I can feel when the coating is even. Place each cookie chocolate-side up on a parchment-lined baking sheet. Leave a little space between them so they don’t stick together. My niece likes to line them up like tiny soldiers.
Step 3 – Add the Candy Corn Peak
Now the fun part. Press a candy corn piece gently into the center of the wet chocolate, pointed side up. Don’t push too hard or it’ll sink into the Oreo. Work quickly here—the chocolate sets fast. If it starts to harden, just pop the bowl back in the microwave for 10 seconds. I keep my candy corn within arm’s reach so I’m not scrambling.
Step 4 – Let the Chocolate Set
Slide the baking sheet into the fridge for about 15 minutes. Do not skip this step! The chocolate needs to fully harden or your hats will be a mess. On humid days, I let them chill a bit longer. You’ll know they’re ready when the chocolate looks matte and feels firm when you touch the edge of a cookie. Patience pays off here, I promise.
Tips for Perfect Oreo Witch Hat Cookies
After a few batches (and some lopsided hats), I’ve learned a couple things that make all the difference. Here’s what I wish I’d known from the start.
Work Quickly but Carefully
That melted chocolate is in a hurry—it starts setting the second you pull it out of the microwave. So before you even start, lay out all your Oreos and candy corn where you can grab them easily. I keep a damp paper towel nearby to wipe my fingers between cookies, because sticky chocolate on my hands means I’m smudging every hat. Trust me, a little prep saves a lot of frustration.
Use the Right Chocolate
Semi-sweet or dark chocolate is your best bet here. Milk chocolate is sweeter, sure, but it stays softer and your hats might not hold their shape as well. If you want to switch it up, white chocolate works great for a different look—just add a drop of orange food coloring for a fun twist. Whatever you choose, skip the cheap stuff; quality chips melt smoother and set firmer.
Variations for Oreo Witch Hat Cookies
Once you’ve mastered the basic hats, you can get creative. I love swapping the dark chocolate for white chocolate—dip the cookies, then sprinkle orange jimmies on top before the chocolate sets. It gives them a festive, candy-corn look. Another idea: pipe a tiny band of frosting around the base of the candy corn peak. And if you’re out of candy corn, try a mini chocolate cone instead—just press it in gently. All these options stay vegetarian and kid-friendly, so go wild!
FAQ About Oreo Witch Hat Cookies
I get asked about these little hats all the time, so here are the answers to the most common questions. I’ve learned a few things the hard way, so listen up!
Can I Use Double Stuf Oreos?
Sure, but they’re thicker. The chocolate may not cover the cream layer fully, and the candy corn can look a bit wobbly. I’d stick with regular Oreos, or use a smaller candy corn piece if you’re set on Double Stuf.
How Should I Store These Cookies?
Keep them in an airtight container at room temperature for up to a week. Don’t refrigerate after the chocolate sets—they’ll get soft. And yes, you can freeze them! Layer with parchment in a freezer-safe container for up to three months.
Can I Make Them Gluten-Free?
Absolutely. Grab a gluten-free chocolate sandwich cookie (like Glutino or Kinnikinnick) and follow the same steps. Just double-check the labels to be safe.
Storage and Reheating Tips
Once your Oreo witch hat cookies are set, pop them in an airtight container—layered with parchment so they don’t stick together. Keep them at room temperature, not the fridge (that’ll make the chocolate go soft and weird). And reheating? Don’t bother. These are meant to be eaten cold and crisp. If the chocolate gets a little dull, just give ’em a quick 10-second blast in the microwave? Nope, I’ve tried—it’s a mess. Trust me, fresh is best.
Nutritional Information
Here’s the breakdown for one cookie. Just remember, these are estimates—they’ll change a bit depending on which brands you grab. Mine came out pretty close to the numbers below, but don’t stress over it too much. It’s Halloween, after all!
- Calories: 120
- Sugar: 12g
- Sodium: 85mg
- Fat: 6g
- Saturated Fat: 3g
- Carbohydrates: 16g
- Fiber: 1g
- Protein: 1g
Your Turn to Try These Oreo Witch Hat Cookies
Alright, now it’s your turn! I’d love to hear how your Oreo witch hat cookies turn out. Snap a photo and tag me—I’m always hunting for Halloween inspiration. And tell me, what’s your go-to spooky treat? Drop a comment below; I’m dying to know. Happy haunting!
PrintOreo Witch Hat Cookies 3 Magic No-Bake Treats

These Oreo witch hat cookies are a fun and easy Halloween treat. You use chocolate cookies and candy corn to create a spooky hat shape.
- Prep Time: 10 minutes
- Cook Time: 0 minutes
- Total Time: 25 minutes
- Yield: 24 cookies 1x
- Category: Dessert
- Method: No-bake
- Cuisine: American
- Diet: Vegetarian
Ingredients
- 24 Oreo cookies
- 24 candy corn pieces
- 1 cup semi-sweet chocolate chips
- 1 tablespoon coconut oil
Instructions
- Melt chocolate chips and coconut oil together in a microwave-safe bowl. Stir until smooth.
- Dip each Oreo cookie into the melted chocolate, coating one side completely.
- Place the coated cookies on a parchment-lined baking sheet.
- Press a candy corn piece into the center of each cookie to form the hat’s peak.
- Refrigerate for 15 minutes until the chocolate sets.
Notes
- Use white chocolate for a different look.
- Store cookies in an airtight container.
- Work quickly so the chocolate does not harden before adding the candy corn.
Nutrition
- Serving Size: 1 cookie
- Calories: 120
- Sugar: 12 g
- Sodium: 85 mg
- Fat: 6 g
- Saturated Fat: 3 g
- Unsaturated Fat: 2.5 g
- Trans Fat: 0 g
- Carbohydrates: 16 g
- Fiber: 1 g
- Protein: 1 g
- Cholesterol: 0 mg
