
There’s just something magical about Halloween baking, isn’t there? The air gets crisp, the stores fill with candy corn, and suddenly I’m itching to get flour all over my kitchen counters. These Soft Halloween sugar cookies have become our family’s go-to treat every October, and honestly, I don’t think I’ve ever had a batch last more than two days around here!
The first time I made these, my youngest was barely tall enough to reach the counter. Now she’s the one reminding me when it’s time to start baking for the season. What I love most about this recipe is how the cookies come out perfectly tender and soft, yet they still hold their shape beautifully when you’re decorating them. No flat, sad-looking ghosts here! Whether you’re planning a spooky party or just want something fun to do with the kids on a rainy fall afternoon, these cookies are pure Halloween happiness in every bite.
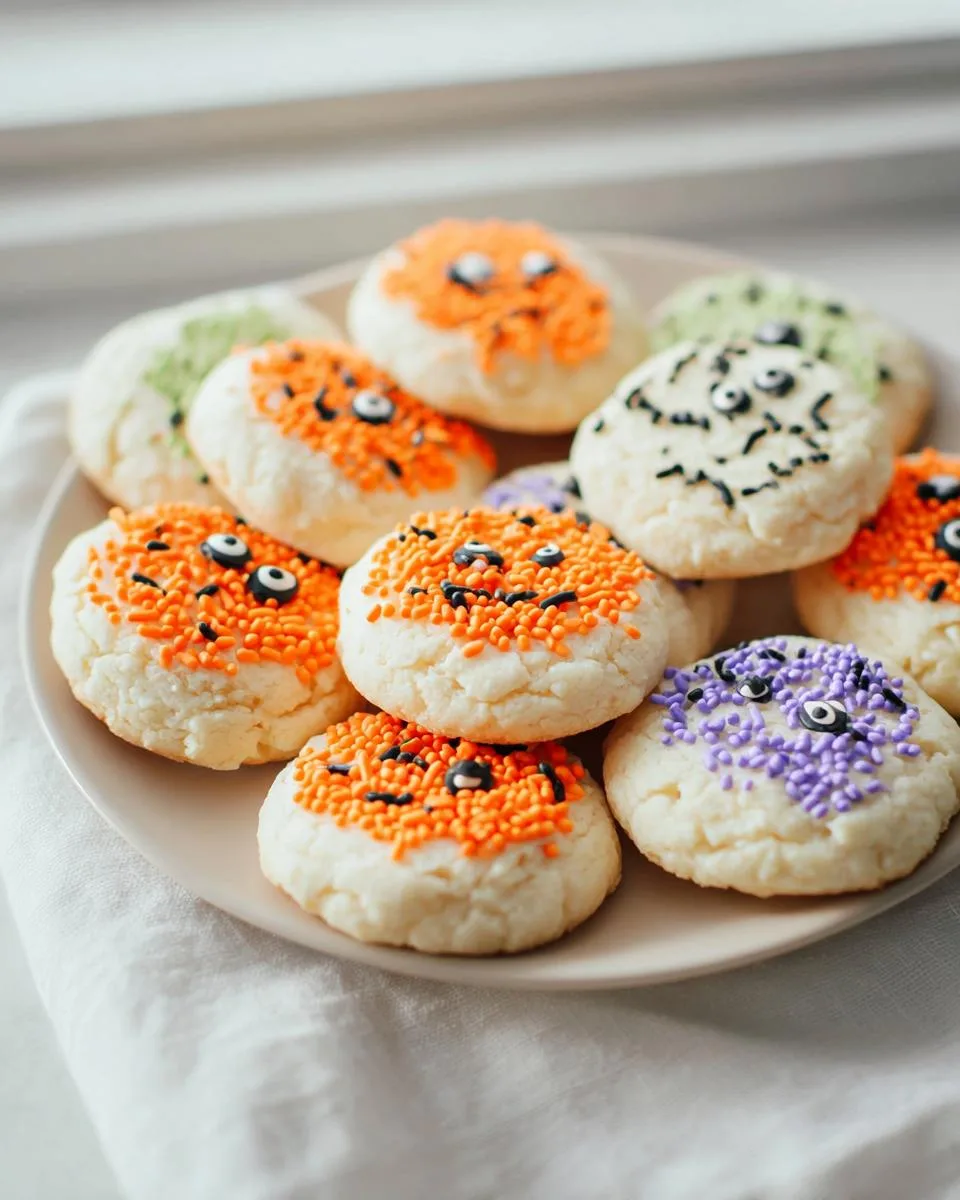
Why You'll Love These Soft Halloween Sugar Cookies
Trust me, once you try these, you'll never go back to store-bought Halloween cookies. They're everything you want in a holiday treat—and nothing you don't.
- Soft and tender. The texture is pillow-soft but sturdy enough for all your spooky decorating.
- Easy to decorate. They hold their shape like champs, so your ghosts won’t turn into blobs.
- Perfect for parties. Whip up a batch for school events, potlucks, or your Halloween bash.
- Kid-friendly. Little hands love rolling the dough and adding sprinkles—no sharp tools needed.
- No chilling required. Seriously! Mix, roll, bake. You can have warm cookies in under 30 minutes.
Ingredients for Soft Halloween Sugar Cookies
These Soft Halloween sugar cookies start with simple staples, but a few key choices matter. Grab unsalted butter, softened to room temperature, 1 large egg, white sugar, all-purpose flour, baking soda, baking powder, vanilla extract, and milk (any kind works).
Now for the secret weapon: almond extract. Just half a teaspoon adds incredible depth. If you’re coloring the dough, use gel food coloring—it gives vibrant shades without changing the texture. And save your Halloween sprinkles or icing for decorating! One quick note: level your ingredients. Too much flour makes dry cookies, and nobody wants that!
Ingredient Notes and Substitutions for Soft Halloween Sugar Cookies
Let me walk you through a few swaps and secrets so your Soft Halloween sugar cookies turn out perfectly. Why the almond extract? It doesn’t make them taste like almonds—it rounds out the vanilla and adds a warm, almost floral note that makes these cookies unforgettable.
Feeling fancy? Swap the vanilla extract for vanilla bean paste. Those beautiful little specks look gorgeous in the dough. Need a dairy-free option? Oat milk, almond milk, or even sour cream work great in place of regular milk. For gluten-free bakers, a good 1:1 gluten-free all-purpose flour blend (I love King Arthur) does the trick—just expect a slightly softer texture.
And please, stick with unsalted butter. Salted butters vary so much in salt content, and this recipe is perfectly balanced as written. Trust the process!
Equipment Needed for Soft Halloween Sugar Cookies
Nothing fancy here—just basic kitchen tools you probably already have. Grab a couple of mixing bowls (one medium, one large), a hand mixer or stand mixer (or a strong arm for creaming butter by hand), and baking sheets. Parchment paper is a must for easy cleanup and even baking. A wire rack for cooling, a 1-inch cookie scoop to keep cookies uniform, and your palm or a fork for flattening. That’s it!
How to Prepare Soft Halloween Sugar Cookies
I’ll never forget the first time I made these Soft Halloween sugar cookies with my niece. We were both covered in flour, the dog was licking sprinkles off the floor, and somehow half the dough disappeared before it ever hit the oven. But you know what? Those cookies were amazing. And yours will be too—just follow these steps.
First, preheat your oven to 375°F. I always do this before I start mixing, so the oven is good and hot by the time I’m ready to bake. Line your baking sheets with parchment paper—trust me, it makes cleanup a breeze.
In a medium bowl, whisk together the flour, baking soda, and baking powder. Set that aside. Now grab your large bowl and beat the softened butter and sugar together until light and fluffy. This takes about 2 minutes with a hand mixer, and you want it to look pale and a little airy. Add the egg, vanilla extract, almond extract, and milk, then beat until combined. The batter will look a bit wet—that’s fine.
Gradually add the dry ingredients to the wet mixture, mixing on low until a soft dough forms. If you’re using food coloring, now’s the time to stir it in. I love using gel colors because they don’t thin the dough. If the dough feels too sticky to handle, pop it in the fridge for 30 minutes. Otherwise, you’re good to go!
Roll the dough into 1-inch balls and place them about 2 inches apart on your prepared sheets. Flatten each ball slightly with your palm or a fork. Now’s the moment to add Halloween sprinkles—or leave them plain if you’re planning to ice later. Bake for 8 to 10 minutes, until the edges are just lightly golden. The centers will look a little soft, but they’ll set as they cool.
Let the cookies rest on the baking sheet for 2 minutes before transferring them to a wire rack. This step is crucial—it lets them finish baking gently without drying out. And that’s it! Warm, soft, perfect Soft Halloween sugar cookies ready for whatever spooky fun you have planned.
Tips for Perfect Soft Halloween Sugar Cookies
After years of trial and error—and plenty of flat, crispy cookies that broke my heart—I’ve figured out what makes these Soft Halloween sugar cookies truly perfect. Let me save you some trouble!
Don’t overmix the dough. Once those dry ingredients hit the wet stuff, mix just until combined. Overworking develops too much gluten, and suddenly you’ve got tough cookies instead of tender ones. I stop the mixer the second I don’t see any more flour streaks.
Use room temperature butter. Cold butter doesn’t cream properly with the sugar, and melted butter makes cookies that spread into thin little pancakes. Let it sit on the counter for about an hour before you start—you want it soft enough to leave an indent with your finger.
Measure flour the right way. Please don’t scoop directly into the bag! Spoon the flour into your measuring cup, then level it off with a knife. Packed flour can add up to 25% more, and that’s the difference between soft cookies and dry ones.
Bake until edges are set but centers still look soft. I pull them out at the 8-minute mark and do the test cookie trick. My first batch, I always bake one single cookie to check timing. If it’s perfect, I know the rest are good to go. Then let them rest on the hot sheet for 2 minutes—they finish baking gently without drying out. That’s the real secret to softness!
Variations for Soft Halloween Sugar Cookies
Once you’ve mastered the base recipe, the fun really begins! I love playing around with different flavors every Halloween. Stirring in some orange zest gives these Soft Halloween sugar cookies a bright, citrusy kick that pairs beautifully with the warm extracts. Or dip the cooled cookies halfway in melted white chocolate and add a sprinkle of black sanding sugar—so pretty and decadent.
Peppermint extract instead of almond is amazing for a chilly, candy-cane vibe. Coconut extract works too, and I’ve even tossed in mini chocolate chips or crushed candy corn for extra texture. Honestly, there’s no wrong way to customize these cookies. Just keep the dough soft and the decorations spooky!
Decorating Soft Halloween Sugar Cookies
This is my favorite part—the decorating! Once your Soft Halloween sugar cookies are completely cool (please don’t rush this, or your icing will melt into a sad puddle), the fun really begins. Royal icing is perfect for detailed designs: mix powdered sugar with meringue powder and water, then add gel food coloring for vibrant purples, greens, and oranges. I love using a squeeze bottle for outlines and flooding—it feels way more controlled than a piping bag. For a super easy option, just mix powdered sugar with a little milk for a simple glaze, then sprinkle on colored sugar or nonpareils while it’s wet. Edible markers are genius for letting kids draw pumpkins, ghosts, and bats directly on the cookies—no mess! And if you want shimmer, dust them with a little luster dust. Honestly, half the joy of these cookies is watching everyone’s personality come out in the designs. Just remember: let the icing set completely before stacking, or you’ll have a sticky situation on your hands!
Serving Your Soft Halloween Sugar Cookies
I love piling these Soft Halloween sugar cookies on a vintage cake stand in the middle of the table—they instantly become the star of any Halloween spread. Pair them with a tall glass of cold milk for the kids, or a mug of hot apple cider for the grown-ups. They also make the perfect treat for a Halloween dessert table alongside cupcakes and candy apples. Honestly, they disappear fast, so maybe stash a few for yourself!
Storing and Reheating Soft Halloween Sugar Cookies
These Soft Halloween sugar cookies actually stay soft for days if you store them right. Pop them in an airtight container at room temperature, and they’ll be perfect for up to a week. I usually lay a piece of parchment between layers so the sprinkles don’t get smudged.
Want to save some for later? Freeze baked cookies in a freezer bag for up to 3 months. When you’re ready, just microwave one for about 10 seconds, or warm them in a 300°F oven for 5 minutes. They come back to life like magic—still soft and tender!
Nutritional Information for Soft Halloween Sugar Cookies
Now, I know we all love a good treat without the guilt trip, so let’s talk numbers. Each of these Soft Halloween sugar cookies clocks in at about 180 calories, with 8 grams of fat, 25 grams of carbs, 2 grams of protein, and 14 grams of sugar. Keep in mind this is just an estimate—it all depends on your exact ingredients and how heavy-handed you get with the sprinkles and icing. A thick layer of royal icing will obviously add a bit more sugar. So use these numbers as a rough guide, not a strict rule, and just enjoy every soft, spooky bite!
Frequently Asked Questions About Soft Halloween Sugar Cookies
I get a lot of questions about these Soft Halloween sugar cookies, so let me tackle the most common ones before you start baking. This little FAQ should save you some head-scratching!
Can I freeze the dough? Absolutely! In fact, I do this all the time. Roll the Halloween cookie dough into 1-inch balls, pop them on a baking sheet in the freezer until solid, then transfer to a freezer bag. When you’re ready to bake, just place the frozen dough balls straight onto your prepared sheet and add a minute or two to the baking time. Easy peasy.
Why did my cookies spread too much? Oh, I’ve been there! Usually it’s because the butter was too warm, or the dough wasn’t chilled. If your kitchen is hot or your butter got overly soft, the cookies will spread like puddles. Next time, chill the dough for 30 minutes, and make sure your butter is just softened—not greasy or melting. Also, don’t over-cream the butter and sugar, or you’ll incorporate too much air, which also leads to spreading.
Can I use gluten-free flour? Yes, you can! A good 1:1 gluten-free all-purpose flour blend (like Bob’s Red Mill or King Arthur) works well here. Just expect the texture to be a tad more delicate—still soft and delicious, but not quite the same sturdy structure. I’d recommend baking one test cookie first to check spread and timing.
How do I keep these soft sugar cookies soft? This is the million-dollar question! First, don’t overbake—pull them out when the edges are just set and the centers still look a bit underdone. They’ll finish baking on the hot sheet. Second, store them in an airtight container with a slice of bread. The bread releases moisture and keeps your cookies soft. Swap the bread slice every couple of days. Works like a charm!
I’d love to see how yours turn out! Drop a rating and comment with your spookiest decorating ideas—I always get inspired by what you all come up with. And don’t forget to tag me on social media so I can share your creations. Happy baking, friend!
Print
These soft Halloween sugar cookies are easy to make and perfect for decorating with spooky designs. They have a tender texture and hold their shape well during baking.
- Prep Time: 20 minutes
- Cook Time: 10 minutes
- Total Time: 30 minutes
- Yield: 24 cookies 1x
- Category: Dessert
- Method: Baking
- Cuisine: American
- Diet: Vegetarian
Ingredients
- 2 3/4 cups all-purpose flour
- 1 teaspoon baking soda
- 1/2 teaspoon baking powder
- 1 cup unsalted butter, softened
- 1 1/2 cups white sugar
- 1 egg
- 1 teaspoon vanilla extract
- 1/2 teaspoon almond extract
- 3 tablespoons milk
- Food coloring (optional)
- Halloween-themed sprinkles or icing for decoration
Instructions
- Preheat your oven to 375°F (190°C). Line baking sheets with parchment paper.
- In a medium bowl, whisk together flour, baking soda, and baking powder. Set aside.
- In a large bowl, beat butter and sugar until light and fluffy, about 2 minutes.
- Add egg, vanilla extract, almond extract, and milk. Beat until combined.
- Gradually add dry ingredients to wet mixture, mixing until a soft dough forms. If using food coloring, add it now.
- Roll dough into 1-inch balls and place 2 inches apart on prepared baking sheets. Flatten slightly with a fork or your palm.
- Decorate with Halloween sprinkles or leave plain for icing later.
- Bake for 8 to 10 minutes, until edges are lightly golden. Cool on baking sheets for 2 minutes, then transfer to a wire rack.
Notes
- Chill the dough for 30 minutes if it is too sticky to handle.
- Store cookies in an airtight container for up to 1 week.
- Use royal icing for detailed Halloween designs.
Nutrition
- Serving Size: 1 cookie
- Calories: 180
- Sugar: 14g
- Sodium: 95mg
- Fat: 8g
- Saturated Fat: 5g
- Unsaturated Fat: 2g
- Trans Fat: 0g
- Carbohydrates: 25g
- Fiber: 0.5g
- Protein: 2g
- Cholesterol: 25mg
