
Banana Pudding is the dessert that shows up at every Southern gathering I’ve ever been to, and for good reason. It’s that perfect trifecta of creamy vanilla pudding, sweet ripe bananas, and those crunchy little vanilla wafers that somehow stay a little crisp even after they’ve soaked overnight. I still remember my first taste at my grandmother’s kitchen table – she’d pull out her big glass dish, and we’d all fight over the corner pieces because they had the most wafers and the thickest layer of meringue on top. The magic is in that balance: the pudding has to be rich but not heavy, the bananas just ripe enough to hold their shape, and the wafers add that little crunch that makes every spoonful interesting. Trust me, once you make this from scratch, you’ll never go back to the boxed stuff.
Why You Will Love This Banana Pudding
I’m telling you, this banana pudding is the real deal, and here’s why you’re going to want to make it for every single potluck, holiday, or random Tuesday night craving:
- It’s ridiculously easy. No fancy techniques, no complicated steps – just simple stovetop cooking and layering. Even if you’ve never made pudding from scratch, you’ve got this.
- Everyone goes crazy for it. I’ve never seen a dessert disappear faster. Kids love it, adults love it, and there’s never a crumb left. It’s the ultimate crowd-pleaser.
- You can skip the baking. Don’t feel like turning on the oven? Leave off the meringue and top with whipped cream instead. The filling is cooked on the stove, so it’s totally no-bake friendly.
- Simple ingredients you already have. Milk, eggs, sugar, flour, vanilla, bananas, and wafers. That’s it. No weird extracts or hard-to-find items – just pantry staples that come together into something magical.
Ingredients for Banana Pudding
Let’s talk ingredients. The list is beautifully short, and you probably have most of it already. You’ll need:
- 1/2 cup white granulated sugar
- 1/4 cup all-purpose flour, spooned and leveled (don’t scoop straight from the bag, you’ll pack in too much!)
- 2 cups whole milk (trust me, it makes the pudding so much creamier)
- 3 large eggs, separated
- 4 ripe but firm bananas, sliced into 1/4-inch rounds
- 1 box (12 ounces) vanilla wafers
And if you’re feeling fancy and want that gorgeous toasted meringue topping, grab another 1/4 cup of white granulated sugar for the egg whites.
Equipment You Need
You don’t need a fancy kitchen to pull this off – just a few basics you probably already own. Grab a medium saucepan (heavy-bottomed is best so the milk doesn’t scorch), a good whisk for stirring the pudding, and a couple of mixing bowls for separating those eggs. You’ll also want a 9×13 baking dish for layering, an electric mixer or hand beater to whip up the meringue, and a rubber spatula for scraping every last bit of pudding out of the pot. That’s it – nothing fussy, I promise.
How to Make Banana Pudding Step by Step
Alright, let’s get to the fun part. I’m going to walk you through this exactly like my grandmother showed me, so you don’t make the same mistakes I did the first time. The key is to take it slow, especially with the pudding base, because rushing is the only way you end up with lumps. And hey, before you even start, go ahead and preheat your oven to 350°F if you’re doing the meringue – you’ll thank me later when you don’t have to wait around.
Make the Vanilla Pudding Base
First things first. In your medium saucepan, whisk together the 1/2 cup of sugar and the 1/4 cup of flour until they’re well combined. I always do this dry first because it helps prevent lumps later. Then, gradually pour in the milk while you whisk – go slow, you’re not in a race. Once it’s smooth, set the pan over medium heat and start stirring constantly with that whisk. Don’t walk away, I mean it! You need to stir the whole time, scraping the bottom and corners, until the mixture thickens and you see those first few lazy bubbles pop up. This usually takes about 5 to 7 minutes. The moment you see those bubbles, pull it off the heat immediately. You’ve got yourself a beautiful, thick pudding base.
Temper the Egg Yolks
Okay, this is the step that freaks people out, but it’s actually so simple. Grab a small bowl and beat those three egg yolks with a fork until they’re smooth. Now, here’s the trick: while whisking the yolks constantly with one hand, slowly pour about 1 cup of that hot milk mixture into them in a thin, steady stream. This warms the yolks up gently so they don’t scramble into nasty little bits. Once that’s incorporated, pour the whole egg mixture back into the saucepan with the rest of the pudding. Put it back over medium heat and cook, stirring constantly, for another 2 minutes. You’ll feel it get even thicker. Take it off the heat and stir in that teaspoon of vanilla extract. Smell that? That’s the good stuff.
Layer the Banana Pudding
Now for the assembly – my favorite part. Grab your 9×13 dish and lay down a single layer of vanilla wafers on the bottom. Don’t overlap them too much, just a nice even carpet. Then top those with a layer of your sliced bananas, arranging them so every bite will get some. Pour half of that hot, fragrant pudding right over the top, spreading it gently with your spatula so it gets into all the nooks and crannies. Repeat with another layer of wafers, another layer of bananas, and then the rest of the pudding. Give the dish a little gentle shake or press down lightly with the spatula to make sure the pudding coats everything. It should look gloriously messy at this point – that’s perfect.
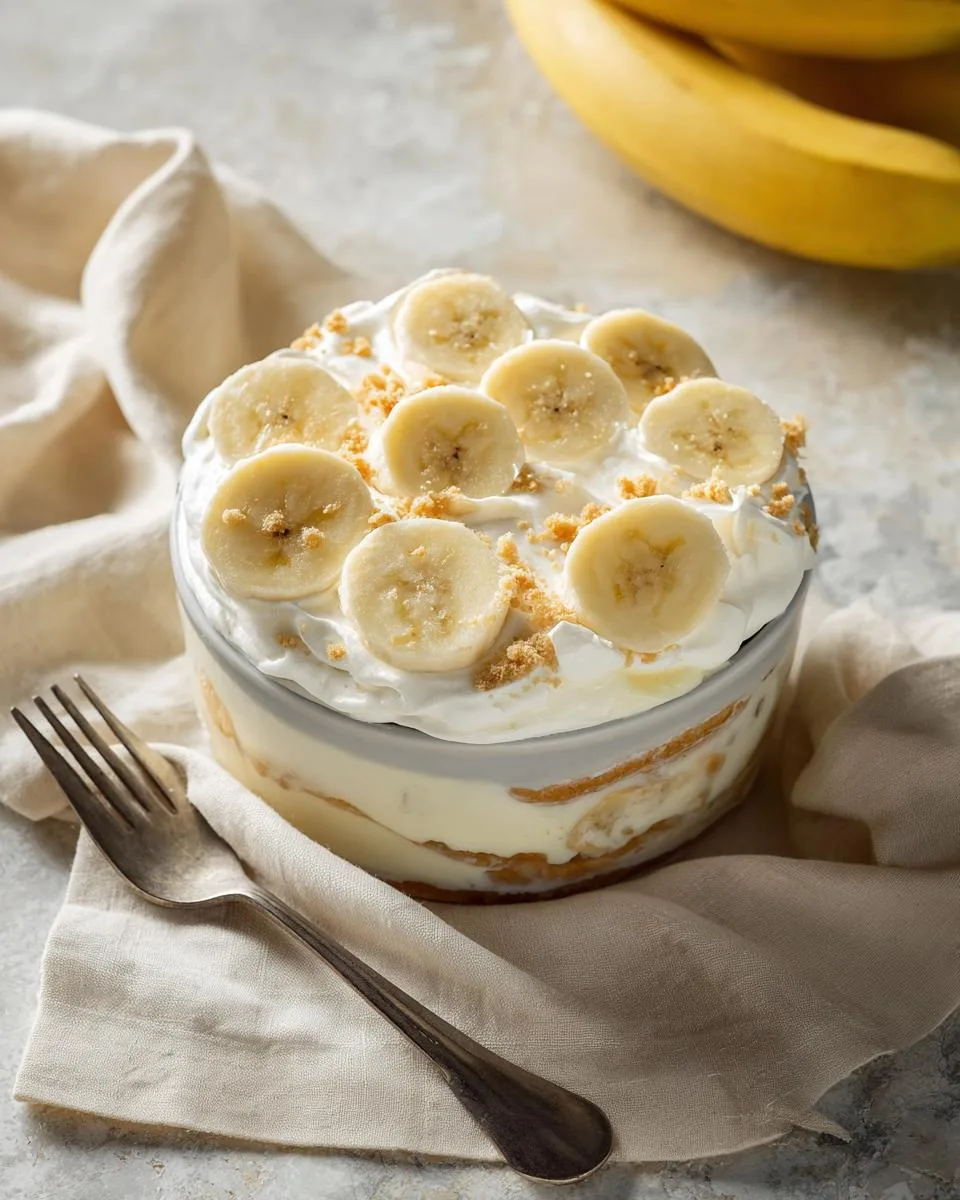
Make and Bake the Meringue Topping
This last step is pure magic. In a completely clean, dry bowl (and I mean completely clean – any grease will ruin your peaks), beat those three egg whites with your electric mixer on medium speed until they turn frothy and form soft peaks that flop over when you lift the beater. Then, with the mixer still running, gradually add that 1/4 cup of sugar, about a tablespoon at a time. Keep beating until the meringue is stiff and glossy, like a cloud you could stand on. This takes about 3 to 4 minutes. Spread it all over the top of your pudding, making sure to seal it right to the edges of the dish – that stops it from shrinking and weeping in the oven. Pop it into your preheated 350°F oven for exactly 10 minutes, until the peaks are golden brown and gorgeous. Let it cool completely on a wire rack, then chill it in the fridge for at least 2 hours. I know it’s hard to wait, but trust me, it’s so worth it.
Tips for the Best Banana Pudding
I’ve made this recipe more times than I can count, and I’ve learned a few things the hard way so you don’t have to. First off, use bananas that are ripe but still firm – you want that sweet flavor, but mushy bananas will turn your pudding into a sad, brown mess. Second, and I cannot stress this enough, stir that pudding constantly while it’s on the stove. Walk away for thirty seconds and you’ll get lumps that no amount of whisking can fix. Third, be patient with the chilling. I know you want to dig in, but giving it at least two hours (overnight is even better) lets everything set up so you get those clean, beautiful slices. And that meringue? Bake it just until golden – about 10 minutes. Any longer and you’ll get little brown tears of syrup running down the sides. Nobody wants that.
Ingredient Substitutions for Banana Pudding
Life happens, and sometimes you don’t have exactly what the recipe calls for. No worries – this banana pudding is super forgiving. If you only have 2% milk instead of whole, go ahead and use it. The pudding will be a little less rich but still creamy and delicious. Need it gluten-free? Grab a box of gluten-free vanilla wafers – they work perfectly and most people won’t even notice the difference. And if you’re short on time or just not in the mood for meringue, skip it entirely. Top the pudding with a generous layer of whipped cream instead. I’ve done it plenty of times when I’m out of eggs or just want to keep things simple. It’s still absolutely wonderful.
How to Store Leftover Banana Pudding
If you somehow have leftovers (which honestly never happens in my house), just cover the dish tightly with plastic wrap or a lid and pop it in the fridge. It’ll keep for up to 2 days, but honestly, it’s best within the first 24 hours. The bananas will start to darken and those vanilla wafers will soften up into a cake-like texture – which some folks actually love, but I prefer it fresh. One thing I’ve learned: don’t even think about freezing this pudding. The texture turns into a watery, sad mess when it thaws. Trust me, just enjoy it while it’s fresh.
Frequently Asked Questions About Banana Pudding
Over the years, I’ve gotten so many questions about this banana pudding, and I totally get it – there are a few little tricks that make all the difference. Let me answer the ones I hear most often so you can nail it every single time.
Can I Make Banana Pudding Ahead of Time?
Absolutely, yes! You can prepare the whole thing up to 24 hours in advance, which is a lifesaver for parties. But here’s my honest advice: if you’re using a meringue topping, wait to add it until just before you’re ready to serve. That way it stays tall and beautiful instead of weeping into the pudding. If you’re using whipped cream, go ahead and top it ahead – it holds up just fine.
Why Did My Pudding Turn Out Lumpy?
Oh, I’ve been there, and it’s frustrating! Lumps usually happen for one of two reasons: you weren’t stirring constantly (I know, it’s a pain, but it’s crucial), or you added the milk too quickly. If you end up with lumps anyway, don’t panic. Just whisk the pudding vigorously after it’s cooked – you can even use a hand mixer right in the pot to smooth it out. It won’t be as silky as a perfectly stirred batch, but it’ll still taste amazing.
Can I Use Instant Pudding Mix Instead?
You sure can, and I won’t judge you one bit. Grab one 5.1-ounce box of instant vanilla pudding mix and prepare it according to the package directions using 2 cups of milk. Then just skip the stovetop cooking step entirely – whisk it up, let it set for a few minutes, and layer away. It’s a great shortcut when you’re short on time, though I do think the from-scratch version has a richer, more authentic flavor.
How Do I Keep Bananas from Turning Brown?
This is the most common question I get, and the answer is simple. First, slice your bananas right before you’re ready to layer them – don’t let them sit around. Second, toss the slices in a little bit of lemon juice or even pineapple juice. It sounds weird, but the acid slows down the browning without making them taste sour. And most importantly, use bananas that are ripe but still firm. Overripe ones will turn brown and mushy no matter what you do.
Nutritional Information for Banana Pudding
Alright, for those of you who like to keep track, here’s the rough breakdown per serving: about 350 calories, 15 grams of fat, 50 grams of carbs, and 5 grams of protein. Just keep in mind this is an estimate – it’ll shift a little depending on the exact brands you use and whether you go for whole milk or something lighter. Either way, it’s worth every single bite.
I’d love to hear how this turned out for you! Drop a comment and a star rating below – it really helps other home cooks know what to expect. And if you snap a photo of your beautiful banana pudding, tag me on social media so I can see your creation. Seriously, don’t be shy – I want to know every detail about your experience making this classic dessert.
PrintRich and Creamy Banana Pudding in 5 Steps
A classic Southern dessert with layers of vanilla pudding, ripe bananas, and vanilla wafers.
- Prep Time: 20 minutes
- Cook Time: 15 minutes
- Total Time: 2 hours 35 minutes
- Yield: 8 servings 1x
- Category: Dessert
- Method: Stovetop and Baking
- Cuisine: American
- Diet: Vegetarian
Ingredients
- 1/2 cup white sugar
- 1/4 cup all-purpose flour
- 2 cups milk
- 3 eggs, separated
- 1 teaspoon vanilla extract
- 4 ripe bananas, sliced
- 1 box (12 ounces) vanilla wafers
- 1/4 cup white sugar for meringue (optional)
Instructions
- In a medium saucepan, combine 1/2 cup sugar and flour. Gradually whisk in milk.
- Cook over medium heat, stirring constantly, until mixture thickens and bubbles.
- Remove from heat. Beat egg yolks in a small bowl. Slowly whisk 1 cup of hot milk mixture into yolks.
- Pour egg mixture back into saucepan. Cook and stir for 2 minutes more. Remove from heat. Stir in vanilla.
- Layer vanilla wafers and sliced bananas in a 9×13 dish. Pour pudding over top.
- Beat egg whites until stiff peaks form. Gradually add 1/4 cup sugar, beating until glossy. Spread over pudding.
- Bake at 350°F for 10 minutes, until golden. Chill for at least 2 hours before serving.
Notes
- Use ripe but firm bananas for best texture.
- Chill the pudding completely before serving.
- Store leftovers in the refrigerator for up to 2 days.
Nutrition
- Serving Size: 1 cup
- Calories: 350
- Sugar: 40 g
- Sodium: 300 mg
- Fat: 15 g
- Saturated Fat: 5 g
- Unsaturated Fat: 8 g
- Trans Fat: 0 g
- Carbohydrates: 50 g
- Fiber: 2 g
- Protein: 5 g
- Cholesterol: 50 mg
