
If you’re looking for a chocolate cake that’s unapologetically rich, incredibly moist, and always a crowd-pleaser, you’ve just found it. I’ve been baking this chocolate cake for family birthdays for years, and it never lets me down. It’s the kind of recipe that makes you look like a pro, even though it uses simple pantry ingredients. The crumb is tender, the flavor is deep, and that silky frosting on top? Pure magic. I’ve tested this one dozens of times to make sure it’s foolproof—baker’s expertise, right here. Whether it’s a lazy Sunday or a big celebration, this is my go-to chocolate cake. Trust me, you’re going to love it.
Why You’ll Love This Chocolate Cake
This chocolate cake is the real deal—and I don’t say that lightly. Here’s why it deserves a permanent spot in your recipe box:
- Super simple ingredients – you probably have most of them in your pantry right now. No weird stuff.
- Incredibly moist – that buttermilk and hot water combo? Magic. Every slice is tender and rich.
- Perfect for any celebration – birthdays, potlucks, Tuesday nights. It fits right in.
- Totally reliable – I’ve made this chocolate cake a dozen times, and it never fails. That’s the kind of recipe you can count on.
Seriously, if you want a chocolate cake that comes together fast and tastes like you spent hours, this is it. You’ll love it.
Ingredients for the Perfect Chocolate Cake
Okay, let’s talk about what you’ll need. This chocolate cake uses seriously simple ingredients, but each one pulls its weight. Here’s the lineup:
- 1 and 3/4 cups all-purpose flour (spooned and leveled) – I can’t stress this enough. Scoop it out with a spoon into your measuring cup, then level it off. No packing it in, or your cake will be heavy.
- 2 cups white sugar – brings the perfect sweetness and helps with that tender crumb.
- 3/4 cup unsweetened cocoa powder (not Dutch-processed) – regular cocoa is what you want here. Dutch-process messes with the rise, so just stick with the classic.
- 2 teaspoons baking soda and 1 teaspoon baking powder – the dynamic duo for lift. Don’t even think about swapping them.
- 1 teaspoon salt – brings all that chocolate flavor into focus.
- 2 large eggs (room temperature) – room temp eggs mix in so much smoother. Set them out with the butter early, trust me.
- 1 cup buttermilk (or substitute – see note) – this is the secret to that incredibly tender texture. Don’t have any? A tablespoon of vinegar or lemon juice in a cup of milk, let it sit 5 minutes, and you’re good to go.
- 1/2 cup vegetable oil – keeps the cake moist for days. That’s the real trick.
- 2 teaspoons vanilla extract – a little warmth to round out the deep cocoa flavor.
- 1 cup hot water (not boiling) – sounds weird, I know, but this blooms the cocoa and makes the cake unbelievably rich. Don’t skip it.
Essential Chocolate Cake Ingredient Notes
Let me break down the heavy hitters. Buttermilk does double duty: its acid tenderizes the gluten and reacts with the baking soda for a beautiful rise. That’s where the tenderness comes from. The hot water is the secret weapon—it “blooms” the cocoa powder, waking up all those deep chocolate notes so the cake tastes intensely rich, not flat. And oil over butter? That’s the moisture guarantee. Butter is great for flavor, sure, but oil keeps the crumb soft and tender even days later. Oh, and one more thing: if you’re dairy-free, just swap the buttermilk with a cup of plant-based milk mixed with a tablespoon of vinegar or lemon juice, and keep the vegetable oil as is. Works perfectly every time.
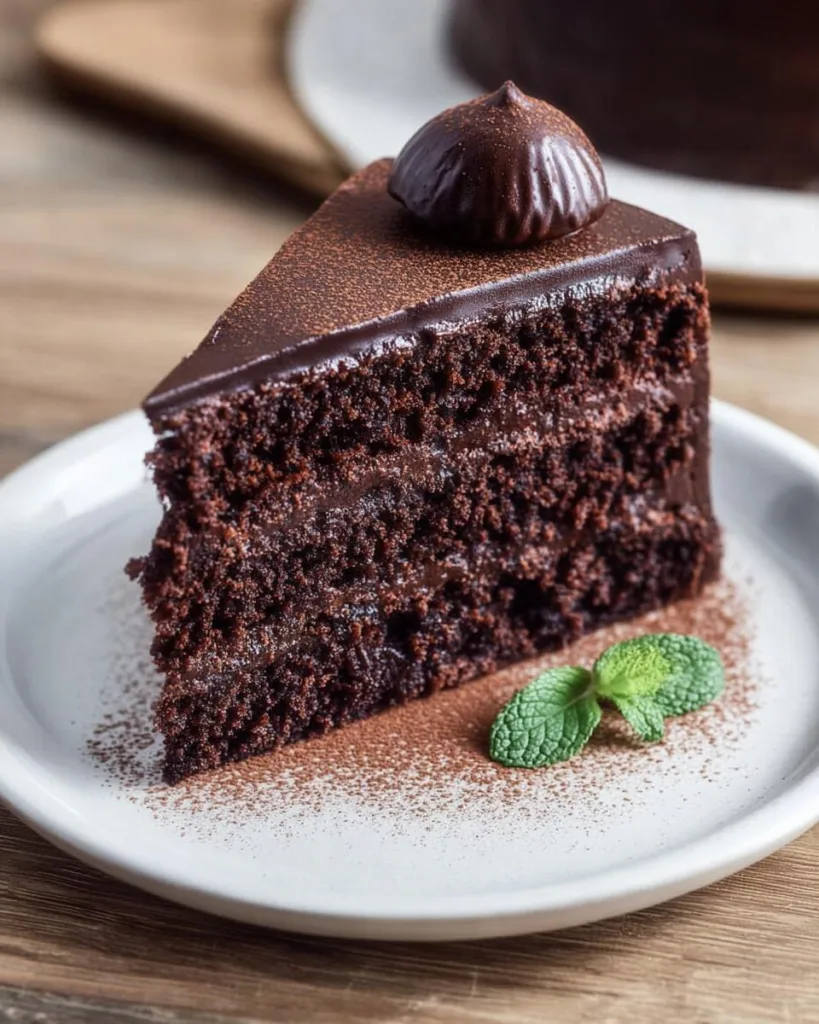
How to Make Chocolate Cake Step by Step
Alright, let’s get to the fun part—actually making this chocolate cake. I’m going to walk you through it just like I do when I’m baking with my niece. Trust the process, especially when that batter looks super thin. That’s totally normal and actually the secret to that moist crumb. Here we go.
First things first: preheat your oven to 350°F. Don’t skip this step—getting the oven hot before you start mixing is key. Grease and flour two 9-inch round cake pans, or use a swipe of butter and a dusting of cocoa powder instead of flour so there’s no white residue on the finished cake. Set those aside.
In a large bowl, whisk together the dry ingredients: the flour, sugar, cocoa powder, baking soda, baking powder, and salt. I like to give them a good stir to break up any lumps. Then you’ll add the wet ingredients—eggs, buttermilk, oil, and vanilla. Beat on medium speed for exactly 2 minutes. Seriously, set a timer if you need to. Scrape down the sides and bottom of the bowl halfway through so everything gets evenly mixed. After that, pour in the cup of hot water and stir until just combined. The batter will be very thin, almost like a milkshake. Don’t panic—that’s exactly what you want. It’ll bake up into the most tender, moist chocolate cake you’ve ever had.
Divide the batter evenly between the two pans. I eyeball it, but using a kitchen scale is even better if you want perfectly even layers. Bake for 30 to 35 minutes. A toothpick inserted into the center should come out clean, maybe with a few moist crumbs but no wet batter. Let the cakes cool in the pans on a wire rack for exactly 10 minutes. Too long and they might stick, too short and they’ll fall apart. Then turn them out onto the rack to cool completely before frosting. Patience is hard, I know, but frost them warm and that frosting will just slide right off!
Preparing the Chocolate Cake Batter
Now let’s dive a little deeper into making that batter. I always sift the cocoa powder if it looks lumpy—it makes a huge difference in the final texture. Just a quick sift over the bowl and you’re good. When you add the hot water, pour it in slowly while stirring gently. You don’t want to overmix at this stage; just stir until you can’t see any streaks of flour or cocoa. A few lumps are okay, they’ll bake out. That thin batter is what gives this chocolate cake its famously moist, tender crumb. It’s counterintuitive, I know, but trust me on this one.
Baking and Cooling Your Chocolate Cake
Here’s where a little attention to detail pays off. Pop the pans on the middle rack of your oven—not too high or low. If your oven bakes unevenly, rotate the pans halfway through, but do it quickly so the temperature doesn’t drop too much. At the 30-minute mark, start checking. Every oven is different. When the cake is done, the edges will just start pulling away from the pan and the top will spring back when you gently press it. If you see cracks on the surface, that means you probably baked it a minute or two too long—still delicious, just a sign to check earlier next time. After 10 minutes in the pans, carefully invert them onto a wire rack. Let the cakes cool completely, no shortcuts. A completely cool chocolate cake is the key to a beautiful, smooth frosting job.
Tips for the Best Chocolate Cake
I’ve picked up a few tricks over the years that turn a good chocolate cake into a great one. These are the little things I do every single time, and they never let me down.
- Room temperature eggs. It makes a real difference in how the batter emulsifies. Just set them out with your buttermilk about 30 minutes before you start.
- Measure your flour correctly. I know I sound like a broken record, but spoon the flour into your measuring cup and level it off. Scooping packs it down, and you could end up with a dry cake.
- Don’t overmix. Once you add the wet ingredients and especially that hot water, mix just until it comes together. Overmixing develops gluten, and gluten is the enemy of a tender crumb.
- Let your buttermilk substitute sit. If you’re using the DIY version (milk plus vinegar or lemon juice), let it sit for at least 5 minutes until it curdles slightly. That reaction needs time to happen before it hits the batter.
- Espresso powder is your secret weapon. Stir a teaspoon of instant espresso powder into the dry ingredients for the richest, deepest chocolate flavor. I promise it won’t taste like coffee—it just makes the chocolate taste more like chocolate.
- Check early, and slice clean. Start checking for doneness at 30 minutes. And for clean slices, use a long, sharp knife and wipe it clean between cuts.
Ensuring a Moist Chocolate Cake
The secret to this moist chocolate cake comes down to a few key choices. First, oil over butter—oil guarantees a tender crumb that stays soft for days. Second, don’t skip the buttermilk; its acid tenderizes the gluten, giving a delicate texture instead of a tough one. Third, that hot water is non-negotiable; it blooms the cocoa and creates steam in the oven. And finally, don’t overbake! Start checking at 30 minutes and pull the cake when a toothpick has just a few moist crumbs attached. Want to go the extra mile? Soak cake strips in water and wrap them around your pans before baking for perfectly even layers with no dry edges.
Chocolate Cake Variations
One of the best things about this chocolate cake is how easy it is to dress up. The base batter is so forgiving, you can tweak it a dozen different ways and it still turns out perfect every time. Here are some of my favorite spins:
- Toss in 1/2 cup chocolate chips right before pouring the batter into the pans. You get these little pockets of melted chocolate in every slice. Dangerous in the best way.
- Switch up the frosting. A classic chocolate buttercream is always a win, but cream cheese frosting takes this cake to another level. Or go fancy with a glossy ganache—just heat 1/2 cup heavy cream and pour it over 4 ounces of chopped chocolate, stir until smooth, and let it set a bit. Divine.
- Swap the hot water for hot coffee. This is my go-to move for deeper flavor. The coffee doesn’t make it taste like coffee at all—it just makes the chocolate taste more intense and rich. Try it once and you’ll never go back.
- Layer up with raspberry jam. Spread a thin layer of seedless raspberry jam between the cake layers before frosting. That little hit of tart fruit against the rich chocolate? Chef’s kiss.
- For peanut butter lovers, pipe a ring of peanut butter buttercream between the layers. Just beat 1/2 cup peanut butter with 1/4 cup softened butter, then add 1 cup powdered sugar and a splash of milk until it’s spreadable. It’s a match made in heaven.
The beauty of this chocolate cake is that every single one of these variations works with the exact same batter. No adjustments needed. So go ahead, make it your own!
Serving Suggestions
Once that chocolate cake is frosted and sitting pretty, the question is how to serve it up. My absolute favorite way? A thick slice, still slightly warm, with a scoop of vanilla ice cream melting into the sides. Or a pile of fresh berries on top for a little tartness. For birthdays, go all out with rainbow sprinkles on the frosting—it just makes everyone smile. A dollop of lightly sweetened whipped cream and a couple of mint leaves makes it feel fancy. And honestly, a cold glass of milk or a hot cup of coffee on the side is the perfect finish. Simple, but perfection.
Storage and Reheating Instructions
Alright, let’s talk leftovers—if you’re lucky enough to have any! This cake keeps beautifully, so here’s the deal. Store a frosted chocolate cake in an airtight container at room temperature for up to 3 days. The oil in the batter keeps it from drying out, so no need to stash it in the fridge unless you live somewhere really warm. If you do refrigerate it (up to 5 days), just bring slices back to room temp before serving—cold kills the flavor and texture.
For longer storage, freeze unfrosted layers. Wrap each one tightly in plastic wrap, then foil, and they’ll stay perfect for up to 3 months. I always bake extra layers and stash them in the freezer for surprise desserts. When you’re ready for a slice, pop it in the microwave for about 15 seconds. Or if you want that fresh-baked vibe, reheat individual slices in a 300°F oven for 5 minutes. The edges get just slightly crisp while the center stays soft and fudgy. Pure heaven.
Nutritional Information for This Chocolate Cake
Okay, let’s crunch some numbers real quick. For a standard slice—that’s 1/12 of the whole cake—you’re looking at about 350 calories, 18 grams of fat (10 of those are saturated), 45 grams of carbs (30 of which are sugar), and 4 grams of protein. Also 300mg of sodium and 50mg of cholesterol. But honestly, these are just ballpark figures based on standard ingredients, so don’t stress too much about perfection. If you swap in a dairy-free buttermilk or use a different oil, those numbers will shift a bit. A slice of this chocolate cake is absolutely worth it, and a little indulgence now and then is part of a happy life!
Frequently Asked Questions
Can I use milk instead of buttermilk? Absolutely, but you’ll need to make a quick buttermilk substitute. Just add 1 tablespoon of white vinegar or lemon juice to a cup of regular milk, let it sit 5 minutes, and you’re good to go. It works perfectly every time.
Can I make this gluten-free? Yes, you can swap the all-purpose flour with a good gluten-free flour blend that contains xanthan gum. I’ve done it myself, and the texture is almost identical – just make sure to spoon and level the flour carefully so the cake stays light.
Can I use margarine instead of oil? I wouldn’t recommend it. The oil is what keeps this chocolate cake so moist and tender for days. Margarine has water in it, which can make the crumb dry and dense. Stick with the oil – it’s the secret to that soft texture.
Why is my cake dense? Usually it’s one of two things: overmixing the batter (which develops too much gluten) or using old baking soda that’s lost its power. Always check that your baking soda is fresh – just drop a pinch into vinegar; if it bubbles vigorously, you’re golden.
Can I halve the recipe? Sure thing! Use two 6-inch cake pans instead of 9-inch ones, and start checking for doneness around 25 minutes. The batter works great as a smaller batch – I’ve done it for smaller gatherings loads of times.
Got another question? Drop it in the comments below or give the recipe a rating – I’d love to hear how your chocolate cake turns out!
PrintBake One Perfect Rich Moist Chocolate Cake
This chocolate cake is moist and rich. You can make it with simple ingredients. It works for birthdays or any dessert.
- Prep Time: 20 minutes
- Cook Time: 35 minutes
- Total Time: 55 minutes
- Yield: 12 servings 1x
- Category: Dessert
- Method: Bake
- Cuisine: American
- Diet: Vegetarian
Ingredients
- 1 and 3/4 cups all-purpose flour
- 2 cups white sugar
- 3/4 cup unsweetened cocoa powder
- 2 teaspoons baking soda
- 1 teaspoon baking powder
- 1 teaspoon salt
- 2 large eggs
- 1 cup buttermilk
- 1/2 cup vegetable oil
- 2 teaspoons vanilla extract
- 1 cup hot water
Instructions
- Preheat your oven to 350°F (175°C). Grease and flour two 9-inch round cake pans.
- Mix flour, sugar, cocoa, baking soda, baking powder, and salt in a large bowl.
- Add eggs, buttermilk, oil, and vanilla. Beat on medium speed for 2 minutes.
- Stir in hot water. The batter will be thin.
- Pour batter into prepared pans.
- Bake for 30 to 35 minutes. A toothpick inserted in center should come out clean.
- Cool in pans for 10 minutes, then turn out onto a wire rack to cool completely.
- Frost with your favorite chocolate frosting.
Notes
- You can substitute buttermilk with milk plus 1 tablespoon vinegar or lemon juice.
- For a dairy-free version, use plant-based milk and oil instead of butter.
Nutrition
- Serving Size: 1 slice (1/12 of cake)
- Calories: 350
- Sugar: 30g
- Sodium: 300mg
- Fat: 18g
- Saturated Fat: 10g
- Unsaturated Fat: 7g
- Trans Fat: 0g
- Carbohydrates: 45g
- Fiber: 2g
- Protein: 4g
- Cholesterol: 50mg
