
Let’s be real—weeknight dinner can feel like a battle. You’re tired, the kids are hungry, and takeout sounds tempting. But I’ve got a secret weapon that changed everything for me: homemade Chicken Parmesan. The first time I made this for my family, I was nervous. Would it be as good as the restaurant version? Spoiler: it was better. The golden, crunchy coating, the gooey melted cheese, and the rich marinara—it’s pure comfort food magic. And the best part? It comes together in 45 minutes with simple ingredients you probably already have. Trust me, once you try this, you’ll never look at takeout the same way again.
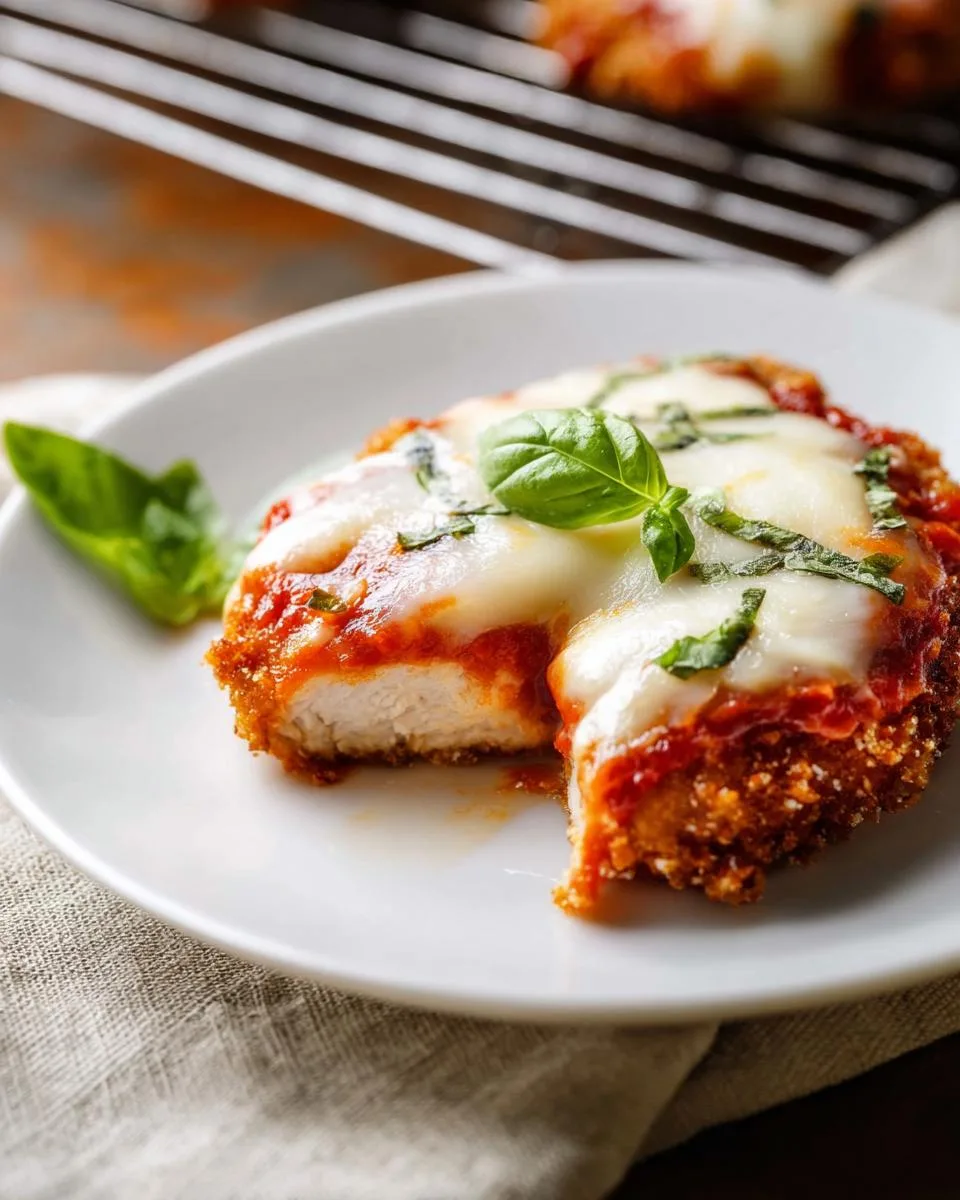
Why You’ll Love This Chicken Parmesan
So what makes this recipe the one you’ll make again and again? Let me break it down for you—it’s all the good stuff, none of the fuss.
- Golden, crunchy coating – That crisp, breaded exterior stays crunchy even after baking. No soggy chicken here!
- Gooey melted cheese – Mozzarella and Parmesan melt into a blanket of pure comfort. You’ll get that perfect cheese pull every time.
- Rich marinara – A good sauce makes all the difference. It soaks into the chicken just enough to add flavor without making it mushy.
- Simple ingredients – Nothing fancy. You probably have most of these in your pantry right now.
- Ready in 45 minutes – It feels like a special occasion dinner, but it’s totally doable on a busy weeknight.
This is one of those meals that makes everyone at the table happy—kids, adults, even picky eaters. It’s become a regular request at my house, and honestly, I never mind making it.
Chicken Parmesan Ingredients
Alright, let’s talk ingredients. This is the part where I get to share exactly what you need, and I promise, it’s nothing scary. I’ve made this dish so many times that I’ve got the list memorized. Here’s everything you’ll need to make this Chicken Parmesan sing:
- 4 boneless skinless chicken breasts – You’re looking for ones that are relatively even in thickness, but we’ll pound them out anyway, so don’t stress too much.
- 1 cup breadcrumbs – Plain, unseasoned ones. I’ll talk about panko in a sec, but for now, plain is perfect.
- 1/2 cup grated Parmesan cheese – This is the finely grated stuff, not the shaved or shredded kind. It’s going to mix into the breadcrumbs and create that incredible savory crust.
- 1 teaspoon garlic powder – Not garlic salt! We’re controlling the salt ourselves.
- 1 teaspoon dried oregano – This gives you that classic Italian-American flavor.
- 1/2 teaspoon salt – Plus more for the water if you’re blanching, but for this, just plain salt.
- 1/4 teaspoon black pepper – Freshly ground is always better, but pre-ground is fine in a pinch.
- 2 large eggs – For the egg wash. This is what makes the breadcrumbs stick.
- 1/4 cup milk – Whole or 2% works best. It makes the egg wash a little richer and easier to coat.
- 1/2 cup all-purpose flour – This is the first step in the breading station. It helps the egg wash cling to the chicken.
- 1 cup marinara sauce – A quality store-bought jar is a total lifesaver, but if you have a homemade batch in the fridge, even better.
- 1 cup shredded mozzarella cheese – Please, please, please shred it yourself! The pre-shredded stuff has anti-caking agents that mess with the melting. Freshly shredded mozzarella melts so much better.
- 1/4 cup vegetable oil – For frying. It has a high smoke point, so it’s perfect for getting that golden crust.
Ingredient Notes and Substitutions
Now, let’s talk about making this recipe your own. I’m a big believer in using what you have, so here are some thoughts:
Breadcrumbs: If you want an extra-crunchy coating, swap the plain breadcrumbs for panko breadcrumbs. They give you those crispy, craggy bits that are just amazing. I use them all the time when I want a little more texture.
Gluten-Free: You can easily make this gluten-free by using a 1:1 gluten-free flour blend and gluten-free breadcrumbs. I’ve done it for friends, and honestly, I couldn’t tell the difference. The chicken still gets perfectly crispy.
Cheese: If you need to go dairy-free, there are some really good dairy-free mozzarella alternatives these days. They melt surprisingly well. And if you’re using fresh mozzarella instead of the shredded kind, you’ll get a creamier, more decadent texture. Just know it will release a bit more water as it bakes, so you might want to let it sit for a few extra minutes before serving.
Oil: You can use canola or peanut oil instead of vegetable oil. They all have similar high smoke points, so any of them will work great for getting that golden-brown crust.
Equipment You’ll Need for Chicken Parmesan
Let’s get your gear ready before we start cooking. You’ll need a few basics, and I promise you won’t need anything fancy. Here’s what I use every time:
- Meat mallet or rolling pin – For pounding the chicken to an even thickness.
- Three shallow bowls – For your breading station (flour, egg wash, breadcrumbs).
- Large skillet – For frying the chicken to golden perfection.
- Tongs – To flip the chicken without messing up the coating.
- Baking dish – For assembling and baking the chicken parmesan.
- Wire rack – To let the fried chicken drain and keep it crispy.
- Meat thermometer – This is your best friend! It ensures the chicken hits 165°F every time.
How to Prepare Chicken Parmesan
Okay, let’s get cooking! I’m going to walk you through this step by step, and I promise it’s easier than it looks. The key is to think of it in three stages: prepping the chicken, breading and frying, then baking. And here’s a little pro tip I’ve learned the hard way—preheat your oven first! That way, everything is ready to go when you are. Also, let the breaded chicken rest for about 5 minutes after you coat it. It helps the breading stick like crazy, so you don’t end up with a sad, naked chicken in the pan. Trust me, that little rest makes all the difference.
Step 1: Prep and Bread the Chicken
First things first, grab your chicken breasts and a meat mallet (or a rolling pin if you’re like me and can’t find yours). Place a breast between two pieces of plastic wrap and pound it gently until it’s about 1/2-inch thick. You want it even so it cooks all the way through at the same time. Now, set up your breading station with three shallow bowls. One with flour, one with the eggs and milk whisked together, and one with the breadcrumb mixture (breadcrumbs, Parmesan, garlic powder, oregano, salt, and pepper).
Here’s the rhythm: take a chicken breast, coat it in the flour, and shake off the excess. Then dip it into the egg wash, letting the extra drip off. Finally, press it into the breadcrumb mixture, making sure it’s fully coated. I like to really press the crumbs in with my hands—it helps them stick. Place each breaded cutlet on a plate while you finish the rest.
Step 2: Fry the Chicken Cutlets
Heat your vegetable oil in a large skillet over medium heat. You want it shimmering, but not smoking. When it’s ready, carefully add the chicken cutlets in a single layer. Don’t crowd the pan! I usually cook two at a time. Let them fry for about 4 minutes per side, until they’re a deep golden brown. You’ll see the edges get crispy and the color turn beautiful. Use tongs to flip them gently—you don’t want to knock off that precious coating.
Once they’re done, transfer them to a wire rack set over a baking sheet. This keeps them crispy instead of soggy. Let them rest while you finish the rest of the batches. And hey, if you’re like me, you might sneak a little piece off the edge. It’s okay, I won’t tell.
Step 3: Assemble and Bake
Now for the fun part! Preheat your oven to 375°F if you haven’t already. Place the fried chicken cutlets in a single layer in a baking dish. Spoon a generous amount of marinara sauce over each one, spreading it evenly. Then top with a handful of shredded mozzarella and a sprinkle of the remaining Parmesan cheese. Don’t be shy with the cheese—that’s the best part!
Pop the dish in the oven and bake for about 20 minutes, until the cheese is bubbly and melted, and the sauce is hot. You’ll see the edges start to brown a little. Let it rest for 5 minutes before serving—this helps the cheese set so it doesn’t slide off when you cut into it. And that’s it! You’ve got a crispy, cheesy, homemade Chicken Parmesan that’ll make everyone at the table smile.
Tips for Perfect Chicken Parmesan
Alright, I’ve made this dish more times than I can count, and I’ve learned a few things along the way. These tips are the difference between good and absolutely incredible. Trust me on these.
Use a meat thermometer. I know, I know, it sounds like a fancy chef thing, but seriously, it’s a game-changer. You want that chicken to hit 165°F in the center. No more guessing, no more dry chicken. Just perfectly cooked, juicy cutlets every single time. For more on safe internal temperatures for poultry, check out the USDA Food Safety and Inspection Service.
Don’t skip the resting time after frying. This is a lesson I learned the hard way. If you rush straight from the skillet to the baking dish, the breading will slide right off. Let those cutlets rest on the wire rack for a few minutes. It helps the coating set and stick to the chicken, so you get that beautiful, crunchy crust instead of a mess.
Use a high-quality marinara. This is the soul of the dish, so don’t skimp here. Look for a jarred sauce with simple ingredients—tomatoes, garlic, basil, olive oil. You want something that tastes like it simmered all day, not something with a bunch of added sugar or weird fillers. A good sauce makes everything else shine.
Pat the chicken dry before breading. This is a small step that makes a big difference. Excess moisture on the chicken’s surface will make the flour clump and the breading slide off. Just grab a paper towel and give each cutlet a good pat before you start the breading process. It’ll help everything stick together beautifully.
Use a cast-iron skillet if you have one. It holds heat so evenly and gets that crust perfectly golden and crispy. If you don’t have one, no worries—a heavy-bottomed skillet works great too. Just make sure it’s big enough so you’re not overcrowding the pan.
Fun Variations on Chicken Parmesan
I love the classic version, but sometimes you just want to shake things up, right? If you’re a fan of heat, toss some red pepper flakes into the breadcrumbs or sprinkle them over the top before baking. It adds a nice little kick without going overboard.
For a vegetarian twist, swap the chicken for thick slices of eggplant. The breading and baking technique works perfectly—you’ll get that same crispy, cheesy goodness. And here’s a wild one: try swapping the marinara for a creamy alfredo sauce. It’s totally different, but oh my gosh, it’s amazing. Check out our Creamy Chicken Alfredo Bake for inspiration.
Don’t forget the fresh basil right after it comes out of the oven. It adds a burst of freshness that cuts through all that richness. The best part about this recipe is how flexible it is. Make it your own! The core technique is solid, so you can really play around with what you’re craving.
Serving Suggestions for Chicken Parmesan
You’ve got this beautiful, crispy, cheesy masterpiece ready to go. So what do you serve with it? I’m a big fan of a classic spaghetti bed—just toss some pasta with a little extra marinara and nestle that chicken right on top. A side of garlic butter rice is practically mandatory for soaking up any extra sauce, and a simple green salad with a lemony vinaigrette cuts through all that richness perfectly. And if you’re feeling fancy, pour yourself a glass of Chianti—it’s the classic pairing for a reason.
Storage and Reheating Instructions
Got leftovers? Lucky you! Pop them in an airtight container and they’ll stay good in the fridge for up to 3 days. When you’re ready to eat, skip the microwave—it’ll turn that gorgeous crust soggy. Instead, reheat in the oven at 350°F for about 10 minutes, and you’ll get that crispy coating back. You can even freeze the cooked chicken parmesan for up to 2 months. Just thaw overnight in the fridge and warm it up the same way. Trust me, these leftovers are just as amazing the next day!
Chicken Parmesan FAQ
I get a lot of questions about this recipe, so I figured I’d answer the most common ones right here. Hope this helps!
Can I use chicken thighs instead of breasts?
Absolutely! I’ve done it plenty of times when thighs were on sale. They’re a little more forgiving and stay juicy. Just keep in mind they might need a minute or two longer in the skillet since they’re thicker. Use your meat thermometer to make sure they hit 165°F, and you’re golden.
How do I prevent the breading from falling off?
This is the worst, right? The secret is two things. First, really press that breadcrumb mixture firmly into the chicken—don’t be shy. Second, let the breaded cutlets rest on a plate for about 5 minutes before they hit the hot oil. That little rest lets the coating set so it actually sticks instead of sliding off in the pan.
Can I make this ahead of time?
You sure can! Bread and fry the chicken, then assemble it all in the baking dish with the sauce and cheese. Cover it up and pop it in the fridge. When you’re ready to eat, just bake it as directed. You might need to add 5–10 minutes since it’s starting cold, but it works beautifully.
What’s the best cheese for Chicken Parmesan?
I love this question! My go-to is a mix of shredded mozzarella and provolone. The mozzarella gives you that perfect, stretchy pull, and the provolone adds a little sharpness that makes the flavor way more interesting. It’s a simple swap that makes a big difference.
Nutritional Information for Chicken Parmesan
If you’re keeping an eye on what you’re eating, here’s the breakdown for one serving of this Chicken Parmesan. Per chicken breast, you’re looking at about 450 calories, 22 grams of fat, 38 grams of protein, and 25 grams of carbohydrates. Just keep in mind, these numbers are estimates—they’ll change a bit depending on the exact brands you use or if you go heavy on the cheese (no judgment here!). This info is meant to give you a general idea, not to replace professional dietary advice.
I can’t wait to see how yours turns out! Drop a comment below and let me know what you think—did your family love it? Give it a rating, too, it helps me know what recipes you want next. And if you snap a photo, tag me on social media so I can cheer you on. Happy cooking, friend!
PrintChicken Parmesan: Irresistible 45-Minute Recipe
A classic Italian-American dish featuring breaded chicken cutlets topped with marinara sauce and melted cheese.
- Prep Time: 15 minutes
- Cook Time: 30 minutes
- Total Time: 45 minutes
- Yield: 4 servings 1x
- Category: Main Course
- Method: Baked and Fried
- Cuisine: Italian-American
- Diet: Low Calorie
Ingredients
- 4 boneless skinless chicken breasts
- 1 cup breadcrumbs
- 1/2 cup grated Parmesan cheese
- 1 teaspoon garlic powder
- 1 teaspoon dried oregano
- 1/2 teaspoon salt
- 1/4 teaspoon black pepper
- 2 eggs
- 1/4 cup milk
- 1/2 cup all-purpose flour
- 1 cup marinara sauce
- 1 cup shredded mozzarella cheese
- 1/4 cup vegetable oil
Instructions
- Preheat oven to 375°F.
- Pound chicken breasts to even thickness.
- Mix breadcrumbs, Parmesan, garlic powder, oregano, salt, and pepper in a bowl.
- Whisk eggs and milk in another bowl.
- Place flour in a third bowl.
- Coat each chicken breast in flour, then egg mixture, then breadcrumb mixture.
- Heat oil in a skillet over medium heat.
- Cook chicken for 4 minutes per side until golden.
- Transfer chicken to a baking dish.
- Spoon marinara sauce over each piece.
- Top with mozzarella cheese.
- Bake for 20 minutes until cheese is bubbly and chicken is cooked through.
Notes
- You can use panko breadcrumbs for extra crunch.
- Serve with pasta or a side salad.
Nutrition
- Serving Size: 1 chicken breast
- Calories: 450
- Sugar: 6g
- Sodium: 780mg
- Fat: 22g
- Saturated Fat: 8g
- Unsaturated Fat: 12g
- Trans Fat: 0g
- Carbohydrates: 25g
- Fiber: 2g
- Protein: 38g
- Cholesterol: 140mg
