
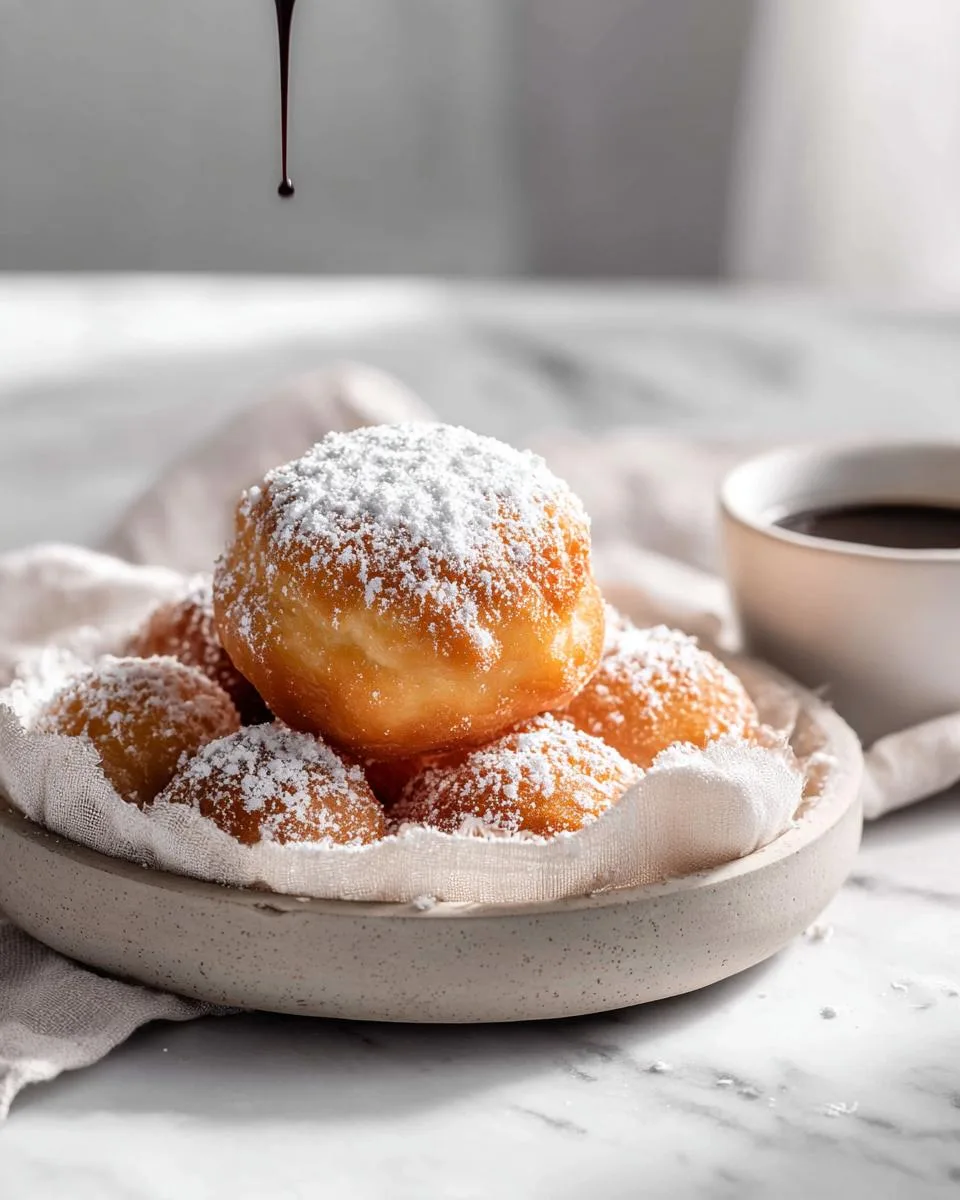
I still remember the first time I bit into a truly perfect Italian ricotta doughnut. It was in my grandmother’s tiny kitchen, and the whole room smelled like warm oil and powdered sugar. The outside was shatteringly crisp, but the inside… that light, airy texture was like nothing I’d ever had before.
The secret, of course, is the ricotta. I’ve tested more brands than I care to admit – from watery supermarket tubs to expensive artisan imports – and let me tell you, using whole milk ricotta that’s been properly drained makes all the difference. That’s what gives these doughnuts their signature fluffy, almost custardy center without needing any yeast.
These are the doughnuts I make now when I want to feel that same comfort. They’re quick, they’re foolproof, and they’re absolutely delicious.
Why You’ll Love This Italian Ricotta Doughnuts Recipe
You know what I love most about this recipe? It skips all the fuss. There’s no yeast to proof, no long rising times, and no complicated shaping. You can go from craving to eating in about 15 minutes of hands-on work.
Here’s what you’re getting:
- Quick prep. Seriously, 15 minutes and you’re almost done.
- No yeast needed. We’re using baking powder instead, so there’s zero waiting around.
- Crispy outside, impossibly soft inside. That ricotta creates the most tender crumb you’ve ever had in a fried doughnut.
- Simple pantry ingredients. Eggs, flour, sugar, ricotta – you probably already have most of it.
Trust me, once you make these, you’ll never look at a box of store-bought doughnuts the same way again.
Ingredients for Italian Ricotta Doughnuts
Let me walk you through exactly what you need. The ingredient list is short, but each one pulls its weight, so don’t skimp here. You’ll want:
- 1 cup whole milk ricotta – please drain it if it looks watery. I’ve learned this the hard way.
- 1 cup all-purpose flour – spoon it into your measuring cup and level it off. No scooping straight from the bag.
- 2 large eggs – room temperature is best so they blend in smoothly.
- 1/2 cup granulated sugar
- 1 teaspoon baking powder
- 1/2 teaspoon pure vanilla extract
- 1/4 teaspoon fine salt
- Oil for frying – canola or vegetable works great. Just make sure it has a smoke point above 375°F.
- Powdered sugar for dusting
I really can’t stress enough how important that whole milk ricotta is. The full-fat version gives you that rich, creamy flavor and the lightest texture. Part-skim just doesn’t deliver the same magic.
Ingredient Notes and Substitutions for Italian Ricotta Doughnuts
Okay, so you’re out of something or need to swap? Here’s what I’ve found works.
Whole milk ricotta is your best bet because the fat adds tenderness and flavor. If you only have part-skim, it’ll still work, but the doughnuts won’t be quite as rich. For a dairy-free version, try a good vegan ricotta – you might need to adjust the flour slightly since it can be wetter. Gluten-free? A 1:1 gluten-free flour blend works perfectly here. No vanilla in the pantry? Grate in some lemon zest instead. It adds a lovely brightness.
And please, stick with a neutral oil. Olive oil has too strong a flavor and a lower smoke point, so you’ll end up with greasy, off-tasting doughnuts. Trust me on that one.
How to Make Italian Ricotta Doughnuts
Making these Italian ricotta doughnuts is almost too easy. The whole process moves fast, so I like to have everything measured and ready before I start. You’re really just mixing a simple batter and dropping it into hot oil – that’s it.
Start by whisking your wet ingredients together in a big bowl. You want the ricotta, eggs, sugar, and vanilla to become smooth and creamy, with no lumps of cheese left behind. Then, gently fold in the dry ingredients – the flour, baking powder, and salt – just until they disappear. A few streaks are totally fine. Overmixing will make the doughnuts tough, and nobody wants that.
Now for the frying. Heat a couple inches of oil in a deep, heavy pot to 350°F. A thermometer is your best friend here. Once it’s hot, drop the batter in by rounded tablespoonfuls. A small cookie scoop makes this so much easier and keeps them all the same size. Fry for 2 to 3 minutes per side, until they’re a deep, gorgeous golden brown. Drain them on paper towels, and while they’re still warm, shower them with powdered sugar.
Step-by-Step Guide to Making Italian Ricotta Doughnuts
Let me walk you through it, step by step, the way I do it every time.
- Combine the wet ingredients. In a large bowl, whisk together the ricotta, eggs, sugar, and vanilla. Keep going until the mixture is completely smooth and creamy, with no visible lumps of ricotta.
- Sift the dry ingredients. In a separate bowl, whisk together the flour, baking powder, and salt. This helps distribute the baking powder evenly so your doughnuts rise properly.
- Fold them together. Pour the dry ingredients into the wet. Use a rubber spatula to fold everything together gently. Stop as soon as you don’t see any more streaks of flour. The batter will be thick and a little sticky – that’s perfect.
- Heat the oil. Pour about 2 inches of oil into a deep pot or Dutch oven. Attach a candy thermometer and heat it to 350°F over medium heat.
- Drop and fry. Working in batches so you don’t crowd the pot, carefully drop spoonfuls of batter into the hot oil. I use a small cookie scoop for perfectly round doughnuts.
- Flip and finish. Fry for 2 to 3 minutes on the first side, until deep golden brown. Flip them gently with a slotted spoon and fry for another 2 to 3 minutes on the other side.
- Drain and dust. Use your slotted spoon to transfer the cooked doughnuts to a plate lined with paper towels. Let them drain for a minute, then dust generously with powdered sugar while they’re still warm.
The first time I made these, I was nervous the batter wouldn’t puff up. But the second they hit the hot oil, they ballooned into these perfect little pillows. I actually let out a little cheer. It’s a magical moment, and I still get excited every single time I see it happen.
Tips for Perfect Italian Ricotta Doughnuts
I’ve made my share of mistakes so you don’t have to. Here are the little things that make a big difference.
First, use a candy thermometer and keep that oil steady at 350°F. If it drops too low, your doughnuts soak up oil and turn greasy. If it climbs too high, they burn on the outside before the middle cooks through. A thermometer takes the guesswork out completely.
Don’t overmix the batter. I know it’s tempting to keep stirring until it looks perfectly smooth, but lumps are your friends here. Overmixing develops the gluten and makes the doughnuts tough. Just fold until the flour disappears and stop.
Here’s a trick I learned the hard way: let the batter rest for 5 minutes before you start frying. This gives the baking powder time to activate and helps the flour hydrate, which makes for a lighter, more tender doughnut.
Always fry one test doughnut first. Drop a small spoonful in and watch how it behaves. If it browns too fast, your oil is too hot. If it sinks and looks greasy, it’s too cool. Adjust from there before you fry the whole batch.
And while you’re working through the rest, keep the finished doughnuts warm in a 200°F oven on a baking sheet. They’ll stay crispy and perfect until you’re ready to serve them all at once.
Variations on Italian Ricotta Doughnuts
Once you’ve mastered the basic recipe, the fun really begins. I love playing with flavors, and these doughnuts are so forgiving, you can really make them your own.
For a cozy, spiced version, whisk a half teaspoon of cinnamon or nutmeg right into the dry ingredients. It fills your kitchen with the most incredible smell. If you’re feeling nutty, swap the vanilla for almond extract – it adds a whole new layer of warmth.
Want something with a little texture? Fold in a handful of mini chocolate chips or some dried cranberries right before frying. They get all melty and delicious inside. And for a bright, fresh twist, add the zest of a whole lemon to the batter and replace the vanilla with lemon extract. It’s like a little ray of sunshine.
I also love serving these with dipping sauces. A simple chocolate ganache or a tangy raspberry sauce turns them into a showstopper dessert. Honestly, the possibilities are endless, and that’s what makes this recipe so much fun.
How to Serve and Store Italian Ricotta Doughnuts
These little pillows of joy are truly at their absolute best the moment they come out of the oil. I like to pile them on a plate while they’re still warm, give them a generous shower of powdered sugar, and watch them disappear. That first bite, when the crispy shell gives way to that impossibly soft center, is pure magic.
For the full Italian experience, serve them with a strong espresso or a frothy cappuccino. The bitterness of the coffee cuts through the sweetness perfectly. They’re also wonderful with a side of fresh berries or a dollop of whipped cream if you’re feeling fancy.
Now, if you somehow have leftovers (it rarely happens in my house!), here’s what to do. Let the doughnuts cool completely first. Store them in an airtight container at room temperature for up to 2 days. Whatever you do, don’t refrigerate them – the cold turns them sad and soggy, and nobody wants that.
To bring them back to life, pop them in a 350°F oven for about 5 minutes. It crisps the outside right back up. You can even freeze un-dusted doughnuts in a single layer on a baking sheet, then transfer them to a freezer bag. Reheat straight from frozen in the oven – they’ll taste almost as good as fresh. I’ve done this for surprise guests more times than I can count.
Nutritional Information for Italian Ricotta Doughnuts
I know we don’t make these for the health factor, but it’s always good to know what you’re working with, right? Here’s the breakdown for one doughnut, based on getting 12 out of the batch.
Each one clocks in at about 220 calories, with 12g of fat (4g of that saturated), 24g of carbs, and 10g of sugar. You’re also getting a nice little 6g of protein from all that ricotta and those eggs, plus 150mg of sodium and 35mg of cholesterol.
Just keep in mind these are all estimates. The exact numbers will shift a bit depending on the brand of ricotta you use, the type of oil, and how long you fry them. But it gives you a solid ballpark. A little indulgence now and then is good for the soul!
Frequently Asked Questions about Italian Ricotta Doughnuts
I get asked about these all the time, so let me clear up the most common questions. You’re not alone in wondering about these things – I had the same questions my first time making them.
Can I bake these instead of frying?
You absolutely can, but I have to be honest with you – the texture is different. Baked ricotta doughnuts come out more like a tender cake muffin than the crispy, airy zeppole you get from frying. If you want to try it, bake spoonfuls on a parchment-lined sheet at 375°F for about 12 to 15 minutes, until they’re golden and spring back when touched. They’re still delicious, just not quite the same experience.
Why are my doughnuts greasy?
This is the most common problem, and it almost always comes down to one of two things. Either your oil temperature was too low – below 350°F – so the doughnuts sat in the oil soaking it up instead of frying. Or your batter was too wet, which can happen if you didn’t drain a watery ricotta. A simple fix for next time: drain that ricotta in a fine-mesh strainer for about 30 minutes before you start.
Can I use low-fat ricotta?
You can, but I’ll warn you – the doughnuts won’t be as tender or flavorful. Whole milk ricotta gives you that rich, creamy texture that makes these so special. If you only have part-skim, it’ll still work, just expect a slightly denser result. I’ve done it in a pinch, and they were still good, just not quite as magical.
How do I know when the oil is ready?
A candy thermometer is your best friend here – it takes all the guesswork out. But if you don’t have one, drop a tiny bit of batter into the oil. It should sizzle immediately, float to the surface, and start bubbling gently. If it sinks like a stone and sits there, your oil’s too cool. If it browns in seconds, it’s too hot. That little test doughnut will tell you everything you need to know.
I’d absolutely love to hear how these turned out for you! Drop a comment below and let me know if they disappeared as fast as mine always do. And hey, if you snap a photo, tag me on social media – there’s nothing that makes my day like seeing your kitchen victories. Happy frying!
PrintMaster 10 Crispy Italian Ricotta Doughnuts

Crispy on the outside, soft inside. These Italian ricotta doughnuts are easy to make at home.
- Prep Time: 15 minutes
- Cook Time: 20 minutes
- Total Time: 35 minutes
- Yield: 12 doughnuts 1x
- Category: Dessert
- Method: Fried
- Cuisine: Italian
- Diet: Vegetarian
Ingredients
- 1 cup ricotta cheese
- 1 cup all-purpose flour
- 2 large eggs
- 1/2 cup sugar
- 1 teaspoon baking powder
- 1/2 teaspoon vanilla extract
- 1/4 teaspoon salt
- Oil for frying
- Powdered sugar for dusting
Instructions
- Mix ricotta, eggs, sugar, and vanilla in a bowl.
- Add flour, baking powder, and salt. Stir until combined.
- Heat oil in a deep pot to 350°F.
- Drop spoonfuls of batter into the hot oil.
- Fry for 2 to 3 minutes per side until golden.
- Remove with a slotted spoon. Drain on paper towels.
- Dust with powdered sugar before serving.
Notes
- Use whole milk ricotta for a richer flavor.
- Do not overmix the batter. It keeps the doughnuts light.
- Keep oil at a steady temperature to avoid burning.
Nutrition
- Serving Size: 1 doughnut
- Calories: 220
- Sugar: 10g
- Sodium: 150mg
- Fat: 12g
- Saturated Fat: 4g
- Unsaturated Fat: 7g
- Trans Fat: 0g
- Carbohydrates: 24g
- Fiber: 1g
- Protein: 6g
- Cholesterol: 35mg
