
There’s something magical about Halloween baking, isn’t there? The whole house starts smelling like butter and sugar, and the kids can barely keep their hands off the dough—especially when we’re making these Jack-O’-Lantern Sandwich Cookies. I’ve tried the store-bought versions, and honestly, they just don’t have that homemade tenderness or the fun of choosing your own pumpkin face. My niece and I started a tradition a few years ago: we crank up spooky music, roll out the dough, and cut out dozens of little pumpkins. It’s messy, it’s silly, and it never fails to make us smile. Best part? This recipe is genuinely simple—no fancy techniques, just good old-fashioned baking fun. Whether you’re a total beginner or a seasoned cookie pro, you’re going to love these.
Why You Will Love These Jack-O’-Lantern Sandwich Cookies
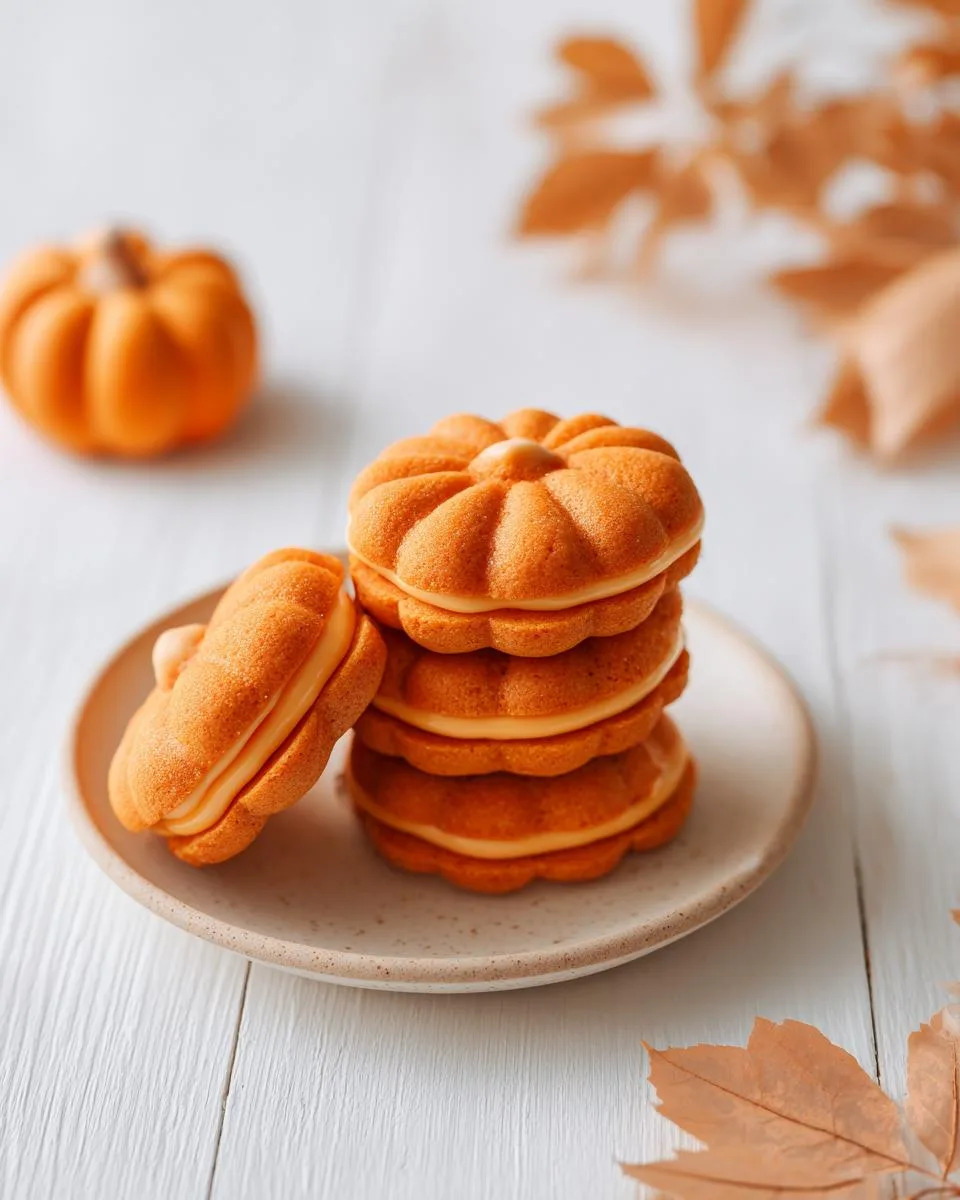
Honestly, I can’t say enough good things about these Jack-O’-Lantern Sandwich Cookies! They’re the perfect blend of soft, buttery pumpkin-shaped cookies and creamy, dreamy orange filling. Here’s why they’re about to become your new Halloween tradition:
- Incredible flavor: You get a tender, vanilla-kissed cookie with warm pumpkin pie spice, paired with a sweet, silky filling. Total perfection in every bite.
- Seriously adorable: Little pumpkin sammies with bright orange centers just scream Halloween fun. They’re guaranteed to steal the show on any dessert table.
- So easy to make: If you can roll out dough and use a cookie cutter, you’ve got this. No complicated piping skills or fancy gadgets required.
- Pure family fun: This is the best kind of messy kitchen project! Get the kiddos involved in cutting out pumpkins and mixing the filling—it’s a memory-maker for sure.
Ingredients for Jack-O’-Lantern Sandwich Cookies
Alright, let’s talk ingredients! You don’t need anything wild for these Jack-O’-Lantern Sandwich Cookies, but a few details really make a difference in how they turn out. I’ve learned the hard way that using the right kind of butter, the right spice, and even the right food coloring can take these from “okay” to “oh-my-gosh-can-I-have-another-one.” So here’s exactly what you’ll need, with all my little tips sprinkled in.
Cookie Dough Ingredients
For the dough, you’ll want 2 1/2 cups all-purpose flour (spoon it into your measuring cup and level it off—don’t scoop straight from the bag or you’ll pack in too much), 1 teaspoon baking powder, 1/2 teaspoon salt, 1 cup unsalted butter (softened to room temperature, not melted!), 3/4 cup granulated sugar, 1 large egg, 1 teaspoon vanilla extract, 1/2 teaspoon pumpkin pie spice (that’s a cozy blend of cinnamon, nutmeg, ginger, and cloves—don’t substitute individual spices here), and orange gel food coloring for that vibrant pumpkin hue. Gel coloring is way better than liquid because it won’t mess with your dough’s texture.
Filling Ingredients
For the filling, it’s wonderfully simple: 1 cup powdered sugar and 2 tablespoons milk. I recommend whole milk or 2% for the best smooth, creamy consistency—skim milk tends to make it a bit thin. And if you want that iconic orange center, just add a drop or two of orange gel coloring to the mix. So easy!
Equipment You Will Need
You don’t need a fancy bakery setup for these cute little cookies—just some basic kitchen gear you probably already have. Grab baking sheets (I like to use two so I can prep one while the other bakes), parchment paper for easy cleanup and non-stick cookies, and a standard 2.5-inch pumpkin-shaped cookie cutter (that size is perfect for sandwich cookies—big enough to hold filling but small enough to be adorable). You’ll also want a rolling pin, a couple of mixing bowls, an electric mixer (hand or stand mixer works great), a wire rack for cooling, and a whisk for that silky smooth filling. That’s it—simple stuff for some seriously fun baking!
How to Make Jack-O’-Lantern Sandwich Cookies
Alright, let’s get baking! I’m going to walk you through each step so these Jack-O’-Lantern Sandwich Cookies turn out perfect on your very first try. Here’s the game plan: we’ll make the dough, cut out our pumpkins, bake them up, and then sandwich them with that luscious orange filling. Take a deep breath—it’s way easier than it sounds, and so worth it. Plus, the whole house will smell like vanilla and warm spices, which is honestly the best part of fall baking.
Prepare the Cookie Dough
First things first, preheat your oven to 350°F. This is super important—you want it nice and hot by the time those cookies are ready to go in. Now, grab your baking sheets and line them with parchment paper so nothing sticks later.
In a medium bowl, whisk together your flour, baking powder, and salt. Set that aside for a moment. In a large bowl, beat the butter and granulated sugar together for about 2 to 3 minutes. You want it to turn light, pale, and fluffy—this is what gives the cookies that tender texture. Then, beat in the egg and vanilla extract until everything’s well combined.
Now, here’s the trick: gradually add your flour mixture to the butter mixture. Don’t dump it all in at once—go in a few additions, mixing between each one until just combined. Overmixing will make your cookies tough, and nobody wants that!
Finally, stir in the pumpkin pie spice and orange gel food coloring. Start with a little less coloring than you think you need, then add more until the dough looks like a bright, cheerful pumpkin. You might find the dough is a bit soft at this point. That’s totally normal! If it feels too sticky to handle, pop it in the fridge for 20 to 30 minutes to firm up. Trust me, this little chill break makes rolling and cutting so much easier.
Shape and Bake the Cookies
Sprinkle some flour on your countertop and roll the dough out to about 1/4 inch thick. Don’t roll it too thin or your cookies will get crispy instead of soft and tender. Now comes the fun part—press out those pumpkins with your cookie cutter, placing them about 2 inches apart on your prepared baking sheets. They do spread a little while baking, so give them some breathing room.
You can gently gather the scraps, roll them out again, and cut another batch. Just don’t do this more than once or twice, because the dough gets tougher each time you re-roll it.
Bake one sheet at a time for even results. After 8 to 10 minutes, they should look set around the edges and be just lightly golden at the bottom. Remember, we want them soft, so don’t overbake! Let the cookies rest on the hot baking sheet for a couple of minutes first—this helps them firm up just enough to move without breaking.
Then, carefully transfer them to a wire rack to cool completely. And I mean completely! Resist the urge to fill them while they’re still warm, or your filling will melt and slide right off.
Make the Filling and Assemble
This is where the magic happens! Grab a small bowl and whisk together the powdered sugar and milk until your filling is completely smooth. No lumps allowed! If you want that extra-pop orange center, add a drop or two of orange gel food coloring and mix until it’s your perfect shade.
Now, flip half of your cooled cookies over so the flat side is facing up. Spread about 1 teaspoon of the filling onto each one—don’t go overboard or it’ll squish out the sides when you assemble. Then, take another cookie and gently press it on top, creating a little pumpkin sandwich.
Here’s a little trick I learned along the way: try to match your cookies by size so the sandwiches look uniform. And if you want to add a face to your jack-o’-lanterns, you can pipe a tiny bit of the filling onto the top cookie using the tip of a toothpick. It’s a small touch that makes them look extra festive!
Tips for Perfect Jack-O’-Lantern Sandwich Cookies
You know, after making these cookies more times than I can count (with kids, without kids, in a rush, and when I had all afternoon), I’ve picked up a few little tricks that really make a difference. Let me share the ones I swear by so your first batch turns out just as good as mine!
First up: don’t fight a sticky dough. If after mixing the dough feels tacky and wants to cling to everything, just pop it in the fridge for 20 to 30 minutes. I do this almost every time, honestly. It makes rolling so much easier and keeps those cute pumpkin shapes nice and sharp.
When you do roll it out, use a light touch. Press too hard and the dough gets tough. I like to roll from the center outward, lifting the rolling pin at the edges so I don’t squish them thin. Aim for that even 1/4-inch thickness—too thin and they’ll crisp up instead of staying soft.
Here’s the most important tip: bake just until the edges are set, not browned. I’m serious! Pull them out when they look puffy and the bottoms are just barely golden. They’ll continue to set on the hot baking sheet for a couple of minutes. Overbaking is the fastest way to dry them out, and we want tender, not crunchy.
For the filling, don’t overdo it. A scant teaspoon per cookie is plenty. Too much filling and it squishes out the sides (still tasty, just messy). And please, let your cookies cool completely before you start spreading the filling on them. Warm cookies will turn that lovely orange icing into a puddle, and nobody wants that. I usually let them sit on the wire rack for at least 20 minutes—perfect time to wash up the dishes!
Variations and Decorating Ideas
Once you’ve mastered the basic recipe, the fun really begins! These Jack-O’-Lantern Sandwich Cookies are like a blank canvas, just waiting for your creativity. I love switching things up depending on my mood or who I’m baking for—sometimes I want them extra spooky, other times just plain cute.
My favorite way to decorate is to use a little royal icing in a piping bag (or a plastic baggie with the tiniest corner snipped off) to draw jack-o’-lantern faces right on the top cookies. Angry faces, silly faces, winking faces—let your imagination run wild! Chocolate icing works beautifully too and looks even spookier against that orange dough.
Feeling a bit more low-key? Just dust the finished sandwiches with powdered sugar for a delightfully “ghostly” look. The contrast of white snow against the orange pumpkin is actually so pretty! You can also add a pinch of cinnamon or nutmeg to the filling for extra warmth—it gives the whole cookie a cozier, fall-baking vibe.
Another super simple option: skip the pumpkin cutter entirely and use a round cutter instead. Then pipe little orange icing faces on top. Honestly, sometimes the simplest ideas end up being everyone’s favorite! No matter how you finish them, these sandwich cookies are guaranteed to be the coolest thing on the Halloween dessert table.
How to Store Your Jack-O’-Lantern Sandwich Cookies
Okay, let’s talk storage! Once you’ve got a gorgeous batch of these little guys, you’ll want to keep them fresh so they stay soft and delicious. Rule number one: always store them in an airtight container at room temperature. I like to layer them with a piece of parchment paper between each row so the filling doesn’t smear all over their cute pumpkin faces.
Whatever you do, don’t stash them in the fridge! I made that mistake once, and the cookies turned dry and crumbly way too fast. They’ll stay perfect at room temperature for up to 5 days—if they last that long!
Want to prep ahead for Halloween? Here’s a great trick: freeze the unfilled cookies. Just pop them in a freezer-safe bag or container, and they’ll keep for up to 3 months. Then, when you’re ready, let them thaw at room temperature, whip up a fresh batch of filling, and assemble. It’s like having Halloween magic on standby!
Frequently Asked Questions
I know you’ve got questions, so let’s tackle the ones I hear the most about these Halloween sandwich cookies! I’ve been making pumpkin cookies for years now, and these are the things people always ask me about before they get started. Think of this as your little troubleshooting guide before you dive into the kitchen.
Absolutely! Any shape works great for these Halloween cookies. Just remember that thinner, smaller shapes will bake faster, so keep an eye on them. Ghosts, bats, or even classic circles all work beautifully.
Can I make the dough ahead of time?
Yes! Wrap the dough tightly in plastic wrap and refrigerate it for up to 2 days. When you’re ready to bake, let it sit at room temperature for about 10 minutes so it’s soft enough to roll without cracking.
Can I freeze these Jack-O’-Lantern Sandwich Cookies?
You sure can! Freeze the unfilled cookies in an airtight container for up to 3 months. When you’re ready, just thaw them at room temperature, whip up the filling, and assemble. It’s such a great way to get ahead on your Halloween baking!
Nutritional Information
I’ve got the numbers right here for you! Per one sandwich cookie, you’re looking at about 180 calories, 12g sugar, 8g fat, and 25g carbs. Keep in mind these are just estimates—your exact numbers will shift depending on the brands you use or if you swap out ingredients. But hey, it’s Halloween, and a little treat is totally worth it!
Your Turn to Bake
Alright, now it’s your turn to get those little pumpkins made! I can’t wait to hear how they turn out for you. Drop a comment below and tell me all about it—did the kids help? Did you add a funny face? And if you’re feeling generous, pretty please give this recipe a star rating. It helps more than you know!
Print7 Jack-O’-Lantern Sandwich Cookies bake in 30 minutes

These Jack-O’-Lantern Sandwich Cookies are fun Halloween treats. They have a pumpkin-shaped cookie with orange icing filling.
- Prep Time: 30 minutes
- Cook Time: 10 minutes
- Total Time: 40 minutes
- Yield: 24 sandwich cookies 1x
- Category: Dessert
- Method: Baking
- Cuisine: American
- Diet: Vegetarian
Ingredients
- 2 1/2 cups all-purpose flour
- 1 teaspoon baking powder
- 1/2 teaspoon salt
- 1 cup unsalted butter, softened
- 3/4 cup granulated sugar
- 1 large egg
- 1 teaspoon vanilla extract
- 1/2 teaspoon pumpkin pie spice
- Orange food coloring
- 1 cup powdered sugar
- 2 tablespoons milk
Instructions
- Preheat your oven to 350°F. Line baking sheets with parchment paper.
- Whisk flour, baking powder, and salt in a bowl.
- Cream butter and granulated sugar in a large bowl until light and fluffy.
- Beat in egg and vanilla extract.
- Gradually add flour mixture to the butter mixture. Mix until combined.
- Stir in pumpkin pie spice and orange food coloring until the dough is evenly orange.
- Roll dough on a floured surface to 1/4 inch thickness. Cut with a pumpkin-shaped cookie cutter.
- Place cookies on prepared baking sheets. Bake for 8 to 10 minutes until edges are lightly golden.
- Let cookies cool on a wire rack.
- For the filling, whisk powdered sugar and milk until smooth. Add a drop of orange food coloring if desired.
- Spread filling on the flat side of one cookie. Top with another cookie to make a sandwich.
Notes
- Store cookies in an airtight container at room temperature for up to 5 days.
- You can use a round cutter and draw a pumpkin face with icing instead.
Nutrition
- Serving Size: 1 cookie
- Calories: 180
- Sugar: 12g
- Sodium: 100mg
- Fat: 8g
- Saturated Fat: 4g
- Unsaturated Fat: 3g
- Trans Fat: 0g
- Carbohydrates: 25g
- Fiber: 1g
- Protein: 2g
- Cholesterol: 20mg
