
Oh, that smell! You know the one—the moment crisp autumn air mixes with the scent of cinnamon, nutmeg, and pumpkin wafting from the kitchen. That’s the feeling I try to capture every single time I make a batch of my favorite Pumpkin Waffles. Honestly, they’re my go-to for cozy weekend brunches, especially when we have friends over. I love watching everyone’s faces light up when I bring a big stack to the table, all golden brown and steaming. The secret to that incredible, fluffy texture is a perfect blend of warm spices and just the right amount of pumpkin puree. It’s not too heavy, not too sweet, but just right. Trust me, once you try these, that boxed mix will be a thing of the past.
Why You’ll Love These Pumpkin Waffles
Let me tell you, these aren’t just any waffles. I make them all season long for so many reasons. First off, they come together in one bowl in about five minutes flat—seriously, it’s almost faster than driving to get takeout. The batter is so forgiving; a few lumps are totally fine, so you don’t have to stress about overmixing. Plus, they freeze like a dream! I always make a double batch and pop the extras in the freezer for those hectic school mornings. My kids absolutely adore them; that warm pumpkin spice flavor feels like a hug in every bite. And the best part? That incredible aroma that fills your whole house. It just screams fall, and it makes any morning feel like a special occasion.
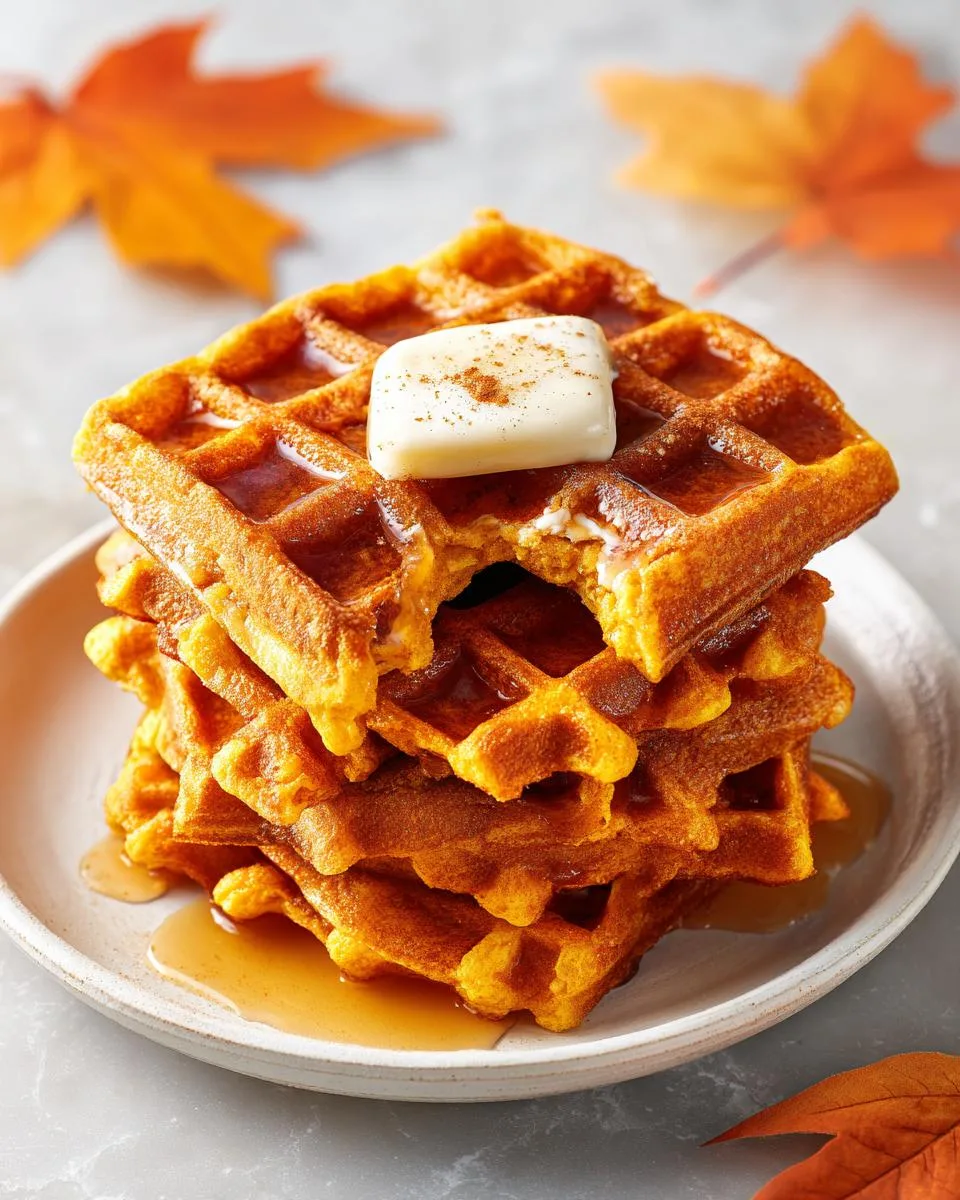
Ingredients for Perfect Pumpkin Waffles
Okay, let’s get to the good stuff! Gathering everything before you start is my number one trick for keeping things calm in the kitchen. You don’t want to be scrambling for the vanilla while your waffle iron is screaming hot. Here’s exactly what you’ll need for that perfect, fluffy stack:
- 2 cups all-purpose flour
- 2 tablespoons brown sugar (the dark kind is my favorite here)
- 1 tablespoon baking powder
- 1 teaspoon ground cinnamon
- 1/2 teaspoon ground ginger
- 1/4 teaspoon ground nutmeg
- 1/4 teaspoon ground cloves
- 1/2 teaspoon salt
- 1 3/4 cups milk (any kind you like!)
- 1/2 cup pumpkin puree (not pumpkin pie filling—big difference, I’ll explain below!)
- 2 large eggs
- 1/4 cup melted butter, slightly cooled
- 1 teaspoon vanilla extract
Ingredient Notes & Substitutions
Now, let’s chat about a few of these, because I know we all have those “oops, I’m out of that!” moments. First, the star of the show: pumpkin puree. This is just plain, cooked pumpkin. You want the can that says “100% pure pumpkin.” Pumpkin pie filling is a different beast—it’s already sweetened and spiced. If you use that, your waffles will be way too sweet and the spice balance will be totally off. Trust me on this one!
No all-purpose flour? You can swap in whole wheat pastry flour for a nuttier taste, or use a 50/50 blend. For the milk, I’ve used everything from whole milk to almond milk, and it always works. The spices are where you can really play. If you don’t have all the individual ones, just use 2 teaspoons of pre-mixed pumpkin pie spice. It’s a fantastic shortcut!
And about that butter—make sure it’s just melted, not piping hot. You don’t want to accidentally cook the eggs when you mix it all together. Let it sit for a minute after melting. These little details make all the difference between a good waffle and a truly great pumpkin waffle.
Essential Equipment for Pumpkin Waffles
Okay, let’s talk tools! You really don’t need anything fancy to make amazing pumpkin waffles, but having the right few things on hand makes the whole process so much smoother. I’m a bit of a chaotic cook, so if I can manage this, you definitely can. Here’s the shortlist of what you’ll want to grab:
- A good waffle iron (this is the star of the show!)
- Two mixing bowls—one for dry stuff, one for wet
- A trusty whisk
- Your set of measuring cups and spoons
- A cooling rack (this is my secret for crisp waffles)
Now, the most important thing, and I can’t stress this enough: preheat that waffle iron! I know, I know, it’s tempting to just plug it in and start mixing, but giving it a good 5-10 minutes to get properly hot is the key to getting those crispy edges and fluffy centers. A cold iron gives you sad, pale, and soggy waffles. A hot one? Magic. It instantly starts cooking the batter, creating that perfect golden-brown crust we all love. So while you’re whisking your ingredients together, let that iron do its thing. It makes all the difference, I promise.
How to Make Pumpkin Waffles: Step-by-Step Guide
Alright, here we go! This is the fun part. Making these pumpkin waffles is honestly a breeze, and I’m going to walk you through it just like I would if you were standing in my kitchen with me. The key is to have everything ready to go—remember, that waffle iron should already be preheating!—and to work with a light hand. Don’t overthink it. Just follow these simple steps and you’ll have a beautiful stack in no time.
Step 1: Combine Your Dry Ingredients
First things first, grab your biggest mixing bowl. You want plenty of room to stir later. Dump in the 2 cups of flour, the brown sugar, baking powder, all those gorgeous spices (cinnamon, ginger, nutmeg, cloves), and the salt. Now, take your whisk and give it a really good stir. I like to whisk for a solid 30 seconds. This isn’t just about mixing; you’re aerating the flour and making sure the baking powder and spices are evenly distributed. That little bit of effort is what helps give us that beautifully even, fluffy rise in the waffle iron. No one wants a bite that’s all spice and no fluff!
Step 2: Whisk Together the Wet Ingredients
In your second bowl, it’s time for the wet team. Pour in the milk, then plop in the pumpkin puree. Crack in the two eggs—if you remembered to take them out ahead of time to get to room temperature, fantastic! They’ll incorporate more smoothly. If not, no worries, it’ll still work. Add in that slightly cooled melted butter and the vanilla extract. Now, just whisk it all together until it’s smooth and beautifully orange. You’ll see the pumpkin blend right in with everything else. It should look like a lovely, creamy pumpkin soup.
Step 3: Gently Combine the Batters
This is the most important step, so listen up! Pour the entire bowl of wet ingredients right into the center of the dry ingredients. Now, take a spatula or a wooden spoon and start folding them together. I use a gentle, sweeping motion, going around the bowl and down through the middle. You want to mix until the flour is *just* moistened. I’m talking maybe 10-15 stirs max. Stop the second you don’t see any big dry patches of flour. The batter will be lumpy, and that is PERFECT. I promise! Those lumps will cook out, and this gentle handling is what keeps our pumpkin waffles tender, not tough and rubbery.
Step 4: Cooking Your Pumpkin Waffles
Okay, your batter is ready and your iron should be nice and hot. Give the plates a quick spray with non-stick spray or brush them with a little melted butter. Now, how much batter? For a standard round waffle iron, I use about a half-cup. For a Belgian-style one, you might need closer to 3/4 cup. It’s okay if it looks like a lot—it will spread. Close the lid and let it work its magic. Don’t peek for at least a minute! You’ll know they’re done when the steam coming out of the iron slows down significantly. Open it up and check for a deep, golden-brown color and a crisp surface. That’s your cue! Use a fork to gently lift the waffle out and onto a cooling rack (this keeps the bottom from getting soggy). Then, repeat with the remaining batter!
Pro Tips for the Best Pumpkin Waffles
Okay, so you’ve got the basic recipe down, but these little tricks? This is where you go from making good pumpkin waffles to making absolutely legendary ones. I’ve learned these through trial and error (and a few less-than-perfect batches, I’ll admit!). They’re the secrets to keeping everyone happy at the breakfast table, even when you’re cooking for a crowd.
First up, that note about not overmixing the batter? I can’t say it enough. A few lumps are your friend! They guarantee a light, airy texture. Overmix, and you’ll end up with waffles that are a bit tough. So, be gentle with that batter—it doesn’t need to be perfectly smooth.
Now, my absolute number one tip for serving a crowd: keep your finished waffles warm and crisp in a 200°F oven. Don’t just stack them on a plate; they’ll steam each other and get soft. Instead, place them in a single layer directly on the oven rack. This lets the air circulate all around them, so they stay perfectly crisp while you finish cooking the whole batch. It’s a total game-changer.
And finally, let’s talk about freezing. I always make a double batch because these pumpkin waffles freeze beautifully for quick breakfasts later. Let the waffles cool completely on a wire rack—this is key to preventing ice crystals. Then, just pop them into a single layer on a baking sheet and freeze them solid for about an hour. After that, you can transfer them to a freezer bag. They won’t stick together, and you can grab one or two whenever the craving hits. To reheat, just pop a frozen waffle right into the toaster. It comes out tasting just-made, crisp on the outside and fluffy on the inside. It’s like having your own personal fall brunch on demand!
Serving Suggestions for Pumpkin Waffles
Okay, the hard part’s over and your kitchen smells incredible. Now for the best part: loading up those gorgeous, warm pumpkin waffles with all the good stuff! Sure, a pat of butter and a river of maple syrup is the classic move—and honestly, it’s a perfect one. But if you’re feeling a little fancy, or just want to mix things up, these are some of my family’s favorite ways to dress them up.
For toppings, I love adding a little crunch and contrast. A handful of toasted pecans or walnuts scattered over the top is my go-to. The nutty flavor is just amazing with the warm spices. For a real treat, a big dollop of freshly whipped cream is divine. And if you’re celebrating, a drizzle of warm caramel sauce or salted caramel takes these pumpkin waffles straight into dessert-for-breakfast territory. My kids go crazy for a few chocolate chips sprinkled on top while the waffle is still hot so they get all melty.
And don’t forget about what you serve on the side! A platter of crispy bacon or some savory breakfast sausage links are the perfect salty counterpoint to the sweet, spiced waffles. It’s that sweet-and-salty combo that makes the whole meal feel so satisfying. A big bowl of fresh fruit, like sliced apples or pears, is also a great way to round everything out. Honestly, just have fun with it—these pumpkin waffles are the perfect canvas for your favorite fall flavors!
Storing and Reheating Pumpkin Waffles
So you’ve made a fantastic batch of pumpkin waffles, but let’s be real—it’s rare that my family finishes them all in one sitting. The great news is that these waffles are total champions when it comes to storing and reheating. They’re perfect for meal prep! But you’ve gotta do it right, or you’ll end up with sad, soggy waffles, and we don’t want that after all our hard work.
If you think you’ll eat them within the next three days, just let the leftover pumpkin waffles cool completely on a wire rack. I mean, totally cool to the touch—no warmth at all. Then, pop them into an airtight container or a large resealable bag and tuck them in the fridge. This keeps them fresh and prevents them from drying out.
For longer-term storage, the freezer is your best friend. After they’re completely cool, lay the waffles in a single layer on a baking sheet and flash-freeze them for about an hour. This little step is the secret to preventing them from all freezing into one big brick! Once they’re solid, you can transfer them to a freezer bag. They’ll keep beautifully for up to three months. It’s like having a little piece of fall waiting for you anytime.
Now, for reheating, the goal is to bring back that wonderful crispness. My absolute favorite method is the toaster. Just take a frozen or refrigerated waffle and pop it right into the slots. Use a medium setting—you might need to run it through twice if it’s frozen solid. It comes out hot, crisp, and tastes like it just came off the iron.
If you’re reheating a whole batch for the family, the oven is the way to go. Preheat your oven to 350°F and place the waffles directly on the oven rack in a single layer. Bake for about 5-8 minutes if they’re refrigerated, or 10-12 minutes if frozen. This method gets them evenly hot and crispy all over. Whatever you do, avoid the microwave if you can—it’ll make them soft and chewy instead of crisp. But in a pinch, 20-30 seconds will warm them up, just don’t expect that perfect texture. Trust these methods, and your leftover pumpkin waffles will be just as good as the first one out of the batch!
Pumpkin Waffles Nutritional Information
Okay, let’s talk about the nutrition side of things for a hot second. I’m all about balance—enjoying delicious food and feeling good about it. But I have to be totally upfront with you: the nutritional info for these pumpkin waffles is just an estimate. It really, truly depends on the exact brands you use and any little tweaks you make.
For example, if you use whole milk versus almond milk, or a different type of flour, the numbers will change. Even the size of your waffles can vary depending on your iron! So, while I can give you a general idea that they’re a source of energy and have some good stuff from the pumpkin and eggs, please take any specific numbers you see online with a grain of salt. Think of it as a helpful guide, not a strict rulebook. The most important thing is that you’re making a homemade breakfast filled with real ingredients, and that’s something to feel great about!
Your Pumpkin Waffles Questions Answered
I’ve been making these pumpkin waffles for years, and I’ve gotten all sorts of questions from friends and family. So, I figured I’d answer the most common ones right here! Hopefully, this saves you a little bit of kitchen stress and helps you get perfect results every single time.
Can I make the pumpkin waffle batter ahead of time?
Oh, I get this one a lot, especially when I’m planning for a big brunch. The short answer is yes, but with a little trick. You can mix the dry ingredients and the wet ingredients separately the night before. Just keep them in their own airtight containers in the fridge. In the morning, let the wet ingredients sit on the counter for about 15 minutes to take the chill off, then combine everything. The batter might be a tiny bit thicker, but it works like a charm. I don’t recommend mixing the full batter the night before, though—the baking powder will start to lose its oomph, and you might end up with flatter waffles.
What if I don’t have a waffle iron? Can I still make these?
Absolutely! Don’t let a missing waffle iron stop you from enjoying that pumpkin spice goodness. This batter makes fantastic pumpkin pancakes. Just heat a lightly greased griddle or non-stick skillet over medium heat. Pour about 1/4 cup of batter for each pancake and cook until you see bubbles forming on the surface, then flip and cook until golden brown. They’ll be just as delicious, I promise.
How can I make my pumpkin waffles extra crispy?
This is my favorite question because a crispy waffle is a thing of beauty! My top three tips are: First, make sure your waffle iron is properly preheated. A hot iron gives you that instant sear. Second, don’t skimp on the fat. That butter in the batter is key for crispness. And third, my secret weapon: place the cooked waffles directly on a wire cooling rack instead of a plate. This stops the steam from making the bottom soggy. If you’re making a big batch, pop them in that single layer in a 200°F oven to stay warm and crisp.
Can I use fresh pumpkin instead of canned puree?
You sure can! It’s a bit more work, but it’s a lovely option if you have a sugar pumpkin lying around. Just cut it in half, scoop out the seeds, and roast it cut-side down on a baking sheet at 400°F until it’s super soft. Let it cool, scoop out the flesh, and puree it in a blender or food processor until it’s smooth. The only thing to watch for is that homemade puree can be a bit wetter than canned. If it seems watery, you can strain it through a cheesecloth for a few minutes to thicken it up a bit.
My batter seems really thick. Is that normal?
Yes, totally normal! Pumpkin waffle batter is typically thicker than a pancake batter. It should be scoopable and hold its shape a little. If it seems so thick that it’s hard to stir, you can add a tiny splash more milk—like a tablespoon at a time—to loosen it up. But remember, a thicker batter often leads to a fluffier, more structured waffle, so a little thickness is a good thing!
Alright, now it’s your turn! I’ve shared my secrets, but I’d absolutely love to hear how your pumpkin waffles turned out. Did you stick with the classic butter and syrup, or did you get creative with some toasted pecans and whipped cream? I’m always looking for new topping ideas!
If you loved this recipe as much as my family does, would you do me a huge favor? Please give it a rating right here on the blog—it really helps other home cooks find it. And if you snapped a picture of that gorgeous, golden stack, I would be thrilled if you shared it with me! Tag me on social media or send it my way. There’s nothing I love more than seeing your kitchen creations. It makes my day to see that this little recipe is bringing a bit of autumn coziness to your home, too.
PrintPerfect Pumpkin Waffles: 5-Minute Recipe for Cozy Mornings

Fluffy homemade pumpkin waffles with warm spices. Perfect for autumn breakfasts or holiday brunches.
- Prep Time: 10 minutes
- Cook Time: 15 minutes
- Total Time: 25 minutes
- Yield: 6-8 waffles 1x
- Category: Breakfast
- Method: Waffle Iron
- Cuisine: American
- Diet: Vegetarian
Ingredients
- 2 cups all-purpose flour
- 2 tablespoons brown sugar
- 1 tablespoon baking powder
- 1 teaspoon cinnamon
- 1/2 teaspoon ginger
- 1/4 teaspoon nutmeg
- 1/4 teaspoon cloves
- 1/2 teaspoon salt
- 1 3/4 cups milk
- 1/2 cup pumpkin puree
- 2 large eggs
- 1/4 cup melted butter
- 1 teaspoon vanilla extract
Instructions
- Preheat your waffle iron.
- Whisk flour, sugar, baking powder, spices, and salt in a large bowl.
- In another bowl, mix milk, pumpkin, eggs, melted butter, and vanilla.
- Pour wet ingredients into dry ingredients. Stir until just combined.
- Lightly grease the waffle iron with cooking spray or butter.
- Pour batter onto the hot waffle iron. Cook until golden brown and crisp.
- Serve immediately with maple syrup and butter.
Notes
- Do not overmix the batter – lumps are fine.
- Keep cooked waffles warm in a 200°F oven while you finish the batch.
- Freeze extra waffles for quick breakfasts later.
Nutrition
- Serving Size: 1 waffle
- Calories: 245
- Sugar: 8g
- Sodium: 320mg
- Fat: 9g
- Saturated Fat: 5g
- Unsaturated Fat: 3g
- Trans Fat: 0g
- Carbohydrates: 35g
- Fiber: 2g
- Protein: 7g
- Cholesterol: 65mg
